Ever create the perfect AI character, only to lose them in the next generation? It’s probably the single most common frustration for anyone trying to create consistent stories or branding with AI images. This guide lays out a practical workflow to lock in your character’s look and keep it that way, image after image.
Why Does AI Keep Changing My Character?
If you’ve felt that pang of frustration seeing your character's face change completely, you're not alone. You dial in the perfect look, the right expression, the ideal style… and then the next render looks like a distant cousin. At best.
This happens because most AI image models have no real memory. Each time you hit "generate," the AI treats it as a brand-new task, interpreting your prompt from a completely blank slate. It’s a process built on probability and creative interpretation, not exact replication.
The AI isn’t “seeing” your character the way a human artist would, who can reference a previous drawing. Instead, it’s just pulling concepts from its massive training library of images and text descriptions. When you ask for the “same character,” it’s really just trying to find a new combination of pixels that matches your words, not recalling the specific face you fell in love with a moment ago.
The Problem is in the Programming
At its core, this is a technical hurdle baked into how these systems are designed. To really get why visual identity is so tricky for an algorithm, it helps to have a basic grasp of understanding the principles of computer vision, which is the science that allows AI to process images in the first place.
Without specific training or advanced techniques, the AI has no reliable reference point for your character’s unique features. It’s like asking a stranger to draw a portrait of someone they only saw for a split second—you’re going to get a guess, not a likeness.
And this isn't a niche problem. The AI image generator market was valued at a staggering $9.10 billion in 2024 and is expected to hit $63.29 billion by 2030. That explosive growth means millions of creators are running into this exact same wall.
The challenge isn't just about writing a better prompt; it's about giving the AI a better memory. Standard models are built for variety, not the kind of precise consistency needed for storytelling or branding.
To set the stage, let's quickly look at the core methods we'll be using. These are the building blocks for creating a reliable character workflow.
Core Techniques for AI Character Consistency
| Technique | Primary Use Case | Complexity Level |
|---|---|---|
| Character LoRA/DreamBooth | Creating a highly specific, trainable character "asset" for maximum consistency. | Intermediate to Advanced |
| Consistent Seed & Style | Locking in the overall aesthetic, composition, and a "base" look for the character. | Beginner |
| Reference Images (IP-Adapter) | Guiding the AI with a picture of your character to influence style and features. | Intermediate |
| ControlNet (OpenPose, Depth) | Forcing the AI to replicate a specific pose, angle, or composition. | Intermediate |
| Prompt Engineering | Using detailed descriptions and negative prompts to refine and control details. | Beginner to Intermediate |
| Face Restoration & Inpainting | Correcting minor flaws or inconsistencies in facial features after generation. | Beginner |
Each of these techniques plays a different role, and the real power comes from combining them.
Moving Beyond Random Chance
This guide is all about overcoming the AI's built-in randomness. We’re going to move past simple prompting and build a workflow that gives you real, repeatable control. You'll learn how to train the AI on your character, use tools to dictate poses, and write prompts that command consistency instead of just hoping for it.
Forget the endless cycle of re-rolling and feeling like you're just getting lucky. By the end of this, you’ll have a dependable system for any project, whether it's for a YouTube faceless channel or a high-stakes ad campaign.
Training Your Own Custom Character Model
If you've ever tried to get an AI to recreate the same character twice, you know the frustration. Relying on prompts alone is a gamble. The real key to getting consistent, repeatable results is to teach the AI precisely what your character looks like. You do this by training a custom model—a small, specialized file that essentially gives the AI a memory of your character's unique face, hair, and style.
This is the jump from a general-purpose image tool to your own personal character generator. The two best ways to do this are with LoRA (Low-Rank Adaptation) and DreamBooth. Both methods inject your character's likeness into the AI's brain, but they get there in slightly different ways.
This whole process is about moving from random, frustrating outputs to a reliable, streamlined workflow.
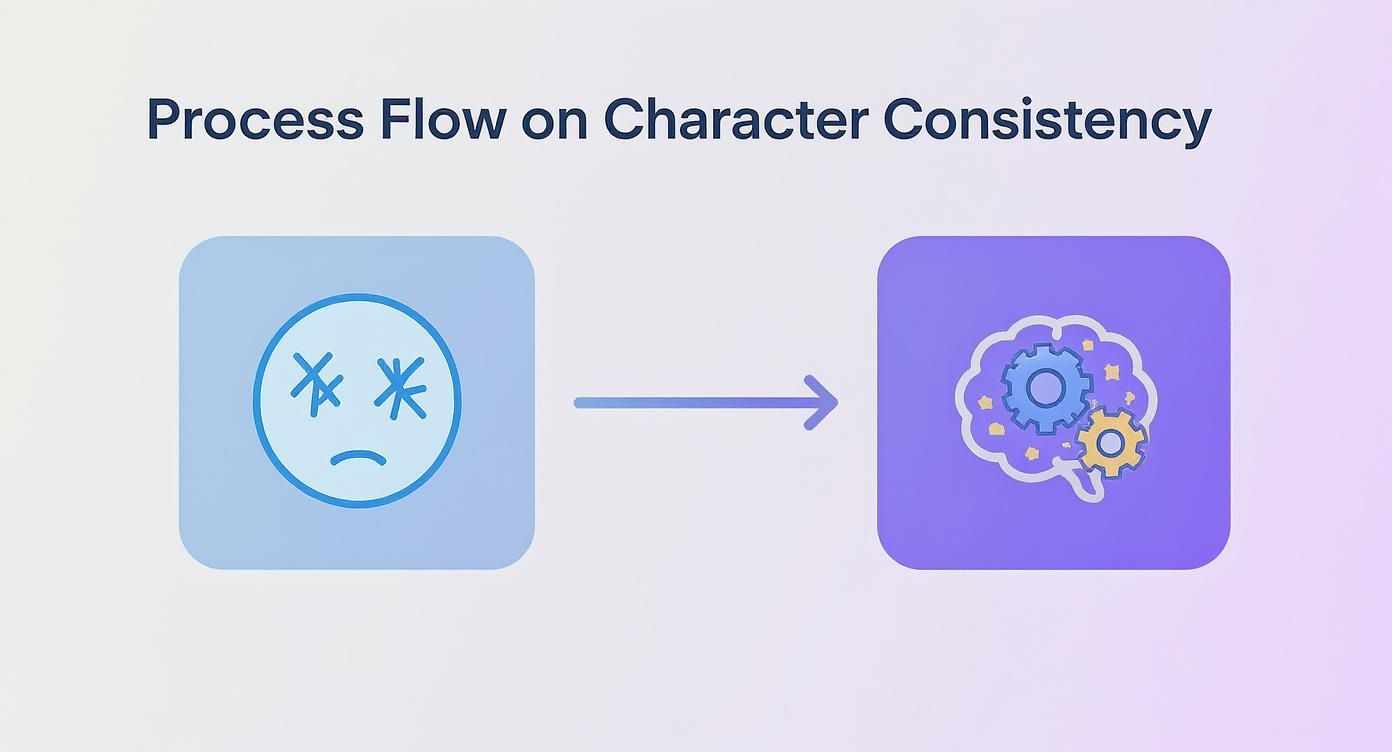
As you can see, the secret is shifting to a model-based approach. It’s the only way to tame the inherent randomness of AI image generation and get the control you need.
LoRA vs. DreamBooth: Which One Should You Choose?
Deciding between LoRA and DreamBooth really comes down to what you need: flexibility or pinpoint accuracy.
Think of it this way: DreamBooth creates a completely new, specialized version of the base AI model with your character baked right in. This gives you incredibly high fidelity, but the trade-off is massive file sizes and less versatility. It’s a bit of a sledgehammer approach.
A LoRA, on the other hand, is a much smaller file that works more like a plugin or a patch. It gently guides the existing model toward generating your character without fundamentally changing the whole thing. LoRAs are way more flexible, a breeze to share, and you can even stack them with other LoRAs (like one for a specific art style).
For most people, especially if you're just getting started, LoRA is the way to go. It hits that sweet spot between quality and efficiency.
A LoRA is like giving the AI a detailed set of reference photos and notes. DreamBooth is like hiring a dedicated portrait artist who only knows how to draw your character. The first approach is far more adaptable for different projects.
The demand for these kinds of specialized tools is exploding. The specialized AI character generation market has carved out its own $3.2 billion niche within the wider AI image industry. It’s a clear signal that creators are moving past generic tools and demanding more control.
Building Your Character's Dataset
The quality of your trained model comes down to one thing: the quality of your dataset. That’s just the collection of images you feed the AI to teach it. A sloppy dataset will always produce a sloppy model, no matter which training method you use. Your job is to create a comprehensive visual guide to your character.
A rock-solid dataset needs to include:
- Varied Angles: Don't just stick to headshots. Show your character from the front, side, three-quarters view, and even from behind if that's important.
- Diverse Expressions: You need more than a neutral stare. Include images of them smiling, frowning, looking surprised, and everything in between. This is how you teach the model their emotional range.
- Different Lighting: Get shots in bright sunlight, deep shadows, and standard indoor lighting. This helps the AI understand how their features look in different conditions, making the model much more versatile.
- Multiple Contexts: If your character is going to wear different outfits or be in various locations, you need to show the AI those possibilities in your training set.
You don't need hundreds of pictures. A great starting point is 15-25 high-quality images. Variety is far more important than volume. The goal is to isolate your character's core features while showing the AI how they adapt to different scenarios.
Sourcing and Prepping Your Images
So, where do you get these initial images? One popular method is to use a base AI model to generate images until you land on a look you absolutely love. From there, you just cherry-pick the best ones for your dataset. You could also start with digital art or even photographs (just make sure you have permission). For instance, some of the newer models are fantastic at creating different poses from a single photo, which you can learn about in our guide on the Nano Banana image model.
Once you have your images, the next step is critical: captioning. For each image, you'll create a simple text file that describes what's in it, using a unique trigger word for your character. Let's say your trigger word is "charXYZ." A caption might look like this: photo of charXYZ, smiling, wearing a red jacket, outdoors.
This process teaches the AI to connect the name "charXYZ" with the person in those photos, making them instantly summonable in any future prompt you write.
How to Write Prompts for Flawless Results
Once you have a custom-trained model like a LoRA, your prompt is no longer a hopeful request—it becomes a direct command. This is the moment you shift from being a passenger to being the pilot, taking full control over the AI's output. Mastering this skill is what separates random, inconsistent results from a reliable, professional workflow.
The real goal here is to build a repeatable template that leaves as little as possible to chance. Instead of just vaguely describing what you want, you need to break your prompt down into distinct, logical components.
This small shift in how you approach prompting will dramatically improve your consistency and save you countless hours of re-rolling images.
The Anatomy of a Perfect Character Prompt
Think of your prompt as a recipe. A great recipe has clear, distinct ingredients listed in a logical order, while a bad one is just a vague paragraph of suggestions. The exact same principle applies here.
A strong, structured prompt for character consistency almost always includes these four key elements:
- Character Trigger and Core Features: Always start with your LoRA's unique trigger word (e.g.,
charXYZ). Immediately follow this with a few essential, non-negotiable descriptors likecharXYZ, a woman with auburn hair and green eyes. This locks in the most important features first. - Action and Pose: What is the character doing? Don't be vague. Instead of
sitting, try something much more specific likesitting cross-legged on a wooden bench, holding a coffee mug. - Scene and Environment: Where is the character? Describe the background, the lighting, and the overall mood. For example,
in a cozy, sunlit library, rows of books blurred in the background, warm morning light. - Artistic Style and Details: This is where you define the final look and feel. Include terms that dictate the camera, lens, and quality, like
photorealistic, cinematic lighting, 4k, detailed skin texture, shot on a Sony A7III.
By separating these components, you make it incredibly easy to swap out one part without disrupting the others. You can change the action or scene while keeping the character and artistic style perfectly locked in.
Building a good prompt is about giving the AI a clear, structured blueprint. I've found that breaking it down into these distinct parts prevents the model from getting confused or ignoring critical details.
Here’s a quick breakdown of how these pieces fit together to form a powerful, repeatable command for the AI.
Effective Prompting Components
| Component | Example | Purpose |
|---|---|---|
| Character | charXYZ, a woman with auburn hair and green eyes |
Locks in the character's identity using the LoRA trigger and core, unchangeable features. |
| Action & Pose | sitting cross-legged on a wooden bench, holding a coffee mug |
Defines exactly what the character is doing, which heavily influences the composition. |
| Scene & Env. | in a cozy, sunlit library, rows of books blurred in the background |
Establishes the setting, mood, and lighting conditions for the entire image. |
| Style & Quality | photorealistic, cinematic lighting, 4k, shot on a Sony A7III |
Controls the final aesthetic, from realism and texture to camera-specific details. |
As you can see, each component has a specific job. When you combine them, you leave very little room for the AI to guess, which is exactly what leads to consistent, high-quality results.
Using Negative Prompts to Eliminate Flaws
Positive prompts tell the AI what to create, but negative prompts are your secret weapon—they tell the AI what to avoid. This is your primary defense against all the classic AI mistakes, like mangled hands, distorted faces, or weird artistic artifacts that sneak into your images.
Instead of trying to fix these issues in post-production, you can prevent them from ever showing up in the first place. A well-crafted negative prompt acts as a quality filter from the very beginning.
Think of negative prompts as a bouncer for your image generation. They keep all the unwanted elements out, ensuring only the high-quality details make it into the final picture.
Your negative prompt library should include terms that combat the most common problems. A few examples I use all the time include:
- For Anatomical Errors:
extra fingers, mutated hands, deformed, disfigured, poorly drawn hands, extra limbs - For Low Quality:
blurry, low quality, jpeg artifacts, ugly, grainy, pixelated, watermark, signature - For Unwanted Styles:
cartoon, 3d, painting, anime, sketch, unrealistic
Start with a standard set of negative prompts and keep adding to it as you notice recurring issues in your own generations. This simple habit is an absolute game-changer for achieving professional-grade results. You can dive deeper into these strategies in our complete text prompt guide for AI image generation.
The Critical Role of the Seed Number
The seed is just a number that controls the initial noise pattern from which an AI image is generated. Here’s the magic part: if you use the same prompt, the same settings, and the same seed, you will get the exact same image every single time. This is your ultimate tool for perfect replication.
Once you generate an image you absolutely love, save that seed number immediately. This allows you to return to that exact image and make tiny, controlled tweaks. For example, you can keep the seed and just change the prompt from smiling to laughing to create a subtle variation while keeping the composition, lighting, and character identical.
This technique is incredibly powerful for creating a series of related images, like a storyboard or a character sheet showing different expressions. The seed gives you a stable foundation to build upon, turning the random art of AI generation into a precise science.
Gaining Full Control Over Pose and Angle
You’ve done the hard work of creating a custom model, and now your character’s face and style are dialed in. That's a huge win. But what happens when you need them to do something specific, like wave at the camera or sit in a certain chair? This is usually where prompts start to fall apart and the AI's randomness takes over.
If you really want to direct the scene like a filmmaker, you need to go beyond text prompts. You need to command the composition itself.
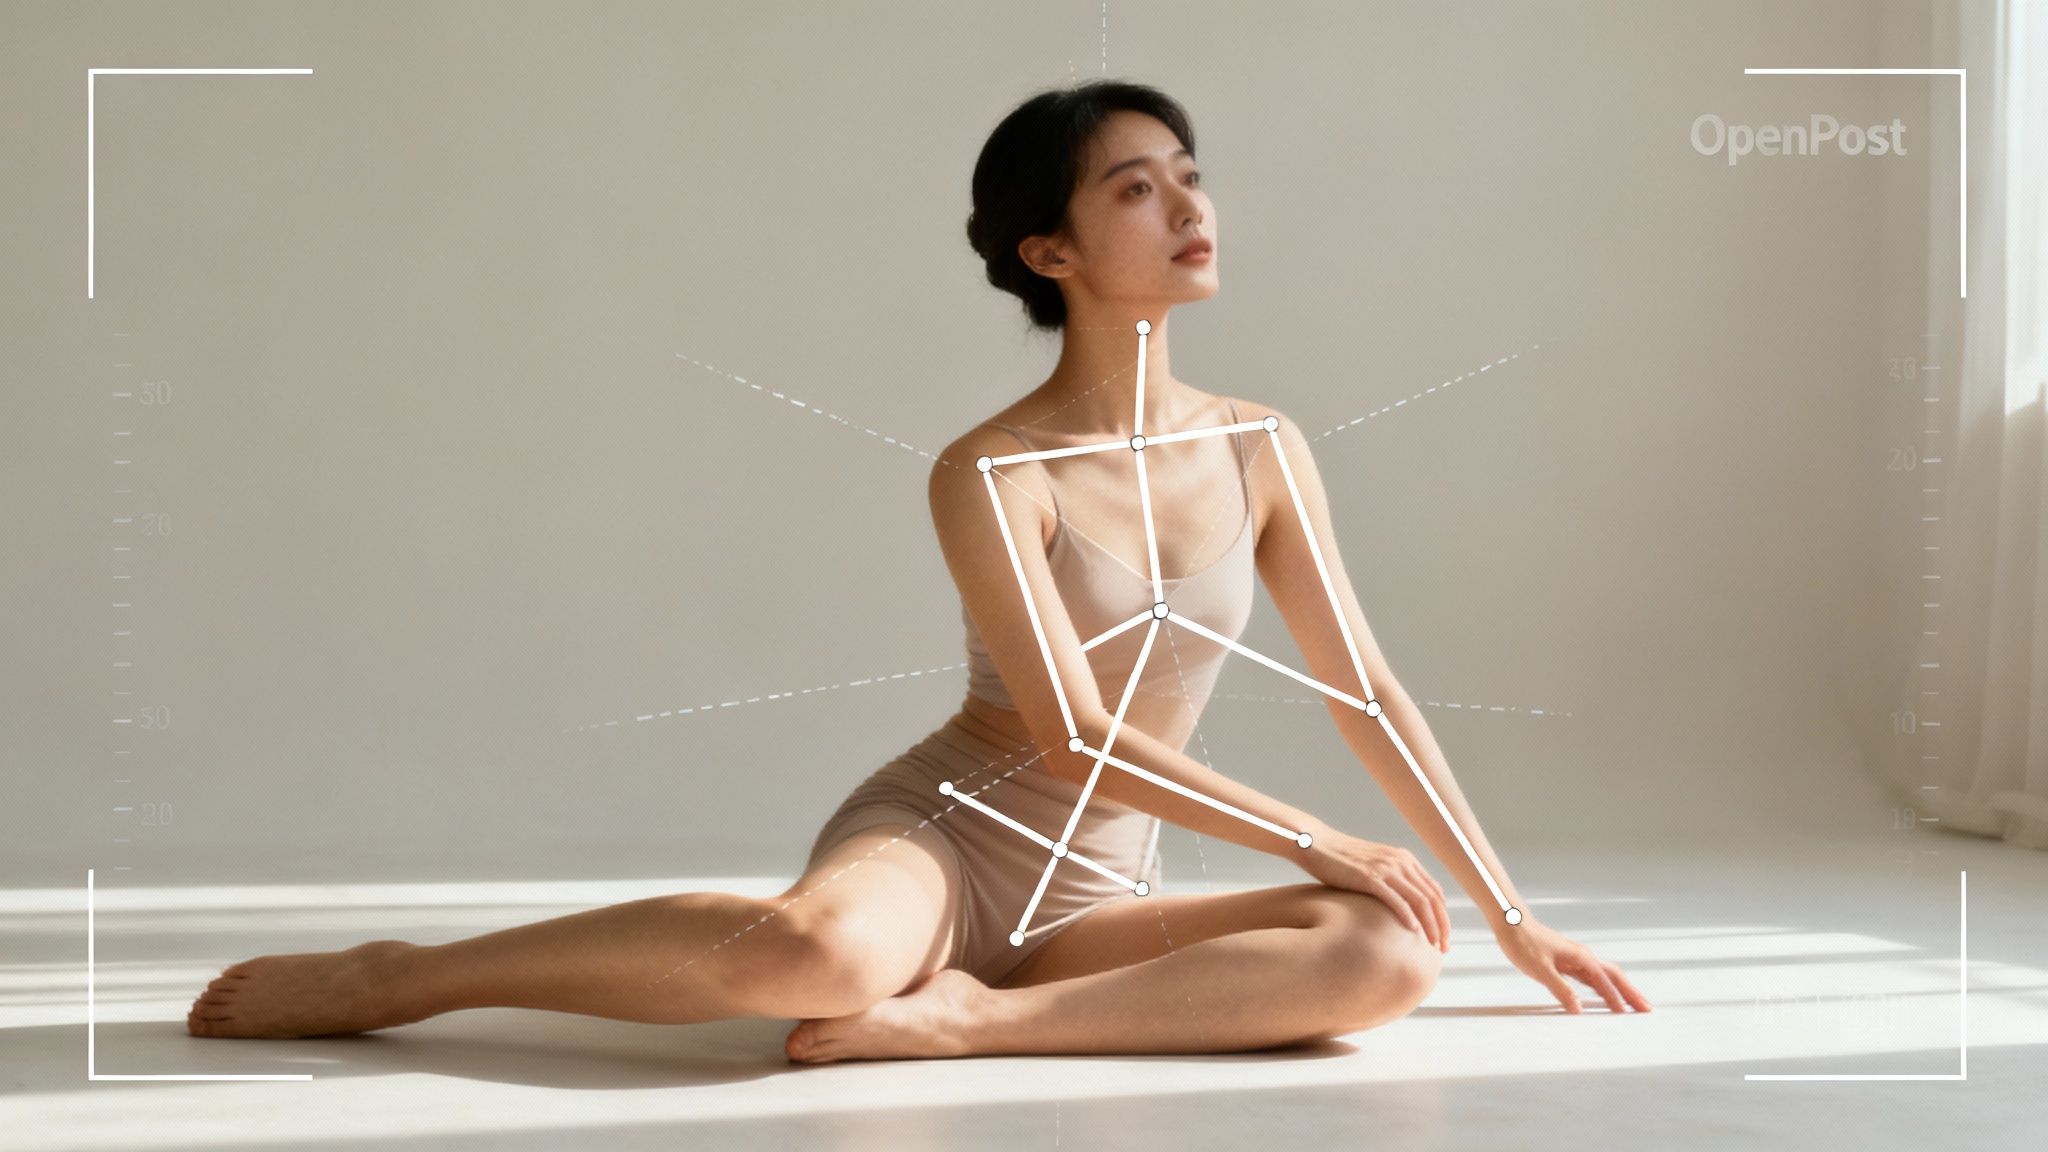
This is exactly what frameworks like ControlNet were built for. Don't think of it as a replacement for your prompt; think of it as the skeleton underneath. It lets you use a reference image to lock in the exact pose, composition, and even the camera angle, forcing the AI to build your character around a structure you define.
Suddenly, you've gone from creating portraits to directing entire scenes. It’s a complete shift in creative power.
How ControlNet Locks in a Pose
So, how does this actually work? ControlNet analyzes a source image you provide and extracts specific data from it—things like a person’s skeletal structure, the sharp edges of an object, or the depth of a scene. It then uses this map as an unbreakable rulebook during generation.
Your prompt still supplies all the creative juice: who your character is, what the background looks like, and the overall artistic style. But ControlNet makes sure the final image follows the foundational structure you provided.
There are a bunch of ControlNet models, but for character work, a few are absolute must-haves.
OpenPose: This is your go-to for nailing any human pose. It looks at an image and generates a simple stick-figure "skeleton." You then use this skeleton to make your character adopt that exact posture, right down to the tilt of their head or the placement of their fingers.
Canny: This one is all about edges. It creates a clean line-art version of your reference, which is brilliant for locking down the overall composition of a scene or the precise outline of an object your character is holding.
Depth: This model generates a depth map, telling the AI how close or far away everything is. It’s perfect for copying a specific camera perspective and making sure your character feels naturally placed within a busy environment.
Using these tools lets you stop describing a pose and start showing the AI what you want. It’s the difference between prompting "a person running" and giving it a reference photo of an Olympic sprinter. The results are infinitely more predictable.
A Practical Workflow for Controlling Poses
Getting started with ControlNet is surprisingly simple. First, find or create a reference image with the exact pose you're after. This doesn't have to be a high-quality photo—even a quick digital drawing of a stick figure works perfectly for OpenPose.
Upload that reference image into your AI tool and choose the right ControlNet preprocessor, like OpenPose. Now, just write your prompt like you normally would, making sure to include your LoRA trigger word (e.g., charXYZ, smiling, in a forest...).
When you hit "generate," the AI does two things at once. It reads your prompt to create your character in the right style and setting, while also forcing the character's body to match the pose from your ControlNet skeleton.
Of course, once you have these perfectly posed images, the next logical step is to make them move. For a deeper dive into that process, you can explore our guide on AI character animation.
Using ControlNet is like giving your AI a choreographer. Your prompt is the script and your LoRA is the actor, but ControlNet is on set making sure everyone hits their marks perfectly, every single time.
This technique is a lifesaver for any project needing a sequence of images, like storyboards, comic books, or ad creatives. It guarantees your character not only looks the same across frames but can also perform a series of actions with flawless consistency.
So you've created your first few images. That's a huge milestone, but the journey from a raw AI output to a professional-grade asset is just beginning. Think of it as moving from a rough sketch to a final, polished masterpiece.
This next phase is all about two things: taking your best images and making them perfect, and then building an entire library of high-quality assets around your character. It’s how you go from a cool-looking one-off to a versatile digital actor ready for any scene.
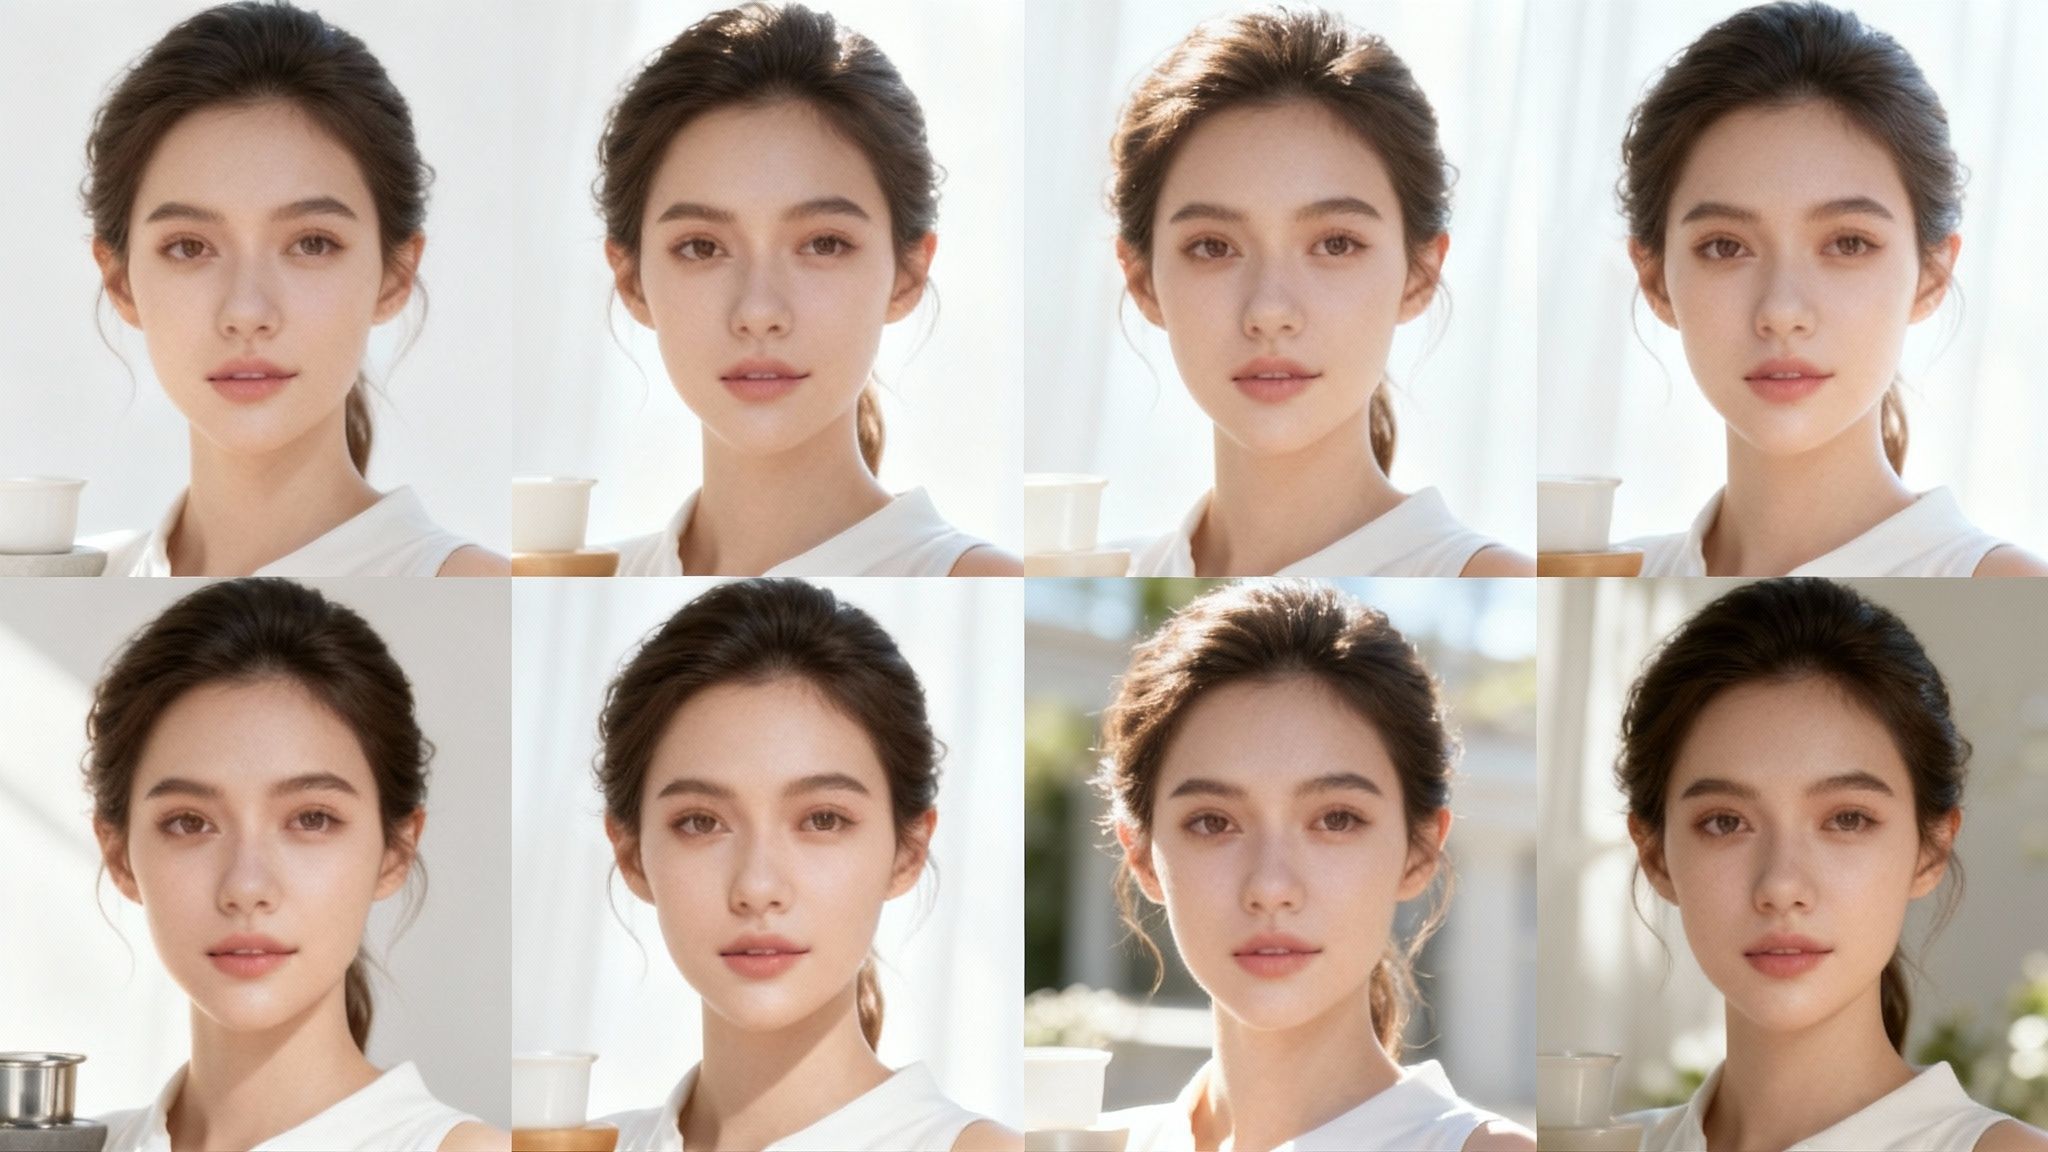
From Good to Flawless: Upscaling and Face Restoration
Even the most advanced AI models can sometimes produce images with slight imperfections or resolutions that just aren't high enough for professional use. That’s where a couple of key post-production tools come into play.
First up is upscaling. This is the magic of increasing an image’s resolution without it turning into a blurry, pixelated mess. Modern AI upscalers are brilliant at this, intelligently adding new detail to make your images crisp and clear. This is non-negotiable if you plan on using your character in high-resolution videos or for print.
Next, you have face restoration. Even with a solid LoRA, you'll occasionally get an image where the face is just a little… off. Maybe the eyes are slightly distorted or the skin texture looks a bit weird. Specialized tools like CodeFormer or GFPGAN are designed to fix exactly these kinds of facial artifacts, bringing them back to a photorealistic and consistent state without losing your character's identity.
Think of upscaling and face restoration as your digital retouching toolkit. It’s the final polish that turns a good image into a great one, ensuring your character always looks their absolute best.
These two steps are simple but can make a massive difference in the final quality of your work.
Build Your Asset Library with Automation
Once you’ve nailed the workflow for a single perfect image, it’s time to think bigger. Generating images one by one is fine for testing, but if you want to build a truly useful library of assets, you need to automate the process.
Most popular UIs like Automatic1111 or ComfyUI have powerful batching features built right in. You can feed them a text file with different prompts, seeds, or settings and let them run.
This lets you set up a job, walk away, and come back to a folder packed with hundreds of new images. For instance, you could generate your character in:
- 10 different locations: a beach, a bustling city, a quiet forest, an office.
- 15 different emotional states: happy, sad, angry, surprised, thoughtful.
- 20 different activities: reading a book, drinking coffee, typing on a laptop.
This is how you build a massive, searchable library of on-brand content. As you get more sophisticated, robust artificial intelligence integration services can help you manage these increasingly complex workflows.
Putting Your Character to Work in the Real World
With a huge library of consistent character images at your fingertips, the creative possibilities are endless. You're no longer just making pictures; you’re stockpiling the raw materials for dynamic storytelling.
This space is growing fast. The global digital art market is projected to hit $5.7 billion in 2025, and character-based assets are the fastest-growing part of it. This isn't just a trend; it's a fundamental shift in how creators and brands approach visual content, all thanks to tools that make this level of production possible for everyone.
Here are a few practical ways you can put your asset library to use:
Engaging Social Media Videos: A classic format on TikTok and Instagram uses a series of still images with the Ken Burns effect (that slow pan and zoom) to tell a story. With a library of your character showing different emotions, you can create a compelling narrative in minutes. Tools like Aicut are perfect for turning these static photos into animated characters.
Faceless YouTube Channels: For channels that focus on storytelling, education, or commentary, a consistent AI character can literally become the face of the brand. You can generate images of your character reacting to what's being said in the script, giving the audience a visual anchor without ever having to show your own face.
Dynamic Ad Creatives: Imagine running a marketing campaign where your brand’s AI ambassador is shown using your product in dozens of different contexts. You can rapidly generate images for A/B testing ad creatives, tailoring the visuals to specific audiences without the time and expense of a traditional photoshoot.
By systematically refining your images and scaling up production, you turn your AI image generator from a novelty into a legitimate content creation engine.
Got Questions About AI Characters? We've Got Answers
Even with the best workflow, you're going to hit a few snags. That's just the nature of working with AI—it's powerful, but it can be quirky. What worked perfectly yesterday might need a little nudge today.
This section is all about tackling those common hurdles. Think of it as a field guide for troubleshooting your character generations, so you can get back to what you do best: creating.
How Many Images Do I Really Need to Train a Good LoRA?
This is the big one, and the answer usually surprises people. You don't need a mountain of images. In fact, quality trumps quantity every single time.
You can get a fantastic, workable LoRA with just 15 to 25 really solid, diverse images. I've seen people push it to 50, and while it might add a tiny bit more refinement, you hit a point of diminishing returns pretty fast.
What matters is variety. A dataset of 20 pictures showing different angles, a range of expressions, and varied lighting will always beat 100 images that are basically the same headshot. Your goal is to give the AI a full, 360-degree understanding of your character, not just one good angle.
Why Does My Character Still Look a Little "Off" Sometimes?
So you've trained a great model, but every now and then, the face just isn't quite right. It happens. Remember, AI generation is an act of creative interpretation, not a copy-and-paste job. Your LoRA gives it strong direction, but the underlying model still has a bit of artistic license.
When this happens, here are a few things I try:
- Bump Up the LoRA Weight: If the likeness feels weak, try nudging the weight in your prompt. For example, moving from
<lora:your_char:0.8>to<lora:your_char:0.9>can often lock the features in better. Just be careful—push it too far and you’ll get distorted, "overbaked" results. - Lock in Your Seed: As we talked about earlier, a fixed seed is your best friend for consistency. When you get a generation where the character looks perfect, save that seed number! Use it as the foundation for all your future images of that character in that style.
- Reinforce Key Features in the Prompt: Don't be afraid to be redundant. Even with the LoRA active, add your character's most important features directly into the text prompt. Spelling out
piercing green eyesora small scar on their left cheekgives the AI another layer of instruction to follow.
Can I Put Two of My Custom Characters in the Same Shot?
Ah, the million-dollar question. Getting two custom LoRA characters to interact flawlessly in a single generation is notoriously difficult. It's definitely possible, but it usually requires a more hands-on, multi-step approach.
The most reliable method right now is a bit of a workaround. You generate each character separately, maybe on a simple grey or green background. Then, you bring those two images into an editor like Photoshop and composite them together. From there, you can use inpainting or generative fill to create a new background and blend them into a believable, cohesive scene.
Getting two custom characters to interact perfectly in a single generation is the current "holy grail" for many AI artists. While direct generation is tricky, a combination of generation and post-production editing is a very effective workaround.
What's the Best AI Model for Creating Consistent Characters?
There’s no single "best" model, because they all have their own strengths. It's more about finding the right tool for the right part of your workflow.
For instance, Midjourney is famous for its incredible artistic polish and often produces very coherent characters right out of the box. Other tools are amazing for dataset creation; some can take a single photo and generate a dozen different poses, which is a massive time-saver.
Most pros I know have a toolbox, not a single hammer. They might brainstorm a character's look in Midjourney, use a specialized tool to train the LoRA, and then do the final scene generation in Stable Diffusion with ControlNet for absolute mastery over the pose. The key is to experiment. Find the combination of tools that gives you the look and control you need for your project.
To help clear up any other questions, here are some quick answers to common queries we see all the time.
| Question | Answer |
|---|---|
| Is it better to use real photos or AI images for my LoRA dataset? | Both can work, but a clean dataset of high-resolution photos often gives the most realistic and flexible results. AI-generated images can sometimes "bake in" an art style. |
| Can I train a LoRA on a specific art style instead of a character? | Absolutely! The same process applies. Just feed it 15-25 images that perfectly represent the art style you want to replicate. |
| How long does it typically take to train a LoRA? | It depends on the service you use and the size of your dataset. It can range from as little as 15 minutes to a few hours. |
| Will my LoRA work with any base model? | Not always. LoRAs are typically trained on a specific base model (like SD 1.5 or SDXL). They work best when used with that same base model or a fine-tune of it. |
Hopefully, this clears up some of the mystery and helps you push past any creative roadblocks.
Ready to stop wrestling with inconsistent results and start creating? Aicut is designed for creators who need reliable, high-quality characters for their videos. Turn your static images into animated characters, generate stunning visuals for your faceless channel, and build an entire library of on-brand content in minutes. Discover how Aicut can streamline your creative process today.