
You're probably here because you saw the effect in the wild, saved the video, then realized every tutorial shows only the middle of the process. It starts after the footage is already shot, the eye is already sharp, and the transition somehow already makes sense.
That's why most first attempts at a zoom into eye edit feel cheap. The keyframes may be correct, but the shot wasn't designed for the move, the eye doesn't hold up at close range, and the reveal scene inside the iris looks pasted on.
The fix is to treat this as a full creator workflow, not just an editing trick. Plan the shot for tracking, build the transition around motion and blur, then use AI where it helps, especially for the part most tutorials ignore: making the eye feel alive instead of flat.
Why the Eye Zoom Is Your Ultimate Scroll-Stopper
The effect works because it does two jobs at once. First, it gives the viewer an immediate focal point. Second, it promises a reveal. That combination is strong in short-form because people decide fast whether a clip deserves more attention.
There's also a simple attention reality behind it. Research summarized by Iowa State University found that in some video-call settings, people looked away from the screen about one third of the time, which shows how unstable visual attention can be in screen-based environments (Iowa State summary of eye-tracking in Zoom and Webex settings). On short-form feeds, that same fight for attention shows up even harder.
Why this hook lands fast
A good eye zoom gives the brain a clean sequence:
- Face first: a human subject creates instant context.
- Eye second: the frame narrows attention to one tiny detail.
- Reveal third: the audience expects something hidden inside.
That rhythm is why the effect keeps showing up in beauty edits, horror intros, cinematic story clips, AI UGC ads, and faceless storytelling. It feels personal and dramatic without needing dialogue.
Practical rule: If your opening frame doesn't tell the viewer where to look, the zoom into eye effect loses half its power.
The best creators also understand that this effect isn't magic by itself. If the inner reveal is weak, the opening feels like bait. If the reveal matches the topic, the effect feels earned. A beauty creator can reveal texture, color, or mood. A horror page can reveal a distorted memory, a creature, or a surreal hallway. A faceless page can use the eye as a portal into the actual story.
For more opening patterns that pair well with this kind of visual hook, this guide on hooks for TikTok and Instagram videos is worth studying.
Shoot It Right Planning for a Perfect Effect
A creator films a strong concept, opens the edit, punches into the eye, and the whole thing falls apart. The iris is soft. The face shifts half a centimeter. The camera was too close, so the perspective already looks warped before any motion starts.
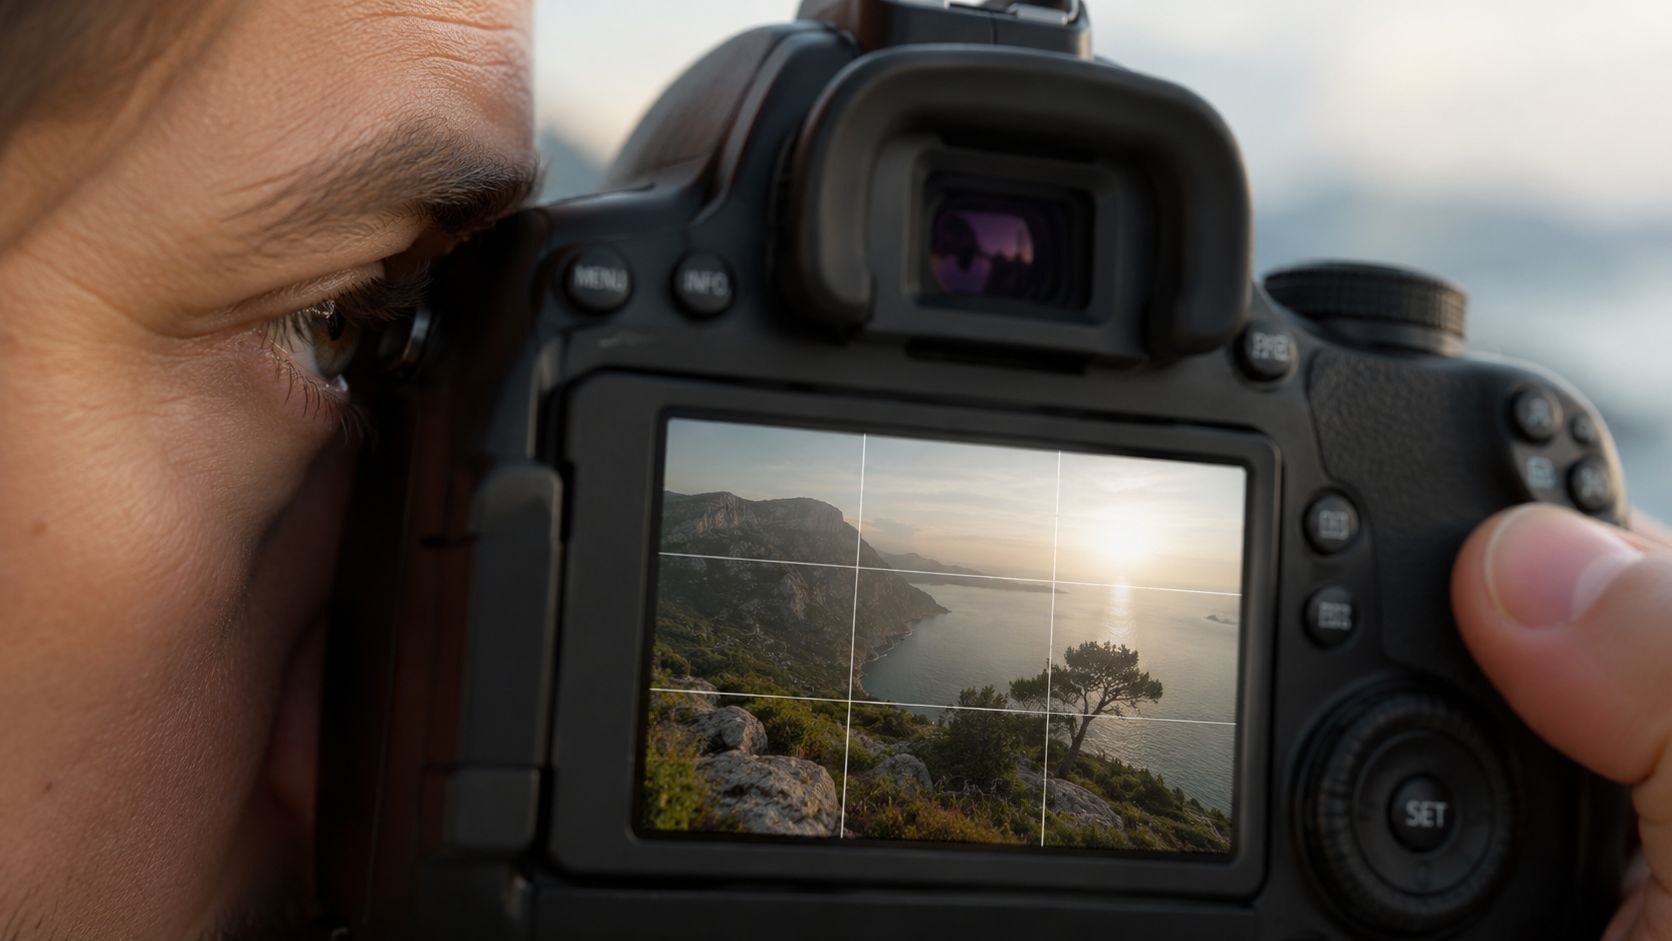
That failure usually starts at capture, not on the timeline. Research on gaze-estimation systems shows the same pattern. Tracking breaks under poor lighting, weak sensor quality, and bad calibration, not because the tracking logic is bad in itself (review on gaze-estimation accuracy and failure points). Eye zoom edits behave the same way. If the eye plate is weak, every zoom just magnifies the weakness.
Creators who get this effect right plan the whole workflow before recording. That includes the reveal inside the eye, the framing that leaves room for the move, and whether the finish will be manual or AI-assisted in a tool like Aicut. Shooting without that plan is how you end up forcing fixes later.
What to lock in before you record
Use a simple pre-shoot checklist:
- Stabilize the shot: Put the phone on a tripod, clamp, or solid surface. Tiny handheld drift makes eye tracking less reliable and makes the push-in feel cheap.
- Focus on the eye itself: Tap the eye, then verify the iris edge or eyelashes are sharp.
- Record at the highest clean quality your device allows: Extra detail gives you more room to crop, track, and blend the reveal.
- Leave framing margin: Keep enough space around the face so the zoom has somewhere to go.
- Create a readable catchlight: Window light, a soft LED, or a ring light gives the eye shape and life.
- Reduce head movement: Ask the subject to hold still for the key beat, especially in the first second.
One more planning move helps a lot. Decide before filming what will appear inside the eye. A horror reveal needs different lighting and expression than a beauty texture reveal or an AI ad transition. The better that match, the less the effect feels like a random template.
Framing choices that make the zoom look cinematic
Keep some distance between camera and face.
If the lens is too close, facial perspective starts looking exaggerated. For this effect, that reads as accidental distortion, not intensity. The eye can get bigger, but it does not get better.
A cleaner setup works like this:
- Move the camera back slightly.
- Frame the face so it still feels intimate.
- Let the edit create the aggressive move into the eye.
That trade-off matters. Shooting wider gives you less immediate drama in the raw clip, but it gives you better tracking, more natural facial proportions, and more control in post. For short-form creators, that is the smarter bet.
If you are still building your setup, it helps to find affordable video editing software that can handle crops, masks, and basic tracking without turning this into a desktop-only project.
Direct the subject like you already know the edit
Give the subject a repeatable action. Neutral face. Eyes into lens. Hold. No blink during the key beat if possible.
That short performance window gives you clean frames for both manual compositing and AI-assisted variations. I usually record several takes with small expression changes because the difference between “interesting” and “scroll-stopping” is often just a slightly wider eye or a calmer face. Mystery, beauty, horror, and ad creatives all need a different read.
Shoot a few safety versions too. One fully still take. One with a slow micro-lean. One with a blink timed before the transition. AI tools can help extend or stylize the effect later, but they work faster and look more convincing when the source clip already gives them stable material.
If you want a clearer handle on how shot stability affects tracking and perceived motion, this guide to camera movements and tracking for video edits is useful background.
The Classic Editing Workflow Step by Step
The manual method still matters because it teaches you what makes the effect believable. Even if you later automate part of the process, you'll get better results when you understand the mechanics.
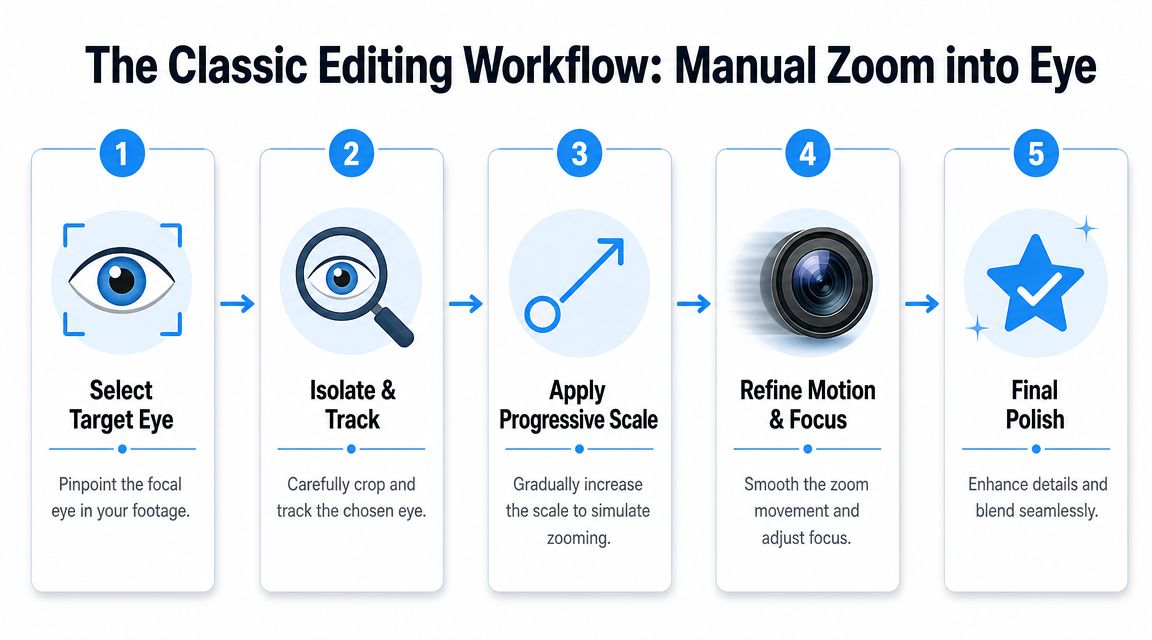
The broad workflow works across After Effects, DaVinci Resolve, and even some mobile editors. The names change a bit, but the logic stays the same.
Build the move around tracking
Start by choosing the eye that stays clearest through the shot. Track that eye, then attach your zoom motion to a parent null or equivalent control layer rather than scaling random layers separately.
A reliable tutorial workflow for this effect uses a tracked null object centered on the eye, adds an anticipation pull-back before the push-in, and uses radial blur set to "zoom" to hide the transition midpoint (motion-graphics tutorial on the eye zoom workflow).
That anticipation is what many beginners skip. They only push forward. The slight pull-back before the move makes the zoom feel intentional instead of abrupt.
The manual stack that actually works
Think in layers:
- Base footage: your original face shot.
- Eye isolation: a mask around the target eye, feathered carefully.
- Inner world layer: the galaxy, scene, text, memory clip, or abstract texture that lives inside the eye.
- Motion control: a null, adjustment layer, or compound clip that drives the zoom.
- Blur and polish: motion blur, radial blur, and color work to stitch the moment together.
The eye zoom usually breaks at the midpoint. That's where viewers notice a fake scale jump, a bad composite, or a flat insert.
The midpoint is where blur earns its keep. Too little blur and the seam is obvious. Too much blur and you lose iris detail. That trade-off is the whole game.
Masking and distortion
This part is less glamorous, but it's where pro-looking edits separate from template-looking ones. The reflected imagery in an eye is spherical, not flat. If you drop a normal rectangular clip into the iris and scale it up, the reveal often feels pasted on.
That's why some warping is usually needed before the full move. Subtle distortion makes the insert feel like it belongs to the eye surface rather than floating above it.
A good manual pass often looks like this:
- Rough mask the eye shape.
- Track the mask or the eye center.
- Place your insert under the eye layer.
- Distort the insert slightly so it feels curved.
- Animate the push-in through the tracked control layer.
- Add blur around the transition center.
- Refine color and brightness so the insert doesn't scream “composite.”
If you're still building your toolkit and want to find affordable video editing software, that roundup is a practical starting point for comparing options before you commit to one workflow.
What doesn't work
A few shortcuts almost always look weak:
- Scale-only zooms: They feel flat because nothing in the motion is anchored.
- Hard-edged masks: The eye instantly looks cut out.
- Static inner scenes: The reveal has no life, so the whole effect feels like a slideshow.
- Mismatched color: A cool-toned face with a warm neon insert usually looks fake unless the contrast is deliberate.
If your manual version looks stiff, the problem usually isn't that you need more plugins. It's that one of the three pillars is weak: tracking, transition blur, or insert realism.
The AI-Powered Workflow with Aicut
The eye zoom usually breaks at the same point. The push-in works, then the reveal inside the eye looks flat, generic, or disconnected from the face.
AI helps most after the shot is already usable. It speeds up concept testing, gives you richer inner-world options, and saves hours you would have spent rebuilding inserts by hand.
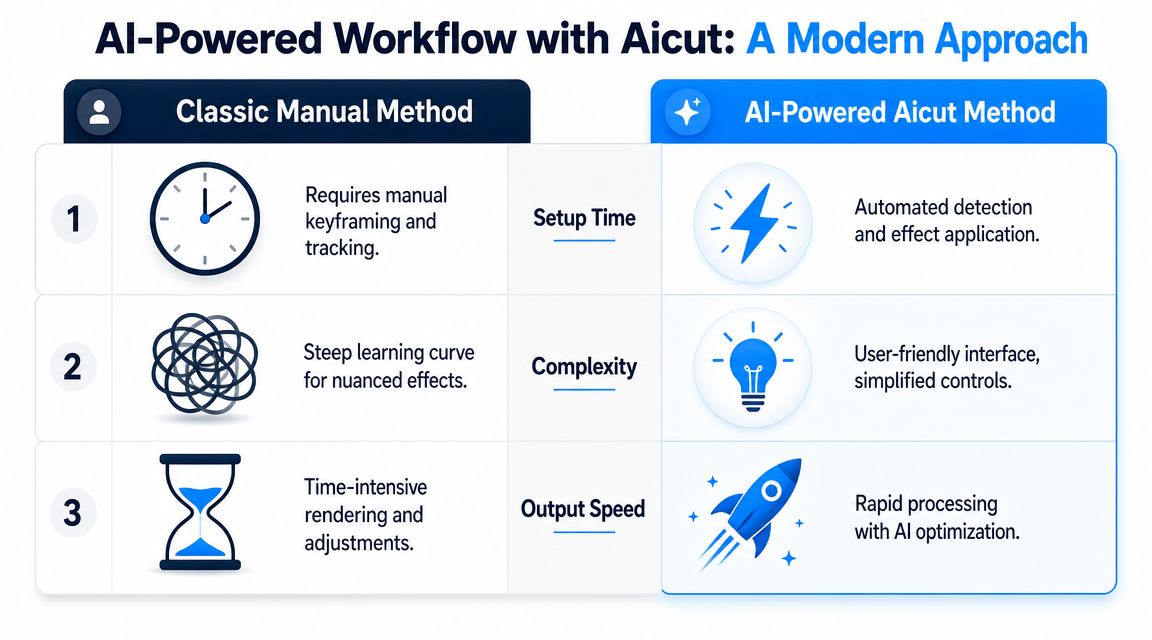
Extreme close-ups expose every shortcut. If the reflections drift, the texture feels too synthetic, or the generated scene has the wrong depth cues, viewers feel it immediately. AI is useful here because it can produce detail and variation fast. It does not fix weak footage, bad timing, or sloppy compositing.
That changes the workflow in a practical way. Instead of spending most of your time hunting for stock, masking around a mediocre insert, and trying to force realism with blur, you can test several inner-scene directions early and keep the one that fits the shot.
Where AI actually saves time
| Workflow need | Manual approach | AI-assisted approach |
|---|---|---|
| Inner world creation | Search stock or build composites | Generate custom scenes from prompts |
| Realism | Hand-paint, warp, and texture layers | Create richer textures and motion variations |
| Iteration | Rebuild pieces by hand | Swap concepts quickly until one feels right |
The gain is speed with better options. Creators making Shorts, Reels, and TikToks need that because the effect often lives or dies on the second or third idea, not the first one.
Aicut's AI video workflow for short-form creators is useful for this style because it lets you build or swap the reveal scene quickly without rebuilding the whole sequence every time. That matters when you are testing whether the eye should open into a memory, a sci-fi interface, a dreamscape, or a beauty-style liquid texture.
Here's the embedded walkthrough:
Prompting the inner world
Weak prompts create weak reveals. “Galaxy in the eye” is too loose. Good prompts define texture, camera behavior, light quality, and motion so the generated result has a chance of matching the footage you already shot.
Use prompt language that reflects how the final clip should feel on screen:
| Desired Scene | Example Prompt |
|---|---|
| Cosmic portal | “Macro cinematic iris opening into a swirling nebula, deep blues and violet dust, glowing stars, subtle rotational motion, realistic reflections, high contrast, dramatic light” |
| Horror memory | “Extreme close-up eye reveal into a dim hallway with flickering light, soft fog, unsettling stillness, realistic lens bloom, moody shadows” |
| Beauty sparkle | “Luxury beauty iris reveal with liquid gold particles, glossy highlights, clean soft lighting, elegant slow movement, premium cosmetic ad style” |
| Fantasy forest | “Enchanted forest seen inside an iris, floating spores, green ambient glow, magical depth, soft camera drift, storybook realism” |
| Tech interface | “Futuristic biometric eye reveal with holographic rings, scanning lines, cool blue light, precision UI motion, sleek sci-fi aesthetic” |
| Emotional flashback | “Warm nostalgic memory scene appearing inside an eye, soft sunlight, dust particles, gentle handheld motion, cinematic realism” |
One practical rule helps a lot. Prompt for motion that can live inside a tiny circular area. Large sweeping action often collapses once it is masked into the iris. Slow rotation, drifting particles, scanning rings, flicker, and atmospheric movement usually read better.
Manual versus AI judgment calls
AI handles asset generation well. You still have to make the editorial calls that sell the effect:
- when the zoom accelerates
- where the transition blur peaks
- how long the viewer stays inside the reveal
- whether the inner world moves subtly or aggressively
- how much texture is believable before it starts to look synthetic
The best results usually come from a hybrid process. Shoot with the effect in mind. Build the transition structure first. Then generate multiple reveal options and test them against the actual eye footage, not in isolation. That last part is where creators waste time. A scene that looks impressive on its own can fail once it sits inside a real iris with real skin texture and catchlights.
Use AI to improve the reveal, not to rescue the shot. That is the difference between a fast workflow and a fake-looking one.
Finishing Touches That Make Your Video Pop
A creator nails the eye track, builds the zoom, and still ends up with a clip that feels flat in the feed. The reason is usually simple. The transition works technically, but the finish does not sell the moment.
What gets this effect over the line is sound, grading, and delivery. Those last 10 percent decisions often decide whether the edit feels cinematic or like a template.
Sound sells the motion
The eye zoom needs a sound stack, not a single whoosh dropped on top.
Start with a light riser that begins just before the push-in. Add the main whoosh at peak speed. Then place a hit, shimmer, or low boom right on the reveal frame. That combination gives the zoom weight and timing.
The style should match the concept. Horror edits usually land better with restrained low-end pressure and sparse texture. Beauty, luxury, and sci-fi edits usually benefit from cleaner highs, airy detail, and sharper transients.
If I build the reveal in Aicut or generate multiple insert options with AI, I still finish sound by hand. AI can get the visual concept fast. The audio timing still needs editorial judgment.
Make the two worlds feel connected
The outside shot and the inside reveal should feel related, even if they are visually different. If the eye footage is warm and natural but the reveal is cold and hyper-digital, the cut can feel pasted together unless you bridge them.
A few finishing passes do most of the work:
- Repeat one color cue across both shots: blue highlights, amber skin tones, neon magenta accents
- Match contrast behavior: if one shot has deep blacks and the other is flat, the handoff feels cheap
- Add texture across the full clip: subtle grain, bloom, or halation helps hide compositing edges
- Check brightness at the transition point: a reveal that suddenly jumps brighter can expose the effect
A polished eye zoom feels like one visual idea changing form.
Export like a creator, not just an editor
Platform compression punishes this effect fast. Fine iris detail, blur ramps, and micro-texture can fall apart after upload, especially if the source is already soft.
Export a clean vertical master, then watch the uploaded version inside the actual app. Do not judge it only from the timeline preview. If the center of the zoom turns mushy, more sharpening usually makes it worse. Better source footage, stronger subject separation, and cleaner motion blur usually fix the problem faster.
This is also where planning and post connect. If you shot for the effect properly and used AI to speed up concept generation instead of covering mistakes, the finishing pass becomes much easier. That is usually the difference between an eye zoom people watch once and an eye zoom they replay.
Creative Variations and Common Problems
Once you've built the standard version, the effect opens up. Some of the most interesting edits don't zoom into a normal human eye at all.
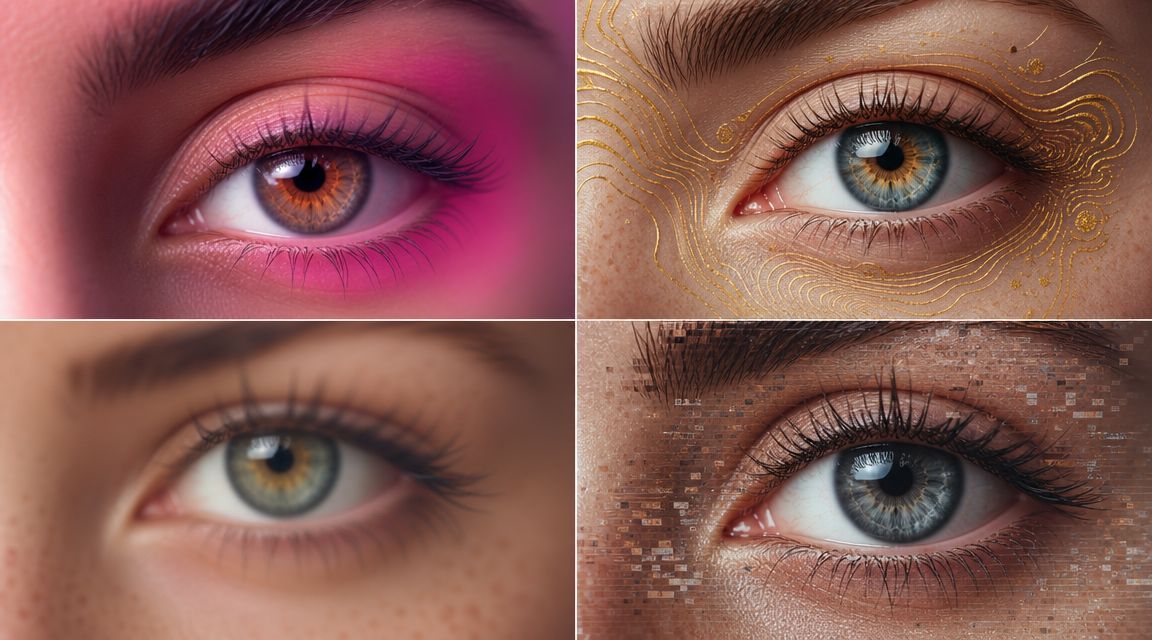
A few variations worth testing:
- Reverse reveal: start inside the pupil, then zoom out to reveal the character.
- Pet eye transition: works well for emotional or funny storytelling.
- Reflection entry: use sunglasses, chrome, or a visor instead of an eyeball.
- Genre twist: same move, different payload. Horror, beauty, luxury, sci-fi, and sports all read differently.
Fast fixes for common failures
If the effect looks close but not right, it's usually one of these:
Tracking slips off the eye
Re-track a shorter segment or manually correct the key area. Trying to force a bad track across the whole shot wastes time.The cut feels obvious
Shift the blur timing so it peaks closer to the visual handoff. A tiny timing change can hide a lot.The eye looks fake at close range
Add texture, subtle light variation, or a curved warp to the insert. Flat imagery usually causes the problem.The zoom feels stiff
Add a hint of camera shake or a better ease curve. Perfectly robotic motion often feels less cinematic than slightly imperfect motion.
The creators who get the most out of this effect don't treat it like a gimmick. They treat it like a doorway. Once that clicks, the eye stops being the trick and starts being the transition engine for almost any story.
If you want a faster way to build this kind of short-form effect, Aicut is one option for generating and editing AI-assisted video concepts, including eye-focused creative workflows, without rebuilding every variation by hand.