
If you’ve ever Googled "best video format," you've probably seen the same answer everywhere: MP4. And honestly, for most everyday uses, that’s not wrong. An MP4 file using an H.264 or H.265 (HEVC) codec is the gold standard for online video, giving you great quality without a massive file size. It just works.
Finding the Best Video Format for Your Needs

But here's the thing: the "best" format truly depends on what you're doing. The right choice for shooting raw footage is often the wrong choice for uploading to TikTok. It's a classic case of using the right tool for the job.
Think about it—the huge, data-rich files your camera captures are perfect for editing, but they'd take forever to upload and would buffer endlessly online. Conversely, that highly compressed file you export for social media has thrown away too much information to be a good master file for a professional editing project.
Containers vs. Codecs: What You Need to Know
To get this right, you have to understand the two pieces of every video file: the container and the codec. People mix these up all the time, but the difference is actually pretty simple.
The easiest way to picture it is to think of the container as the box (.MP4, .MOV) and the codec as the method used to neatly fold and pack the video and audio inside (H.264, AV1). Your computer reads the box to know what type of file it is, but the codec inside determines the final quality and size.
Different pairings of containers and codecs are built for different tasks. Getting a handle on what is the best video format for quality and compatibility in different situations will help you make the right call every time.
Let's look at a quick comparison between two of the most common container formats, MP4 and MOV, to see how they're used in the real world.
| Feature | MP4 (.mp4) | MOV (.mov) |
|---|---|---|
| Primary Use | Web Streaming & Sharing: This is your go-to for universal playback. | Editing & Production: Perfect for high-quality capture and post-production work. |
| Compatibility | Excellent: Works on virtually every browser, device, and social platform without a fuss. | Good: It's native to Apple's world. On Windows or Android, you might need extra codecs. |
| Compression | High Efficiency: Famous for delivering great quality at impressively small file sizes. | Flexible: Can use little-to-no compression, preserving maximum detail for editing. |
| Best For | Uploading to YouTube, TikTok, and Instagram, or sending files through email. | Professional editing in apps like Final Cut Pro or Adobe Premiere Pro. |
Choosing Your Format Based on Your Goal
Once you grasp this distinction, your entire video workflow becomes clearer. Your choice of format should always follow your goal.
- Shooting: Capture as much data as possible. Using a format like MOV with a high-quality codec is a great start.
- Editing: Stick with those high-quality, less compressed files. This gives you more creative flexibility and prevents quality loss.
- Delivering: When you're ready to share, export to a compressed, universally loved format like MP4 for smooth, reliable playback anywhere.
This guide is designed to help you navigate these decisions, making sure your final video looks fantastic, loads fast, and plays perfectly for your audience, no matter where they're watching.
Understanding Video Containers and Codecs
Before you can pick the right video format, you have to get your head around two key building blocks of every video file: the container and the codec. People mix these terms up all the time, but they’re two totally different things working together. Once you get this relationship, making smart choices about your video files becomes second nature.
Think of it this way: the container is the box. It’s the file itself—the thing with the .mp4, .mov, or .avi at the end of its name. This box holds all the different pieces of your video: the picture, the sound, and even extras like subtitles or chapter markers.
The codec, on the other hand, is how you pack everything into that box. It’s a bit of software that compresses (and later decompresses) all that visual and audio data to make the file small enough to actually use. Common codecs you've probably seen are H.264, H.265 (HEVC), and the newer AV1. You can put the same compressed video into different containers, but it’s the container that ultimately decides if a device or app can even open the file.
The Tradeoff Between Quality and File Size
A codec's main job is compression, and this leads us to the biggest tug-of-war in video: quality versus file size. There are two main ways codecs go about this.
Lossless compression is exactly what it sounds like. It shrinks the file without throwing away a single bit of the original data. Think of it like a ZIP file. When you unzip it, everything comes back exactly as it was. This is perfect for archiving your original, high-quality footage, but the files are massive and totally impractical for sharing online.
Lossy compression is what makes the internet go 'round. This method cleverly throws away data your eyes are unlikely to miss, which slashes the file size. You can’t get that data back, but modern codecs are so good at this that the dip in quality is often impossible to spot, especially on a phone screen.
A professional videographer will shoot in a MOV container using a high-quality, lightly compressed codec to keep every last detail for the editing process. But for the final upload, they’ll export it as an MP4 with a super-efficient lossy codec like H.264. This ensures it loads fast and plays everywhere without a hitch.
Why MP4 Became the Standard
The digital graveyard is full of old video formats, but one container rose above them all to dominate the web. When MP4 (MPEG-4 Part 14) showed up in 2001, it was a game-changer. It delivered compression so efficient it could cut file sizes by 50-70% compared to the old MPEG-2 format. Suddenly, a 2-hour HD movie that took up an 8GB DVD could fit into less than 2GB.
Apple gave it a huge boost by making it the go-to format for QuickTime and iTunes. By 2010, with over 10 billion songs and videos streamed, MP4's place was cemented. For today's creators on YouTube, TikTok, and those using tools like Aicut, MP4's blend of quality, small file size, and near-universal (95%) compatibility is the perfect mix. It’s ideal for getting those faceless clips and UGC videos seen by the most people.
If you're a history buff, you can check out this video formats timeline to see how we got here.
Editing Efficiency vs. Playback Compatibility
The best format for your project really depends on what you're doing at that moment. A great editing format is often a terrible playback format, and vice versa.
For Editing: When you’re in the thick of editing, you need a format that your software can easily "scrub" through. This means it can jump to any frame instantly without your computer breaking a sweat. Formats like Apple ProRes, usually found in a MOV container, are built for this. The files are huge, but they put very little strain on your CPU, making for a smooth, frustration-free edit.
For Playback: Once you're ready to share, the priorities flip. Now it's all about small file sizes and making sure anyone, anywhere, can watch it. This is where MP4 comes back into the spotlight. Its compression is optimized for a straight-through viewing experience, which is exactly what your audience is going to do.
Getting this distinction is key. It allows you to pick the right tool for the job at every stage—from capturing flawless footage to delivering a polished video that looks amazing on any screen.
Matching Your Video Format to the Platform
Picking the right video format feels technical, but it's really about speaking the native language of each platform. If your settings are off, the platform's algorithm can bury your content before it ever gets a chance. It’s a harsh reality: a perfectly edited video can be dead on arrival simply because it doesn't fit the platform's preferred mold.
Think of it this way: every social app has its own culture. A sweeping, cinematic video that looks incredible on a YouTube channel will feel clunky and out of place on TikTok. To get seen, you have to adapt your content to its environment.
H3: Optimizing for YouTube
YouTube is built for the big screen—even if that screen is just a phone held sideways. It's the home of traditional, horizontal video, and for good reason. Your goal here is to deliver a crisp, clean image that holds up on everything from a small phone to a massive 4K TV.
For your standard, long-form YouTube videos, sticking to these settings is your best bet:
- Container: MP4. It's the universal choice and what YouTube officially recommends. Simple.
- Aspect Ratio: 16:9 (horizontal). This is the native format for YouTube's player and prevents those ugly black bars.
- Resolution: 1080p (1920x1080) is the gold standard for balancing quality with manageable file sizes. Pro tip: if you can, upload in 4K (3840x2160). YouTube's compression is more generous with 4K files, meaning your final 1080p version will look sharper than if you had uploaded 1080p to begin with.
- Frame Rate: 30 FPS is perfect for most videos. If you're creating content with a lot of fast motion, like gaming or sports, bump it up to 60 FPS for that buttery-smooth look.
Getting these settings right from the start means YouTube can process and display your video without a hitch, giving viewers the best possible experience.
Before we go further, it's helpful to understand the two parts of a video file: the container and the codec. The container is the box (like MP4), and the codec is what's inside, compressing the video (like H.264).
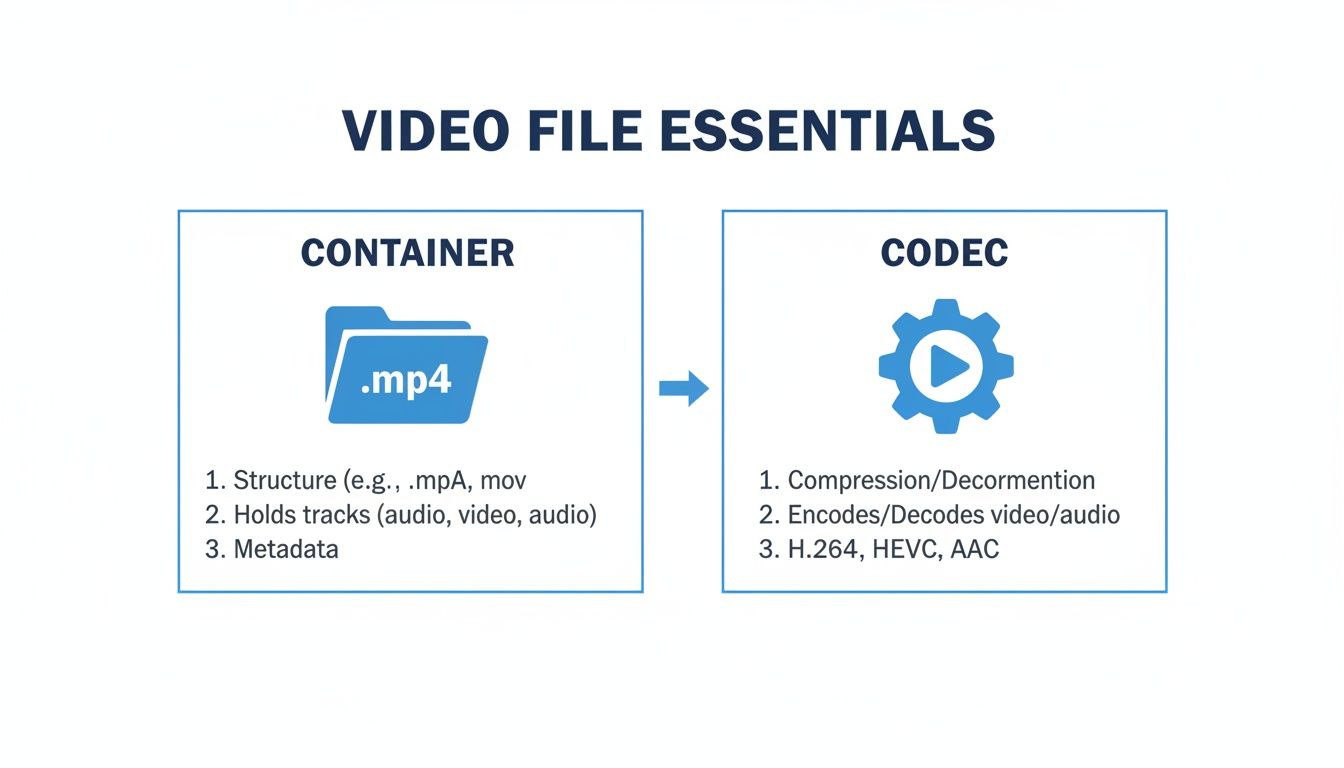
This matters because while the container is your first choice, the codec is what truly impacts your file's final size and visual quality.
H3: Winning on TikTok and Instagram
Forget everything you just learned about YouTube. On TikTok and Instagram Reels, the game is completely different. These platforms are designed for quick, vertical, on-the-go viewing. Here, vertical video isn't just a best practice—it's the only way to compete. You're fighting for attention in a rapid-fire feed, and only a video that fills the entire screen will stop the scroll.
The core principle is simple: match the native experience. On a phone, people hold their devices vertically. Forcing them to turn it sideways creates friction and encourages them to scroll to the next video.
To grab and hold attention on these platforms, these are your go-to specs:
- Container: MP4 is still your most reliable option.
- Aspect Ratio: 9:16 (vertical). This is non-negotiable. It's what ensures your video takes up the whole screen.
- Resolution: 1080x1920 is the standard for vertical HD.
- Frame Rate: 30 or 60 FPS, just like YouTube, depending on your content's motion.
This isn't just about following rules; it's about strategy. Data from 2026 shows that on TikTok and Instagram, vertical 9:16 videos in 1080x1920 are king. In fact, 60% of top-performing videos use this exact format, leading to a 15% decrease in bounce rates according to platform analytics.
This is where a tool like Aicut can give faceless creators a serious leg up. Its AI can upscale footage into photorealistic 1080p clips, helping you meet these specs without extra work. We've seen YouTube channels that optimize for HD this way reach the 1,000-subscriber mark 40% faster.
If you really want to master the Instagram game, we've put together a complete guide. Check out our deep dive on Instagram video formats and best practices to make sure every post is perfectly optimized.
Platform-Specific Video Format Recommendations for 2026
To make it even easier, here’s a quick reference table to help you get your settings right every time.
| Setting | YouTube (Long-Form) | TikTok & Instagram Reels (Short-Form) |
|---|---|---|
| Container | MP4 | MP4 |
| Aspect Ratio | 16:9 (Horizontal) | 9:16 (Vertical) |
| Resolution | 1080p or 4K | 1080p (1080x1920) |
| Frame Rate | 30 or 60 FPS | 30 or 60 FPS |
Think of this table as your pre-flight checklist before you export. Using these proven settings removes the guesswork and ensures your content has the best technical foundation to succeed on each platform.
How Resolution and Frame Rate Shape Your Video’s Vibe
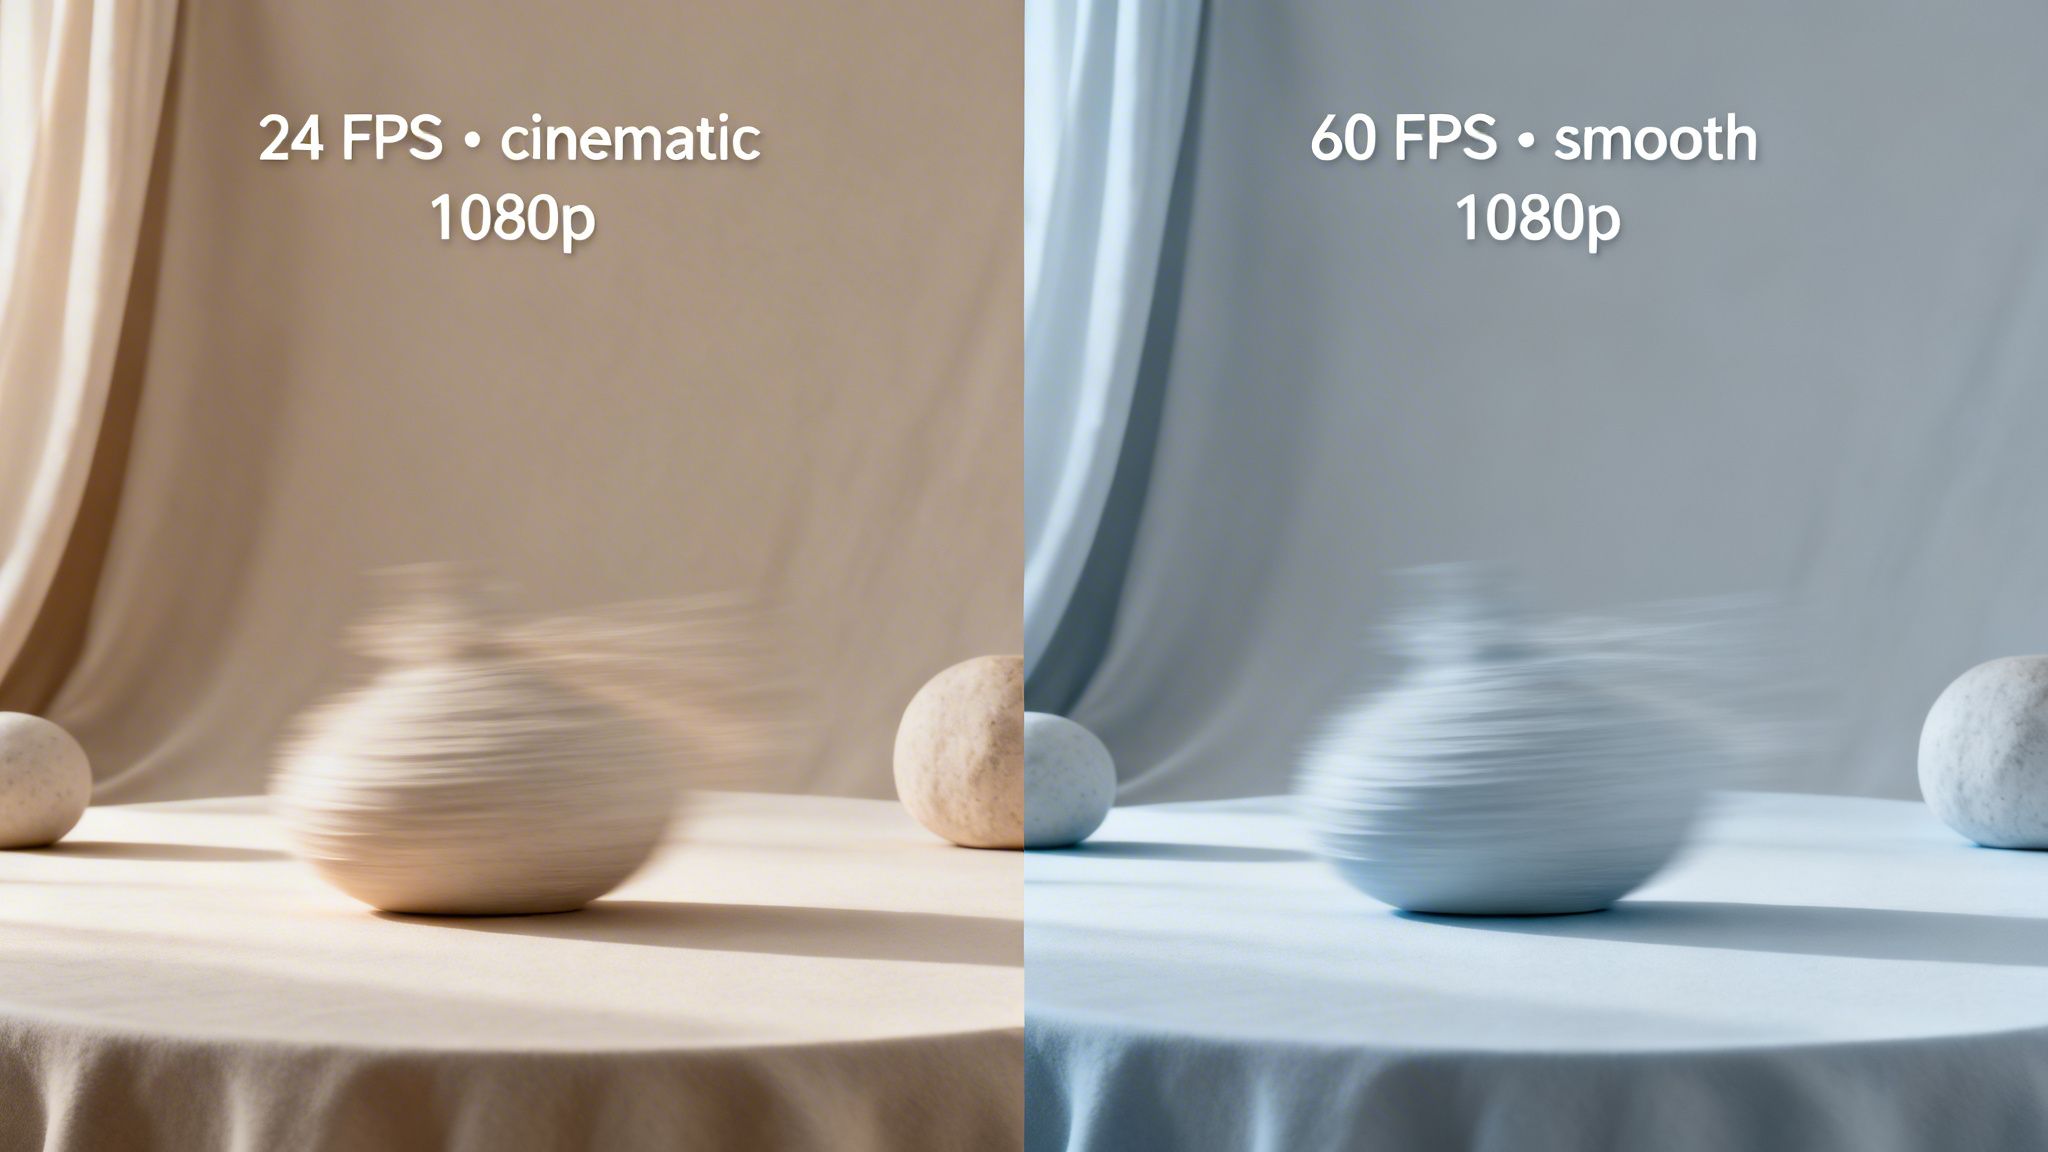
When you're dialing in your video settings, it's easy to get lost in the numbers. But two settings—resolution and frame rate—do more than anything else to define how your audience will actually feel when they watch your content. Get them right, and your video looks professional and polished. Get them wrong, and you risk creating something that feels off, and that’s a quick way to lose a viewer.
Think of resolution as the raw sharpness of your image. It’s simply a measure of how many pixels make up the picture. More pixels equal a cleaner, more detailed video. But before you crank everything to the max, you need to think about the real-world trade-offs.
For years, 1080p (1920x1080 pixels) has been the go-to standard for online video, and for good reason. It delivers fantastic quality that looks sharp on everything from a phone screen to a laptop, all without creating gigantic files that take forever to upload or leave viewers staring at a buffering wheel.
Choosing Your Resolution: 1080p vs. 4K
So, should you stick with 1080p or make the leap to 4K? The right answer depends on what you’re creating today and where you want your content to be tomorrow. Both have their place.
When to Stick with 1080p:
- Most Social Media: For platforms like TikTok and Instagram, 1080p is what they're built for. It’s the sweet spot for quality and smooth playback on mobile devices.
- Faster Workflows: This is a big one. Smaller files mean your computer won't grind to a halt when editing, rendering is quicker, and uploads are much faster. If you need to publish content consistently, this matters.
- Simple, Direct Content: If you're creating talking head videos, straightforward tutorials, or vlogs, 1080p is more than enough to look crisp and professional.
When to Shoot in 4K (3840x2160 pixels):
- Future-Proofing Your Work: Recording in 4K is an investment in your content's longevity. It guarantees your videos will still look incredible on the bigger, better screens that will be common in the years to come.
- Editing Freedom: A 4K frame is huge. This gives you the power to crop in, reframe your shot, or even create a digital zoom or pan in your edit without a noticeable drop in quality. It’s like having multiple camera angles from a single shot.
- When Details Matter: For cinematic work, sweeping landscape shots, or product videos where you need to show off every little detail, 4K offers a level of clarity that’s impossible to ignore.
Here's a little-known secret for YouTube creators: upload your videos in 4K even if most people will watch in 1080p. YouTube uses a better compression algorithm (the VP9 codec) on 4K files. This means the 1080p version that YouTube generates will look significantly sharper than if you had uploaded a 1080p file to begin with.
Finding the Right Frame Rate for the Feel
If resolution is about clarity, frame rate (FPS) is all about the smoothness of motion. It’s the number of still images flashed on the screen every second, and it completely changes the "feel" of your video.
A lower frame rate isn't bad—it's a creative choice. Let’s break down the common options and when to use them.
- 24 FPS: This is the magic number for Hollywood movies. That subtle motion blur you see in films gives videos a "cinematic" and story-driven vibe. Use it when you want your content to feel less like a recording and more like a film.
- 30 FPS: For a long time, this was the standard for TV. It looks clean and natural, making it a fantastic all-around choice for most online content like vlogs, tutorials, or corporate videos. To get a deeper dive, check out our guide explaining the nuances of different frames per second settings.
- 60 FPS: By capturing twice as many frames per second, this setting gives you incredibly smooth, almost hyper-realistic motion. It's the only choice for anything fast-paced—think sports, video game streams, or action shots where you need to see every moment clearly.
For social media, aiming for 30-60 FPS is a solid bet. The data backs this up: TikTok's top 1% of videos are often running at 60 FPS, which can increase viewer retention by up to 35% by making those popular selfie-style pans feel much smoother. Instagram has also seen that Reels clips over 50 FPS get 22% more shares. It just feels better to the viewer.
Getting Bitrate Right for Quality and Upload Speed
Resolution and frame rate are important, but bitrate is the one setting that secretly controls your video’s final quality and file size. It’s a simple concept: bitrate is the amount of data used for every second of your video.
Think of it this way. A higher bitrate packs more data into each second, giving you a sharp, clean image but a much bigger file. A lower bitrate uses less data, which is great for file size, but it can introduce those ugly compression artifacts like blurriness or pixelation, especially when there’s a lot of action on screen.
Getting this right can dramatically cut your upload times without your audience ever noticing a drop in quality. If you're a streamer, it's worth digging into optimizing your OBS settings to really dial this in at the source.
Variable vs. Constant Bitrate
When you go to export, you'll almost always see two choices: Constant Bitrate (CBR) and Variable Bitrate (VBR).
CBR is a bit of a blunt instrument. It forces the same amount of data on every single second of your video. This is incredibly inefficient. It wastes data on simple, static shots and often starves complex, fast-moving scenes of the data they desperately need.
VBR is the smarter, more modern approach for online content. It analyzes your video and adjusts the bitrate on the fly. It gives more data to the complex parts and pulls back on the simple ones. This creates a much smaller file while keeping the visual quality consistent.
For pretty much any creator uploading to the web, VBR is the way to go. It delivers better quality for a given file size, which is a win-win for both you and your viewers.
Recommended Bitrate Ranges
So, what numbers should you actually use? Your perfect bitrate is a balancing act between your resolution and frame rate. The table below gives you some solid starting points for standard SDR videos.
| Resolution | 30 FPS Bitrate (Mbps) | 60 FPS Bitrate (Mbps) |
|---|---|---|
| 1080p (Full HD) | 8–12 Mbps | 12–18 Mbps |
| 1440p (2K) | 16–24 Mbps | 24–36 Mbps |
| 2160p (4K) | 35–55 Mbps | 53–85 Mbps |
For a typical 1080p 30 FPS video for YouTube, exporting at 10 Mbps will look fantastic. You could crank it up to 20 Mbps, but you'd be doubling your file size and upload time for no visible gain.
Don't just take these numbers as gospel. Use them as a starting point. Export a 30-second clip of your own content at a few different bitrates and see for yourself. You might be shocked at how low you can set the bitrate while keeping your video looking crisp.
If you want a deeper dive into how YouTube re-compresses everything anyway, check out our guide on video compression for YouTube. It will give you a better understanding of what happens after you hit "upload."
A Creator’s Guide to Video Format Workflow
Knowing the best video format is one thing, but actually putting that knowledge into practice—without getting lost in a sea of technical settings—is a whole different challenge. If you’re a creator who needs to publish consistently, especially if you run a faceless channel or focus on UGC, you can't afford to waste time. The secret isn't to become a technical wizard; it's to stop guessing and start using templates.
This is all about creating a simple, repeatable system that gets your videos perfectly optimized for any platform. It takes the technical guesswork out of the equation so you can get back to the fun part: creating.
Your Simple Three-Step Workflow
Instead of wrestling with dozens of settings every single time you finish a video, you can build a much smarter system. This workflow makes sure you’re always using the best format for your platform without having to memorize a single bitrate value or codec name.
Here's how it works:
Pick a Platform-Specific Template: When you start a new project, choose a template designed for where your video will live. Making an Instagram Reel or a YouTube Short? Grab that 9:16 vertical template. This instantly sets the right resolution and aspect ratio from the get-go.
Get Creative: Now that the technical foundation is laid, you can forget about it completely. Go ahead and edit your clips, add your text, and apply your effects. Your only job here is to tell a great story.
Choose an Export Preset: Once your masterpiece is ready, resist the urge to dive into the advanced settings. Just find and click a preset that matches your goal, like "YouTube 1080p" or "TikTok."
Think of this preset-driven method as your shortcut to technical perfection. It’s a one-click way to apply the ideal MP4 container, H.264 codec, resolution, frame rate, and bitrate for that platform, guaranteeing your video looks great and works perfectly.
Making Exports Easy with Presets
Modern editing tools, like Aicut, are built around this exact idea. They take the complicated decisions off your plate by giving you clear, goal-oriented options for exporting. You don't have to translate technical jargon; you just have to choose your destination.
For example, here's what you might see when you go to export in an editor like Aicut.
The screenshot shows how presets for YouTube, TikTok, and Instagram are laid out so you can't miss them. Each one is a bundle of pre-configured settings. When you click one, you're automatically choosing the best video format for that specific platform, making sure your content looks professional and plays back smoothly.
This simple change turns video production from a chore into a straightforward, creative process, helping you get high-quality content out the door that much faster.
Answering Your Top Questions About Video Formats
Let's cut through the noise. When you're dealing with video formats, a few key questions come up again and again. Getting these right is the difference between a smooth workflow and a major headache, so let's tackle them head-on.
What's the Real Difference Between MP4 and MOV?
It's a question I get all the time, and it really boils down to this: are you sharing your video, or are you still editing it? Both MP4 and MOV are just containers for your video data, but they're built for very different parts of the creative process.
Think of MP4 as the universal shipping container. It’s designed to be compatible with practically everything—phones, web browsers, social media platforms—you name it. Its smart compression keeps file sizes down, making it perfect for uploading to YouTube or sending to a client. It just works.
MOV, on the other hand, is Apple's baby, and it’s a powerhouse for production. It’s built to hold onto higher-quality video with less compression, which is exactly what you want when you’re editing. It supports professional-grade codecs like Apple ProRes, preserving all that crucial image data. The trade-off? The files are often massive.
Here's a simple rule of thumb I tell creators: Edit in MOV to protect your quality, then export to MP4 to share it with the world.
Should I Bother Uploading in 4K to YouTube?
Uploading in 4K is a great way to future-proof your content, but let's be realistic—it's not a must-have for every creator. If you upload in 4K, your video will look incredible on big screens for years. Plus, there's a little-known perk: YouTube gives 4K uploads its better VP9 codec, which means even the 1080p version of your video will look cleaner and sharper than a standard 1080p upload.
But there’s a big catch. 4K files are huge. They eat up storage space and can take forever to upload, which can throw a real wrench in your posting schedule. For most people, especially if you're trying to post consistently, a high-quality 1080p upload is more than enough. It looks sharp on most screens and keeps your workflow from grinding to a halt.
How Much Does Video Format Actually Affect Going Viral?
While killer content will always be king, your technical choices are the supporting actors that can make or break a video's performance. The most obvious factor is the aspect ratio. If you're posting to TikTok, a 9:16 vertical video isn't just a suggestion; it's essential. The algorithm favors content that fills the screen and feels native to the platform.
Beyond that, performance is a huge deal. A video that loads instantly and plays smoothly keeps people watching. Platforms like YouTube and Instagram track viewer retention closely. A technically sound video that doesn’t buffer keeps eyes on the screen longer, which sends a powerful signal to the algorithm that your content is worth pushing to more people.
Ready to stop guessing and start creating perfectly optimized videos every time? Aicut uses viral templates and AI-powered export presets to automatically handle the technical details for you. Transform your ideas into stunning, platform-ready content in minutes at https://www.aicut.pro.