
The first time I tried a DIY bullet time effect, the footage looked less like The Matrix and more like a broken slideshow. The lesson was immediate. This effect is unforgiving, and the method you choose matters more than most creators think.
What Is the Bullet Time Effect
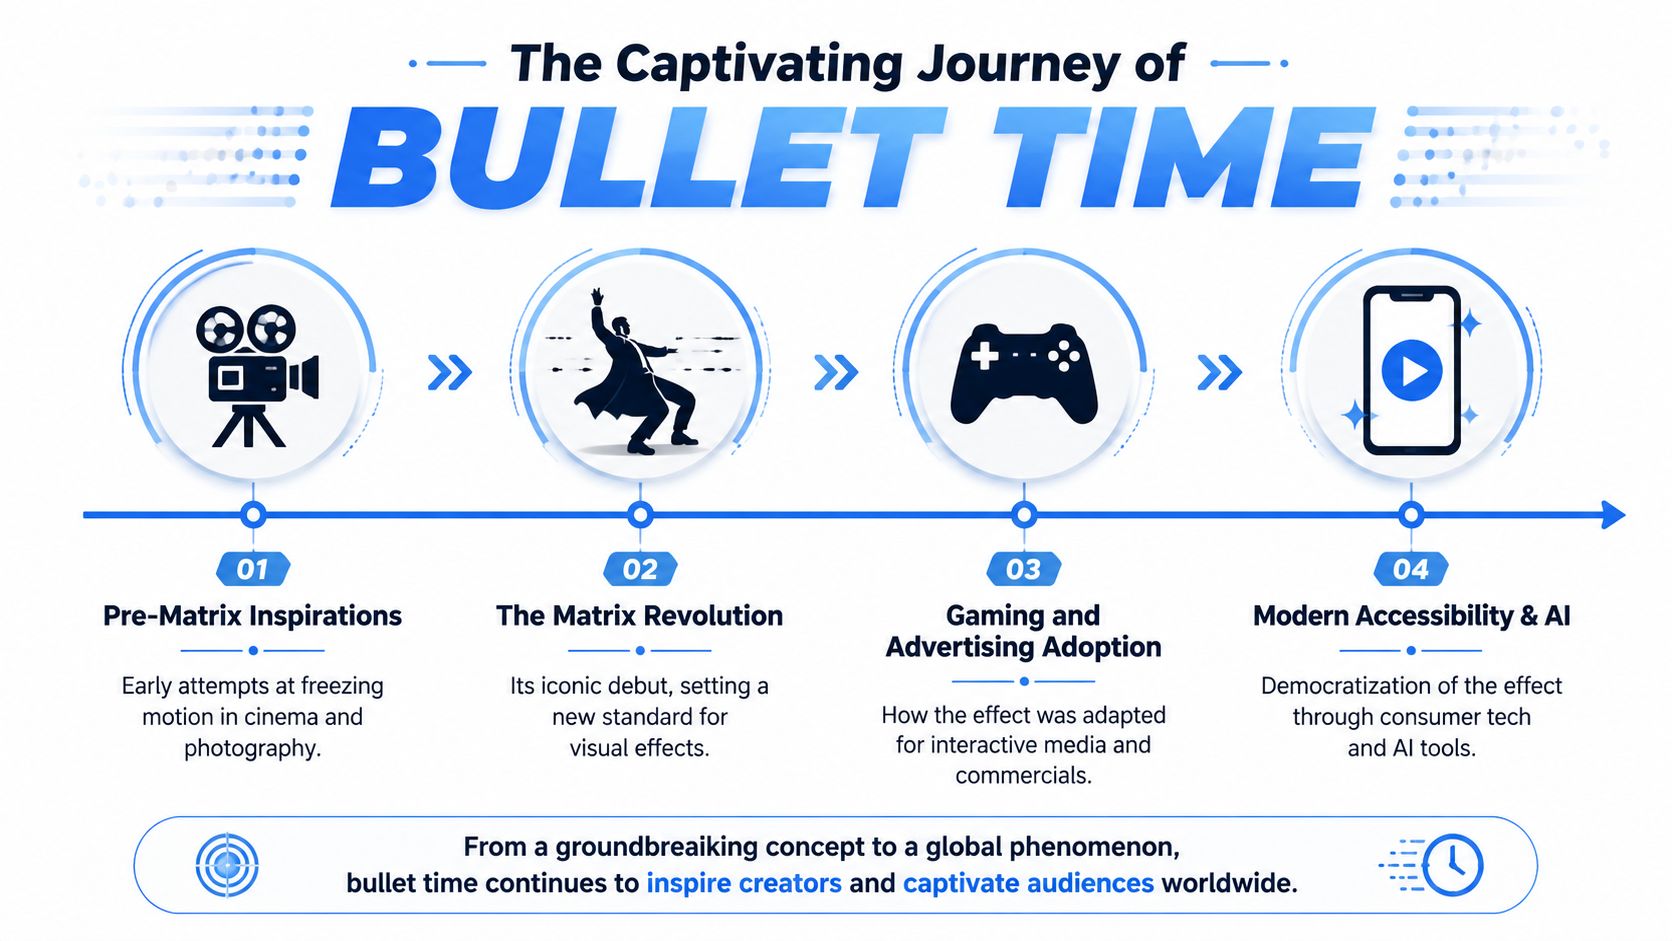
The bullet time effect became part of film language the moment The Matrix showed Neo bending backward as the camera seemed to fly around a near-frozen moment. What made that shot feel impossible wasn't slow motion alone. It was the illusion of a moving camera inside suspended time.
That original setup was brutally hardware-heavy. The Matrix used over 100 still cameras arranged in a circle to create the effect, allowing the virtual camera to move at normal speed while the action slowed to an almost imperceptible rate, which conventional slow motion couldn't do, as described in Cined's breakdown of bullet time and volumetric capture.
Why it feels different from slow motion
Regular slow motion stretches time along a single camera angle. Bullet time changes viewpoint while time appears frozen. That's the whole trick.
A cleaner way to think about it is this:
- Slow motion keeps the camera perspective mostly fixed and slows the action.
- Bullet time changes the camera position around the subject during a frozen or near-frozen instant.
- Hybrid versions mix a freeze, a time ramp, and a stitched camera move to fake the same sensation.
If you understand camera movement already, bullet time sits somewhere between a time-slice and a highly controlled orbit shot. If you need a refresher on movement language, this guide to types of camera movements helps place it in context.
Bullet time works because your brain accepts the impossible for a second. The body looks paused, but the camera keeps traveling.
How it moved from Hollywood trick to creator tool
The idea behind the effect is older than commonly understood. The underlying multi-camera approach has roots in much earlier motion studies, but The Matrix turned it into a cultural reference point. Soon after, similar ideas showed up in games, ads, and music videos.
That shift matters because the effect is no longer tied to a warehouse, a VFX team, and a custom camera array. Today, creators can chase the same visual feeling with a phone, a 360 camera, or software that simulates the move.
The catch is that access doesn't mean parity. Modern tools make the bullet time effect easier to attempt, but not every method produces the same result. Some look cinematic. Some look social-native. Some only hold up for a few seconds on a vertical feed.
The DIY Approach with Camera Rigs and Phone Hacks
If you want the most authentic version of the bullet time effect without a studio budget, DIY is still a valid route. It's also the route that punishes sloppy prep the hardest.
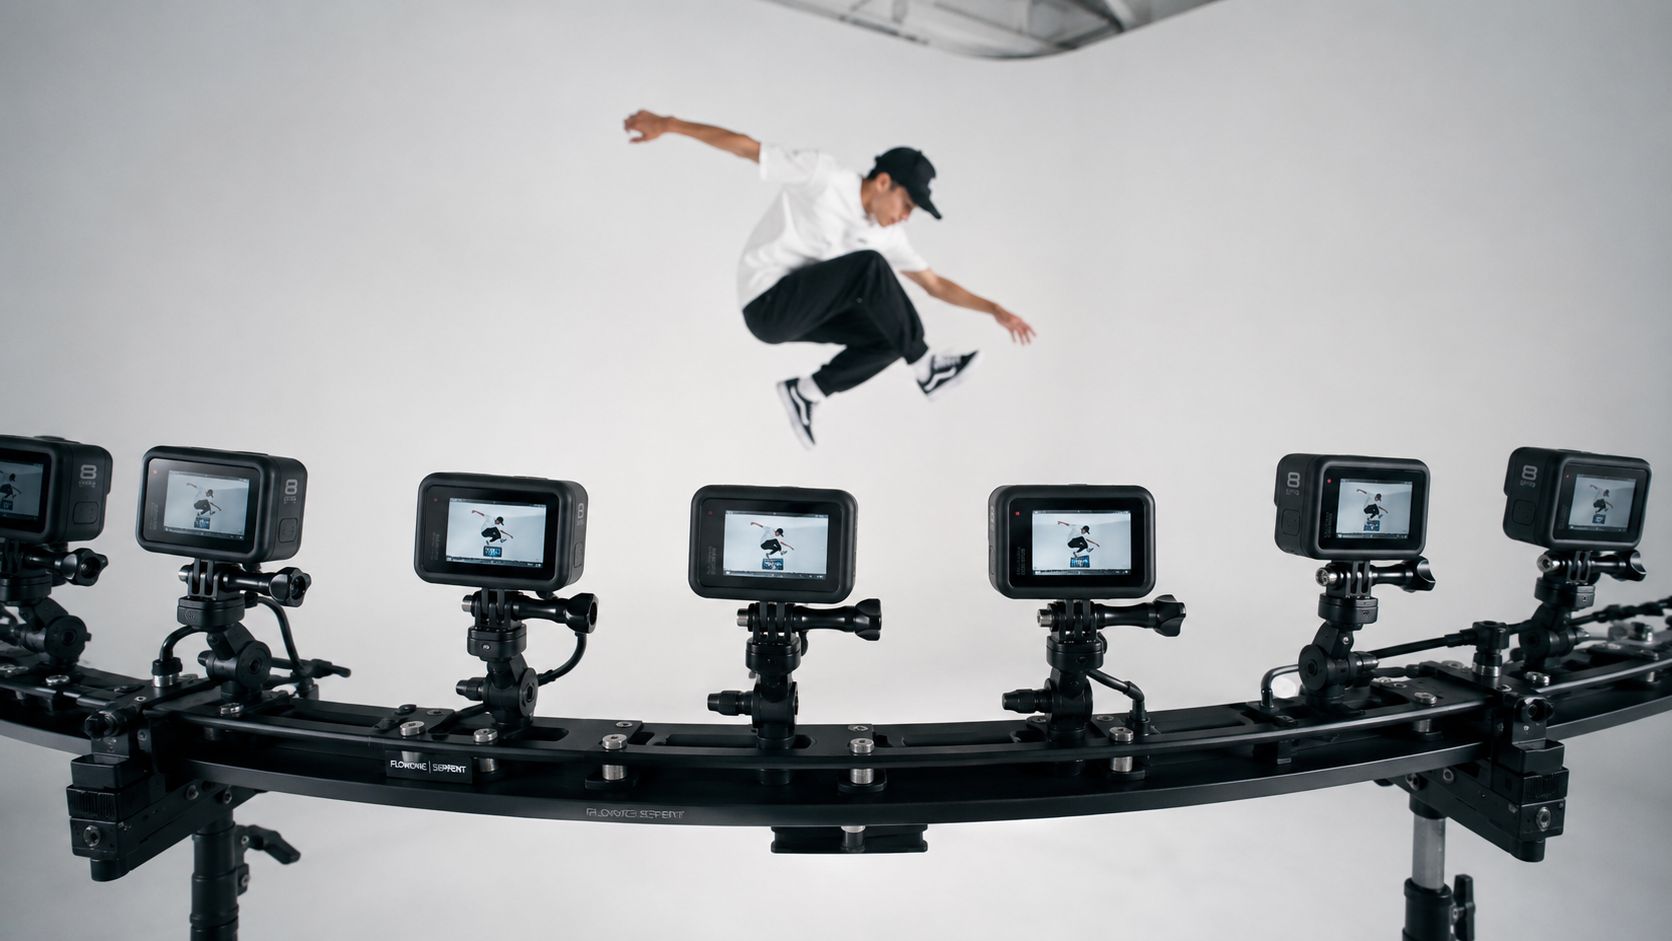
The core principle is simple. Multiple viewpoints need to describe a smooth arc around the subject. In a multi-camera array, camera spacing determines how smooth that virtual move can be, and irregular gaps force heavier interpolation and compositing in post, as noted earlier in the Cined reference.
Method one uses many cameras and lots of patience
A proper DIY rig works best when you treat it like a controlled product shoot, not a casual weekend experiment. Old phones, action cameras, or mixed bodies can work, but consistency matters more than people expect.
What usually works:
- Keep lenses similar: If one camera is much wider or more distorted than the others, stitching gets ugly fast.
- Lock your framing: Once the arc is built, changing the path is difficult. Test with stand-ins before talent steps in.
- Choose one hero moment: A jump, kick, hair flip, bottle splash, or fabric movement reads better than vague motion.
- Use a fixed background when possible: Busy backgrounds make misalignment more obvious.
For creators trying to build a repeatable setup, the mindset is close to motion control photography. You aren't just capturing action. You're pre-designing the path the viewer will feel later in the edit.
What breaks first
Most failed DIY bullet time rigs die before post-production even starts. Cameras don't line up. The subject shifts too much between viewpoints. Exposure changes from device to device. Someone bumps the rig.
The effect also gets worse when creators chase too much movement. A modest arc with clean alignment usually beats an ambitious half-circle that's full of jumps.
Practical rule: A shorter, cleaner move almost always looks more expensive than a longer move with visible gaps.
A good way to plan the shot is to decide what matters most:
| Goal | Best DIY choice | Main downside |
|---|---|---|
| Cleanest cinematic look | Multi-camera arc | Highest setup time |
| Cheapest experiment | Old phones on a simple rig | Harder to match image quality |
| Fast social clip | Single-phone fake orbit | Least convincing freeze |
Method two fakes it with one phone
This is the scrappy version. It doesn't create true bullet time, but it can mimic the feeling well enough for TikTok, Reels, or stylized transitions.
The basic idea is to move one phone in a fast, controlled arc around a subject while the subject holds a pose or performs a highly repeatable move. Then you add speed ramps, freeze frames, masking, or motion blur in editing.
What helps:
- Pick a strong pose. Mid-kick, hand extension, hair whip, or a jump at peak height.
- Move around the subject, not away from them. Distance changes ruin the fake.
- Keep your horizon steady. Tilt drift screams “phone footage.”
- Use short takes. Long fake bullet time attempts usually fall apart.
Later, you can compare your results against a more advanced example in this walkthrough:
This single-phone approach is cheap and fast. It also has a ceiling. If the shot needs to survive close inspection in a commercial, it usually won't. If the goal is a punchy social post with attitude, it can work surprisingly well.
The 360 Camera Method for Smooth Swinging Shots
A 360 camera is the middle ground most creators should consider first. It asks for less setup than a rig and gives cleaner movement than a phone hack.
The reason is straightforward. You're capturing a sphere of image data, then choosing the angle later. That gives you room to create an orbit-like move without managing a forest of cameras.
Why this method feels smoother
Modern 360 camera software does a lot of cleanup automatically. Insta360's software can erase the selfie stick and digitally level the horizon between clips, which cuts down on manual post work, according to Insta360's guide to bullet time shooting.
That convenience changes the whole production equation. Instead of obsessing over stitching dozens of viewpoints, you're focusing on movement discipline and shot timing.
The most common mistake is treating the swing like chaos. It isn't. The move needs rhythm.
- Keep the camera parallel to the ground. A drifting axis looks messy.
- Commit to one clean rotation speed. Uneven speed makes the shot feel accidental.
- Give the subject room. Tight spaces make the orbit feel cramped and risky.
- Use the environment. Open plazas, rooftops, beaches, and skate spots read better than cluttered interiors.
Where 360 shines and where it doesn't
This method is great for action, travel, fitness, and lifestyle content. If you're filming yourself, the setup is especially efficient because one person can capture a polished result without a crew.
It isn't the best choice when you need the fully frozen, multi-angle time-slice look associated with big-budget cinema. A 360 swing shot produces a related sensation, not the exact same artifact. That's fine for most social work. It matters for branded work where clients expect the classic look.
Good 360 bullet time lives or dies on control. The software helps, but it can't rescue a wild, uneven swing.
A practical way to choose this route is to ask one question. Do you need the audience to admire the effect, or just feel the movement? If feeling is enough, a 360 camera is often the sweet spot.
The AI Shortcut with Aicut Templates
For short-form content, the fastest path isn't a rig or a 360 camera. It's simulation.
That's not a compromise by default. It's a different production logic. If the clip only needs to look convincing on a feed, not hold up as a forensic VFX breakdown, AI can be the most efficient way to get the bullet time effect.
Why AI changes the decision
One of the biggest practical problems with bullet time is that creators still don't have a clear minimum threshold for a convincing manual setup. AI-assisted workflows bypass that uncertainty by simulating the effect from standard footage instead of depending on specialized rigs or disciplined physical motion, as discussed in Adobe's look at real-time bullet time experiments.
That matters more than enthusiasts like to admit. Most creators don't need engineering purity. They need speed, repeatability, and a result that looks strong in vertical format.
If your priorities are:
- fast turnaround,
- minimal gear,
- low editing friction,
- and quick iteration for trend-based content,
then AI is hard to beat.
What you gain and what you give up
AI wins on convenience. You can start from regular footage, apply a style, and avoid the classic pain points: rig building, synchronization, alignment, stitching, and cleanup.
It also makes style matching easier. If you're producing a stream of short clips and want a consistent visual rhythm, templates keep the look coherent in a way ad hoc DIY methods often don't.
For creators exploring ready-made automation, these AI video templates show why template-driven workflows appeal to TikTok, Shorts, and Reels production.
The trade-off is authenticity. AI-generated bullet time can feel polished, but sometimes too polished. If the camera path feels generic or the freeze lacks physical credibility, viewers may register it as a template instead of a shot.
A simple comparison helps:
| Need | AI workflow | Manual workflow |
|---|---|---|
| Publish quickly | Strong fit | Weak fit |
| Learn craft deeply | Weak fit | Strong fit |
| Repeat the style often | Strong fit | Slower |
| Impress technical viewers | Depends on execution | Usually stronger |
If the platform rewards speed and novelty, AI is often the smart choice. If the project rewards craft and physical realism, manual capture still has an edge.
For commercial social, AI is often enough. For a hero shot in a campaign film, you'd usually want more control than templates alone can offer.
Post-Production Workflow for Manual Setups
Manual bullet time doesn't end on set. Most of the work starts after the files land on your drive.
The biggest trap is assuming the edit will fix sloppy capture. It won't. In manual rigs, the highest-risk failure is frame misalignment. If images aren't aligned precisely on their X and Y axes, the result is a visible glitch or jump instead of a smooth time-slice, as explained in New World Designs' bullet time workflow notes.
The edit sequence that usually works
Whether you're in After Effects or DaVinci Resolve, the workflow is less glamorous than the final shot suggests. It is repetitive and detail-heavy.
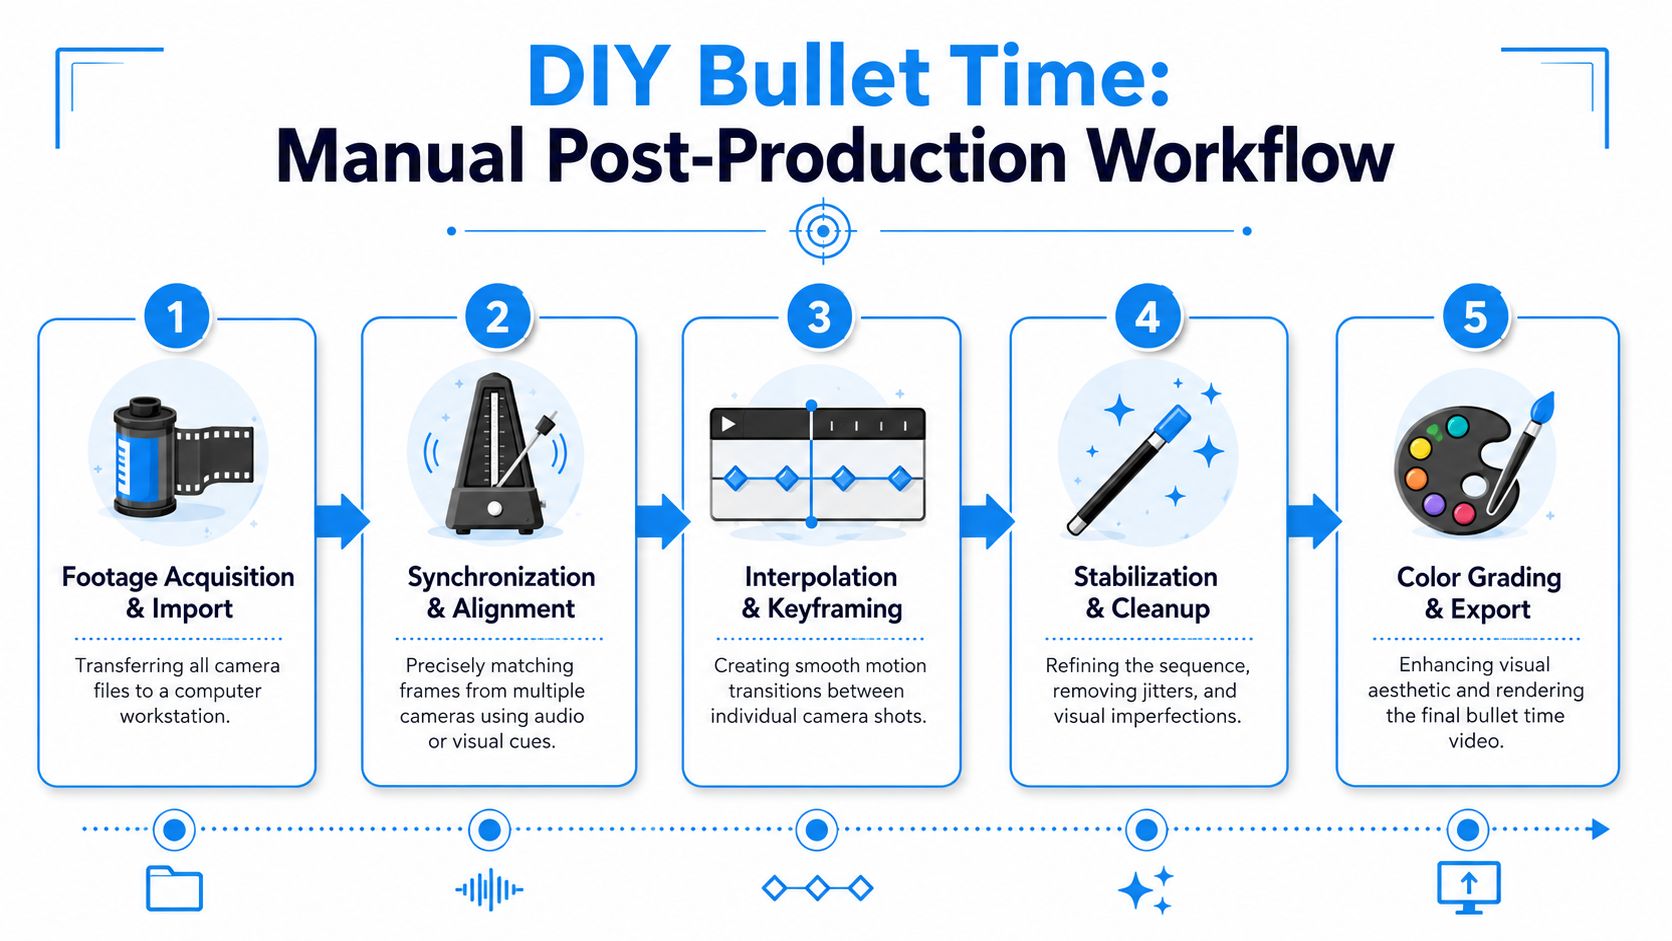
A solid order looks like this:
Ingest everything cleanly
Rename files by camera position. If your folders are chaotic, the edit gets chaotic.Pick the exact action frame
Find the key instant from each camera. This is the frozen moment your move will orbit around.Align backgrounds first
Ignore the subject for a second. If the set or horizon doesn't match, the viewer will see the jump immediately.Build the camera travel
Sequence the frames in the order of the physical array. Add interpolation only where necessary.Hide the seams
Use masking, blending, retiming, and slight stabilization to smooth transitions.
Where editors waste time
Too many creators start with effects before basic alignment. That's backwards. A flashy grade won't hide a bad stitch.
The second time sink is overcorrecting. If one camera sits off-axis, don't spend hours pretending software will make it perfect. Sometimes the better choice is shortening the move and using fewer positions.
Editing note: The cleanest bullet time effect often comes from restraint. Remove weak frames instead of trying to rescue every camera angle.
How to make it feel finished
Once the motion is stable, small choices separate “DIY” from “deliberate.”
- Use a subtle time ramp into and out of the frozen section.
- Match exposure and color before doing stylized grading.
- Add sound design that supports suspension, then release.
- Sharpen carefully. Over-sharpening emphasizes edge mismatches.
- Check on a phone screen. Many glitches show up faster there than on a large monitor.
A polished result often comes from reducing ambition. A short, smooth move with good sound and clean color feels premium. A long, unstable orbit feels unfinished no matter how dramatic the action is.
Export Settings and Creative Variations
Export is where many strong edits get softened, cropped badly, or compressed into mush. Bullet time is especially sensitive because the effect depends on crisp edges and smooth motion cues.
Export settings that travel well
If the clip is for TikTok, Instagram Reels, or YouTube Shorts, keep the delivery simple and platform-friendly.
Use this as a starting point:
Vertical social posts
Export in a vertical frame, use a common social codec, and keep the frame rate consistent with your timeline. If the source move feels smooth, don't force a new frame rate on export.High-motion clips
Give the export enough bitrate headroom to preserve detail around the subject and background edges. Compression artifacts can make the fake camera move feel choppy.Short looping posts
Trim aggressively. Bullet time works best as a peak moment, not a long sequence.YouTube versions
If you're posting a wider cut, make sure the reframed move still centers the subject. Some bullet time shots look great vertically and weak horizontally.
The practical rule is simple. Export for the platform you're publishing to, not the one you might publish to later.
Creative uses beyond the classic dodge shot
The bullet time effect gets stale when everyone copies the same action beat. It becomes more useful when it supports a clear visual idea.
A few situations where it works well:
| Use case | Why it works |
|---|---|
| Skate trick at peak height | The freeze emphasizes body shape and board position |
| Dance hit or spin | The orbit adds energy to a strong pose |
| Product reveal | A suspended object or splash creates a premium feel |
| Fitness content | It highlights form during a jump, kick, or strike |
| Fashion clip | Fabric movement and pose changes read beautifully |
Another smart variation is the near-bullet-time approach. Instead of freezing completely, let the subject keep micro-movement. Hair, fabric, dust, and water all make the shot feel richer.
The best bullet time effect isn't the one that looks hardest to make. It's the one that fits the moment and gives the viewer a reason to stay.
If you're making social content, shorter is usually better. If you're making branded work, spend more effort on composition than on gimmicks. Viewers remember the image first. The trick only helps if the image already has something worth circling around.
If you want the fastest route to a bullet time-style video for short-form content, Aicut is built for that kind of workflow. You can generate scroll-stopping clips with AI templates, skip the rigging and stitching, and move from idea to publish-ready video much faster than a manual setup allows.