Welcome to the new frontier of video production, where your words aren't just the script—they're the camera, the actors, and the director, all rolled into one.
The idea is simple yet powerful: you generate AI video from text by typing a description of a scene. Something like, "a golden retriever chasing a red ball in a sunny park," and an AI model brings that exact clip to life in seconds. This isn't just a gimmick; it’s a genuine shift in how we create.
A New Way to Create Video Content
This technology smashes through the traditional barriers of video production. Forget the need for cameras, crews, or complicated editing software. Your main tool is now your imagination, expressed through language. You feed the AI a text prompt, and it translates your words into a visual story.
To get a handle on this change, it helps to start by understanding what AI-generated content entails. Text-to-video is just one piece of a much larger puzzle that includes AI-written articles, images, and audio. Seeing the bigger picture really clarifies how far things have come.
The Real-World Impact on Creators
If you're a marketer, educator, or creator, the benefits are immediate and massive. What used to take days of planning and shooting can now be done in minutes. This speed opens up incredible possibilities for scaling your content without needing a bigger team or a fatter wallet.
Think about these advantages for a second:
- Massive Time Savings: You could genuinely knock out a week's worth of social media videos in a single afternoon.
- Slashed Production Costs: Kiss goodbye to expenses for locations, equipment rentals, and on-screen talent.
- Unlimited Creative Freedom: Test dozens of concepts and visual styles with zero financial risk. Want a photorealistic product shot? Done. A quirky animation? Easy.
- Accessibility for All: Anyone with a good idea can now produce high-quality video, leveling the playing field in a medium once dominated by big budgets.
Key Features of Modern AI Video Generators
To get the most out of these tools, you need to know what to look for. Not all platforms are created equal, and the right features can make or break your final video.
| Feature Type | What to Look For | Why It Matters for Your Videos |
|---|---|---|
| Model Quality & Realism | High-fidelity outputs, photorealistic options, consistency across clips. | This directly impacts how professional and believable your video looks. Poor quality screams "AI" in a bad way. |
| Prompt Understanding | Accurately interprets complex and nuanced text descriptions. | The better the AI understands you, the less time you'll spend re-writing prompts to get the shot you envisioned. |
| Customization & Controls | Camera angles (POV, selfie), motion controls, aspect ratios (16:9, 9:16). | These controls give you director-level power to create dynamic, engaging videos tailored for specific platforms. |
| Template Library | Pre-built templates for specific use cases like social media ads or tutorials. | Templates are a huge time-saver, giving you a solid starting point that you can customize to fit your brand. |
| Editing & Post-Production | In-app tools for trimming, adding text/music, upscaling, and transitions. | A good built-in editor means you can do everything in one place, avoiding the hassle of exporting and using separate software. |
Choosing a platform with a strong mix of these features will set you up for success right from the start.
The momentum here is undeniable. The global AI video generator market is on a rocket ship trajectory, with some forecasts suggesting it could hit nearly $14.8 billion by 2030. This kind of growth shows that creators are catching on fast.
Key Takeaway: Generating AI video from text isn't about replacing human creativity; it's about giving it a massive boost. This guide is here to show you exactly how to master this new tool and turn your ideas into compelling videos, faster than ever before.
Choosing the Right AI Video Generator
Finding the right tool to turn your text into video can feel like a huge task. The market is flooded with options, and every single one claims to be the best. But here’s the secret: instead of getting lost in endless feature lists, the smart move is to match the tool to your specific goal.
Think about what you're actually trying to make. Are you aiming for a cinematic, photorealistic ad for a high-end brand? Or do you just need a quick, punchy UGC-style video for a TikTok campaign? These are two completely different beasts, and they require tools with completely different strengths.
For instance, a platform like Runway is a powerhouse for creating artistic, high-fidelity clips that would feel right at home in a brand film. On the flip side, a tool like InVideo is built for speed, helping you churn out videos from prompts for social media, ads, or quick explainers. Then you have options like Pika, which has become a favorite for its knack for keeping characters consistent and bringing still photos to life.
What Really Matters When You're Choosing a Tool
To cut through the marketing noise, I always tell people to evaluate platforms on three simple things: output quality, style variety, and how easy it is to use. Yes, cost is a factor, but you’ll find that price usually tracks with these three areas. The more you pay, the more control and realism you generally get.
Here’s a quick mental checklist:
- Output Quality: Don't just take their word for it—look at the examples in their gallery. Does the quality hold up? Watch out for classic AI weirdness like mangled hands, wobbly backgrounds, or lighting that just feels off.
- Style Variety: A good tool should be a chameleon. Can it do photorealistic, animated, 3D, and cinematic? You want a platform that gives you options, not one that locks you into a single aesthetic.
- Ease of Use: Is the interface intuitive? You should be able to find the prompt box, tweak camera settings, and pick an aspect ratio without needing to watch a 20-minute tutorial.
My Favorite Trick: Sign up for the free trials. Nearly every platform offers one. Take the exact same simple prompt and run it on two or three different tools. It’s the fastest way to see which generator’s "vibe" and workflow just clicks with you.
Getting Comfortable With the Interface
The good news is that most AI video generators are laid out in a pretty similar way. Once you know your way around one, you can usually jump into another without feeling totally lost. Getting a handle on these basic components will make you feel like a pro before you even type a word.
Here’s what a typical interface looks like. You’ll be spending most of your time in these key areas.
See that big prompt bar in the middle? That’s your command center. You’ll also spot toggles for styles, aspect ratios (16:9 for YouTube, 9:16 for TikTok), and other settings to fine-tune your clip.
Knowing where these controls are lets you work fast and focus on the creative side of things instead of hunting for buttons. For a much deeper comparison, check out our guide to the best text-to-video AI apps, where we really get into the weeds on the pros and cons of each one.
Comparing Popular Text-to-Video AI Platforms
To help you visualize the options, I’ve put together a quick comparison of some of the top contenders. This table should give you a starting point for deciding which tool might be the best fit for your budget, skill level, and creative ambitions.
| Platform | Best For | Key Strengths | Pricing Model |
|---|---|---|---|
| Runway | Creative professionals and artists | High-fidelity output, advanced camera controls, multi-modal editing | Subscription with credits |
| Pika | Character-driven stories and animating images | Strong character consistency, lip-sync, image-to-video | Freemium with paid tiers |
| InVideo AI | Social media managers and marketers | Speed, templates, AI script-to-video workflow, voice cloning | Subscription-based |
| HeyGen | Corporate and educational content | Realistic AI avatars, multi-language support, custom avatars | Subscription-based |
Ultimately, the "best" platform is the one that gets the job done for you. Use this as a guide, but always test the tools yourself to find the one you enjoy using the most.
Let's Look at a Few Scenarios
To bring this all together, let's walk through a few real-world examples. This helps show how your end goal should dictate your choice of tool.
Scenario 1: E-commerce Product Ad
You need a 15-second, high-energy UGC-style video for an Instagram ad showing off a new skincare product.
- Your Priority: An authentic, not-too-polished look, a fast turnaround, and maybe some templates to get you started.
- What to Look For: A generator with solid AI avatar or actor features, pre-built ad templates, and a simple editor for adding text and music. A tool like InVideo or HeyGen would be a great starting point.
Scenario 2: Animated Explainer Video
You're creating a short, animated video for a YouTube channel that breaks down historical events.
- Your Priority: Getting a specific animated look (like cel animation or 3D) and making sure your main character looks the same from one scene to the next.
- What to Look For: A tool known for its range of animation models and features that lock in character consistency. Pika is often a strong contender here.
Scenario 3: Cinematic B-Roll
You're editing a travel vlog and need some stunning, atmospheric drone shots of a coastline for the intro.
- Your Priority: Maximum photorealism and precise control over camera movements (like a "drone shot" or "dolly zoom").
- What to Look For: A top-tier generator like Sora (when available) or Kling. These models are built to produce breathtaking, realistic visuals and understand detailed camera direction in your prompts.
When you start with the end in mind, you can cut through the noise and pick a platform that’s truly right for the job. This approach not only saves a ton of time but also ensures you're set up for the best possible results.
How to Write Prompts That Generate Great Video
Okay, you've picked a tool. Now for the fun part—and the part where most people get tripped up. Moving from an idea in your head to a finished video clip all comes down to the prompt.
Simply telling an AI to create "a video of a dog" will technically work. You’ll get a video of a dog. But it probably won’t be the one you're picturing. The real secret to getting stunning results is learning to think like a director and talk like a programmer. A good prompt is the bridge between your imagination and the AI's output.
Think of it this way: you're giving instructions to an incredibly talented artist who takes everything you say literally. You need to be specific, descriptive, and leave no room for guessing. This is what separates a weird, generic clip from something that looks like it was professionally shot.
The Anatomy of a Perfect Video Prompt
After generating thousands of videos, I've noticed a pattern. The best prompts almost always cover five key ingredients. When you break your idea down into these parts, you build a set of instructions that the AI can't misinterpret.
I call it the S.A.S.S.C. framework:
- Subject: Who or what is the star of your scene? Don't just say "a woman." Get specific. Try "a young woman with curly red hair and freckles."
- Action: What is the subject doing? Verbs are your best friend here. "Walking" is fine, but "strolling leisurely" or "sprinting urgently" paints a much more vivid picture for the AI.
- Setting: Where is all this happening? Details matter. "A forest" is a good start. "A misty redwood forest at sunrise, with golden light filtering through the canopy" is way better.
- Style: What's the vibe? This tells the AI what kind of 'lens' to use. You could go for "cinematic, photorealistic, 8K, vivid colors," or maybe "lo-fi, vintage 90s camcorder footage, grainy."
- Camera: How should the scene be filmed? This is your chance to play director. Specify shots like "extreme close-up," "wide-angle drone shot," or "first-person point of view (POV)."
Putting it all together, you get a simple but powerful formula: [Subject] + [Action] + [Setting] + [Style] + [Camera].
Learning how to write a good prompt is a lot like developing a character. This is especially true when you’re trying to build a consistent look and feel. In fact, you can learn a lot from guides that explain how to make influencer AI, because the process of using descriptive text to build a believable digital persona is exactly what you’re doing when you describe a scene for a video.
From Theory to Practice: Real-World Examples
Let's put this framework into action. You'll quickly see how a little detail goes a long way.
Scenario 1: A UGC-Style Skincare Ad
You're trying to create a quick, authentic-looking clip for a TikTok ad for a new face serum.
- Vague Prompt: "A woman using skincare."
- S.A.S.S.C. Prompt: "A 25-year-old woman with clear skin, smiling, applying a glowing serum to her face in a brightly lit, modern bathroom. UGC style, selfie shot from a smartphone, soft natural lighting."
See the difference? The second prompt nails the subject's age, the action, the setting, the trendy "UGC" style, and the exact camera shot. This is how you generate AI video from text that actually serves a purpose.
Scenario 2: A Cinematic Travel Vlog Intro
You need a jaw-dropping opening shot for a YouTube video about the Italian coast.
- Vague Prompt: "A drone shot of the coast."
- S.A.S.S.C. Prompt: "A slow-panning aerial drone shot revealing the colorful houses of Positano, Italy, built into a cliffside. The turquoise Mediterranean Sea is calm, with a few small boats. Cinematic, golden hour lighting, hyper-realistic, 4K."
Here, we've specified the exact location, the camera movement ("slow-panning"), the time of day ("golden hour"), and the precise quality ("hyper-realistic, 4K"). The AI now has a perfect blueprint.
Pro Tip: Don't be afraid to be too descriptive at first. It’s always easier to start with a detailed prompt and cut things out than it is to add more detail to a vague prompt that isn't working. Think of it like a sculptor—you start with a big block of stone and chip away everything you don't need.
The best way to get good at this is just to do it. For more ideas and advanced tricks, check out our guide on how to write good texts and prompts in Aicut, which is packed with examples you can adapt.
This infographic is a great visual reminder of how your prompt choices connect to the final product.
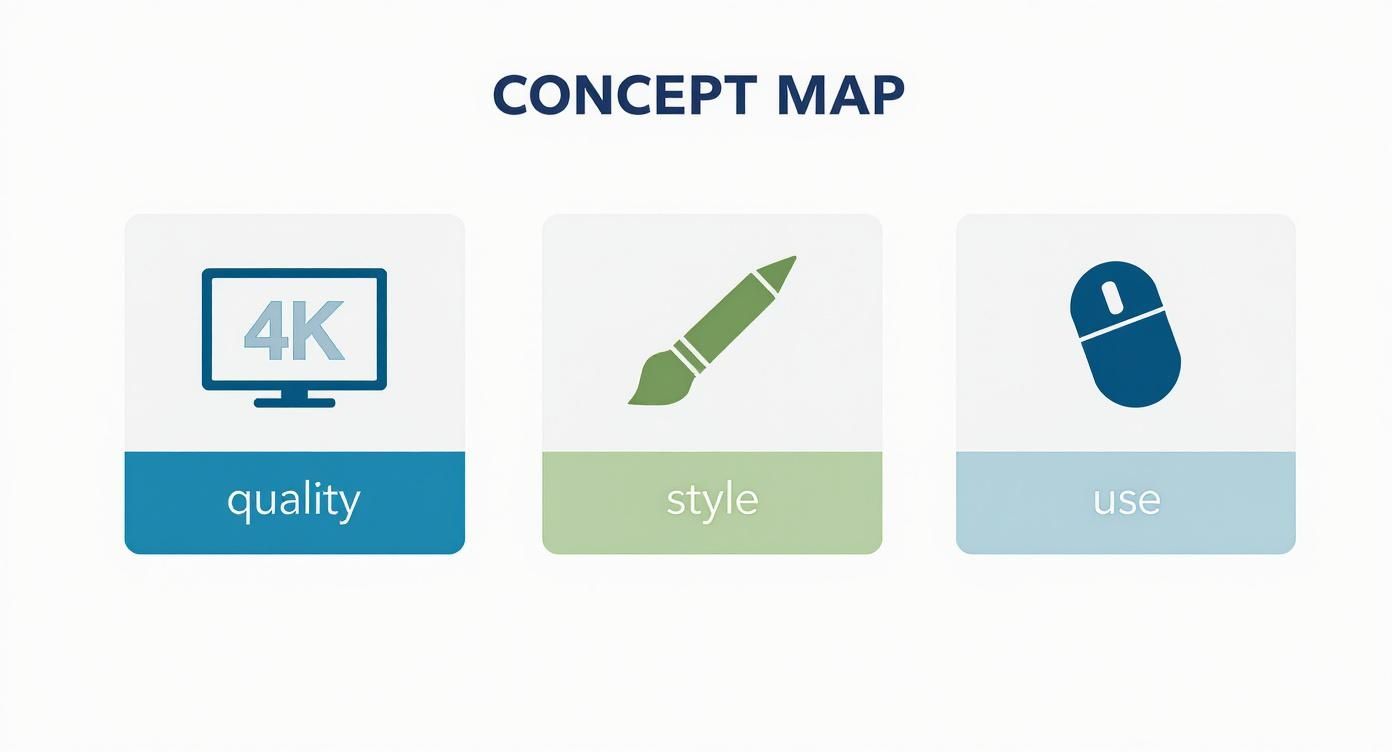
It really just boils down to making sure your creative style and quality settings make sense for what you're trying to do.
Mastering Advanced Prompting Techniques
Once you have the basics down, you can start using a few more advanced tricks to really dial in your results and fix common problems.
Using Negative Prompts
Sometimes, telling the AI what you don't want is just as important as telling it what you do want. This is where negative prompts come in. Most AI generators have a feature that lets you list things to exclude. This is a lifesaver for getting rid of weird artifacts like distorted faces, extra limbs, or blurry text in the background.
Let's say you're generating a video of a corporate meeting, but the AI keeps putting bizarre, unreadable charts on the wall.
- Standard Prompt: "A team of professionals in a modern conference room discussing a project, bright office lighting."
- Prompt with Negative Command: "A team of professionals in a modern conference room discussing a project, bright office lighting. --no text, charts, writing"
That --no command (the exact syntax might vary by tool) tells the AI to avoid those elements, giving you a much cleaner scene.
Here are a few negative prompts I use all the time:
--no blurry, distorted faces--no extra fingers, mutated hands--no watermark, logo--no text, words
Specifying Camera Movement
Static shots get old fast. To make your videos more engaging, you need to tell the camera what to do. Adding specific camera movements to your prompt is one of the easiest ways to make your content look more professional.
Try experimenting with commands like these:
- Pan: "A slow pan across a desert landscape at sunset."
- Tilt: "A dramatic tilt up from the base of a skyscraper to the sky."
- Dolly Zoom: "A dolly zoom on a character's surprised face." (This creates the classic "Vertigo effect.")
- Crane Shot: "A crane shot rising above a bustling medieval marketplace."
- Tracking Shot: "A side-tracking shot following a runner on a forest path."
When you start using these kinds of specific commands, you stop being a user and start being a director. That's how you make AI videos that don't just look cool, but actually captivate your audience.
Using Advanced Techniques for Professional Results

Once you’ve gotten the hang of writing solid prompts, it’s time to dig into the more advanced features. This is what really separates the quick, amateur clips from polished, professional-grade content. Think of this as moving beyond just generating a cool-looking shot and starting to build a complete visual story.
Some of the most powerful tools in the AI video arsenal are image-to-video and photo animation. For creators and marketers, these are absolute game-changers. They let you start with a known visual—like a product photo or a brand mascot you’ve already designed—and bring it to life. It’s the perfect bridge between your static brand assets and the dynamic world of video.
For example, a small e-commerce brand can take a slick photo of their new sneakers, upload it, and prompt the AI to add subtle motion. Suddenly, they have an eye-catching ad without needing a pricey photoshoot. One educational startup I followed was able to produce an entire animated series 3x faster using these methods compared to their old workflow. If you want to dive deeper into the nuts and bolts of how this all works, you can learn more about AI video generation workflows and the tech behind it.
Animating Photos and Using Image References
Bringing a still image to life is easily one of the most practical uses for AI video. The process itself is usually pretty simple: upload your image, then write a text prompt telling the AI what kind of motion you want.
- For Product Shots: Got a photo of your product on a clean background? Upload it and try a prompt like: "Slowly rotate the product, subtle glint of light on the surface."
- For Character Animation: Take a character illustration and bring it to life. A prompt like "Make the character blink and smile gently, hair waving slightly in the wind" works wonders.
But you can take this a step further by using an image as a stylistic reference. When you upload a reference image along with your prompt, you're essentially telling the AI, "Make the video look and feel like this." This is incredibly helpful for keeping your videos on-brand or nailing a specific artistic style across a whole series of clips.
Achieving Character and Scene Consistency
Let’s be honest: one of the biggest headaches in AI video is consistency. You generate an amazing clip of your main character, but in the very next one, they look like a distant cousin. It's frustrating. While the tech is getting better by the day, there are a few tricks you can use right now to keep things cohesive.
First, get hyper-specific with your character descriptions in every single prompt. I mean it. Reuse the exact same descriptive phrases for hair color, clothing, and key facial features. Second, many platforms are now rolling out "character lock" or "consistency" features. These tools often let you upload a reference photo of your character and assign it a name or ID code. You can then call on that character in future prompts, and the AI will know exactly who you're talking about.
My Personal Workflow for Consistency: I keep a simple text file I call my "character sheet." It has the exact, copy-pasteable descriptions for my main characters and key locations. This guarantees I’m using the identical phrasing for every single clip in a sequence, and it dramatically improves the final result.
Upscaling and Final Quality Adjustments
Before you even think about dropping your clips into an editor, you need to make sure they're as sharp as possible. Most AI tools will generate video at a standard resolution like 1080p, but many offer upscaling options to bump that quality up to 4K. This process uses AI to intelligently add detail and make your video look crisp, especially on larger screens.
So, when should you bother upscaling?
- Always for YouTube: If YouTube is your main platform, upscaling to 4K is pretty much non-negotiable for a professional look.
- For "Hero" Content: Any big marketing video, website background, or important ad creative will benefit from the higher resolution.
- Not Always for Social Media: Honestly, for most TikToks or Instagram Reels, 1080p is perfectly fine. You'll save a ton on processing time and credits.
Beyond just the resolution, keep an eye out for quality and motion settings. Some tools let you tweak a "motion score" or "aesthetic level," which can affect the smoothness of the animation. Play around with these. I've found that sometimes a lower motion score can produce a more stable, less "wobbly" video, which is great for subtle, atmospheric shots. Mastering these final controls is what makes your output feel like a deliberate creative choice, not just a random AI-generated guess.
Editing and Sharing Your AI-Generated Video
https://www.youtube.com/embed/HdvTO9rvSm4
Getting your clips generated is a great first step, but the job isn't done yet. Think of those raw outputs from any text-to-video tool as your raw ingredients. The real creative work starts when you piece them together into a final video that tells a story.
This is where you move from prompt engineer to editor. You're taking a collection of visually interesting scenes and turning them into something that actually resonates with people. Don't worry, you don't need to be a professional filmmaker to pull this off.
Assembling Your Story in an Editor
You can skip the expensive, complicated editing software. For this kind of work, straightforward and user-friendly editors like CapCut or Adobe Express are perfect. They're built for creating social media content quickly and have all the features you’ll need.
Start by dragging your clips onto the timeline. Ask yourself: does this order make sense? Is there a clear beginning, middle, and end? I’ve found that even trimming just a half-second off the start and end of each clip can make the pacing feel much tighter and more deliberate.
Next, think about transitions. A simple cross-dissolve can help ease the viewer from one scene to another, while a hard cut can create a more energetic, jarring effect. The key is not to go overboard; a few well-chosen transitions are far more powerful than a dozen flashy ones. If you want to get more advanced, our complete guide on AI video editing software has plenty of deeper techniques.
Adding Audio and Sound Design
Honestly, audio is what gives your video its soul. A silent clip just feels flat and incomplete. Layering in background music and the right sound effects is what truly sets the mood and grabs your audience's attention.
- Background Music: Find a track that matches the vibe you're going for. Is it a high-energy promo or a chill, atmospheric scene? The music should support the visuals, not distract from them.
- Sound Effects (SFX): Little touches make a huge difference. A "whoosh" sound on a quick transition or some subtle ambient noise that matches the scene can make the whole thing feel more real and immersive.
Good audio design is also a fantastic trick for smoothing over any visual oddities between different AI-generated clips. It ties everything together into one cohesive experience. This isn't just a theory; it works. New data shows that when polished correctly, AI content can be incredibly compelling. In fact, 56% of marketers report that content made with generative AI performs better than content made by humans. You can read more about these findings on generative AI performance to see how much things are changing.
Key Insight: The final edited video is your unique creation. The AI gives you the raw materials, but you're the one directing the story, setting the pace, and crafting the final experience with your edits and sound design.
Exporting for Different Platforms
Once your edit is complete, you need to export it with the right settings for each social platform. You can't just use one file for everything. YouTube, TikTok, and Instagram all have their own specific requirements for aspect ratio, resolution, and format.
Here’s a simple cheat sheet to get it right every time:
YouTube:
- Aspect Ratio: 16:9 (Horizontal)
- Resolution: 1080p is the bare minimum, but 4K looks much more professional.
- Frame Rate: 24 or 30 FPS works great.
- File Format: Stick with MP4 for the best compatibility.
TikTok & Instagram Reels:
- Aspect Ratio: 9:16 (Vertical)
- Resolution: 1080p is the sweet spot (1080x1920).
- Frame Rate: 30 FPS will give you that smooth mobile playback.
- File Format: MP4 is your best bet here, too.
Nailing these settings from the start means you won't have to deal with frustrating upload errors or blurry, pixelated videos. It ensures all your hard work is seen in the best possible light.
Your Top Questions About Making AI Videos, Answered
Diving into any new creative tool brings up a lot of "how do I...?" or "what if...?" moments. When you first start turning text into AI video, a few common questions and roadblocks tend to pop up. Let's walk through some of the big ones so you can get back to creating.
Can I actually use my own face and voice?
Yes, you absolutely can. This is where AI video gets really interesting for anyone trying to build a personal brand or create marketing content that feels authentic. Many of the newer platforms have built-in voice cloning and custom AI avatar features.
For your voice, you’ll usually just upload a clean audio sample of yourself talking for a minute or two. The AI chews on that and learns to replicate your tone and inflection, allowing it to narrate any script you feed it. For the visual side, you can upload photos or a short video clip to create a digital version of yourself that speaks and syncs its lips to the audio.
Think about it: you could create personalized training videos, social media updates, or product walkthroughs without ever stepping in front of a camera again. It's a massive time-saver. Just make sure you read the fine print on how the platform handles your biometric data.
A Quick Heads-Up: Before you go all-in, double-check the platform's terms of service. You need to be certain you get full commercial usage rights for everything you create, especially if it's for your business.
How do I stop my videos from looking... weird?
We’ve all seen those AI creations with slightly off-kilter faces, six-fingered hands, or backgrounds that seem to melt into themselves. While the models are getting better every day, these little glitches are still part of the game. The best defense is a good offense: be ridiculously specific with your prompts.
Instead of just writing "a person walking," try something with much more texture: "Full body shot, a woman in a vibrant red coat walks confidently down a rain-slicked city street at night, with neon lights reflecting in the puddles." See the difference? Giving the AI less room to guess helps guide it toward a better result.
Another trick up your sleeve is the negative prompt. Most good tools let you tell the AI what to avoid. Simply adding things like --no blurry faces, extra fingers, distorted hands can work wonders to clean up your final output.
What's the deal with copyright for AI videos?
This is a tricky one, as the laws are still catching up to the technology. Generally speaking, something created 100% by AI without meaningful human input probably can't be copyrighted by itself.
But here’s the key: your finished video project is rarely 100% AI. When you take those generated clips, edit them together, add your own music or voiceover, tweak the colors, and assemble it all into a unique story, that final product is yours. The creative choices, the sequencing, the editing—that's where your copyrightable work comes in.
Ready to put this all into practice? Aicut has everything you need to make amazing, pro-level videos from a few simple words. With viral templates, powerful models like Sora 2, and an easy-to-use workflow, you can get your ideas out of your head and onto the screen in minutes. Start making your next hit video right now at https://www.aicut.pro.