Using AI to upscale an image is all about boosting a picture's resolution without turning it into a blurry mess. The AI smartly adds new pixels to make the image bigger and sharper, which is a lifesaver when you need to turn low-res files into crisp, high-definition visuals for social media, video, or even print.
Why High-Quality Visuals Matter Now More Than Ever
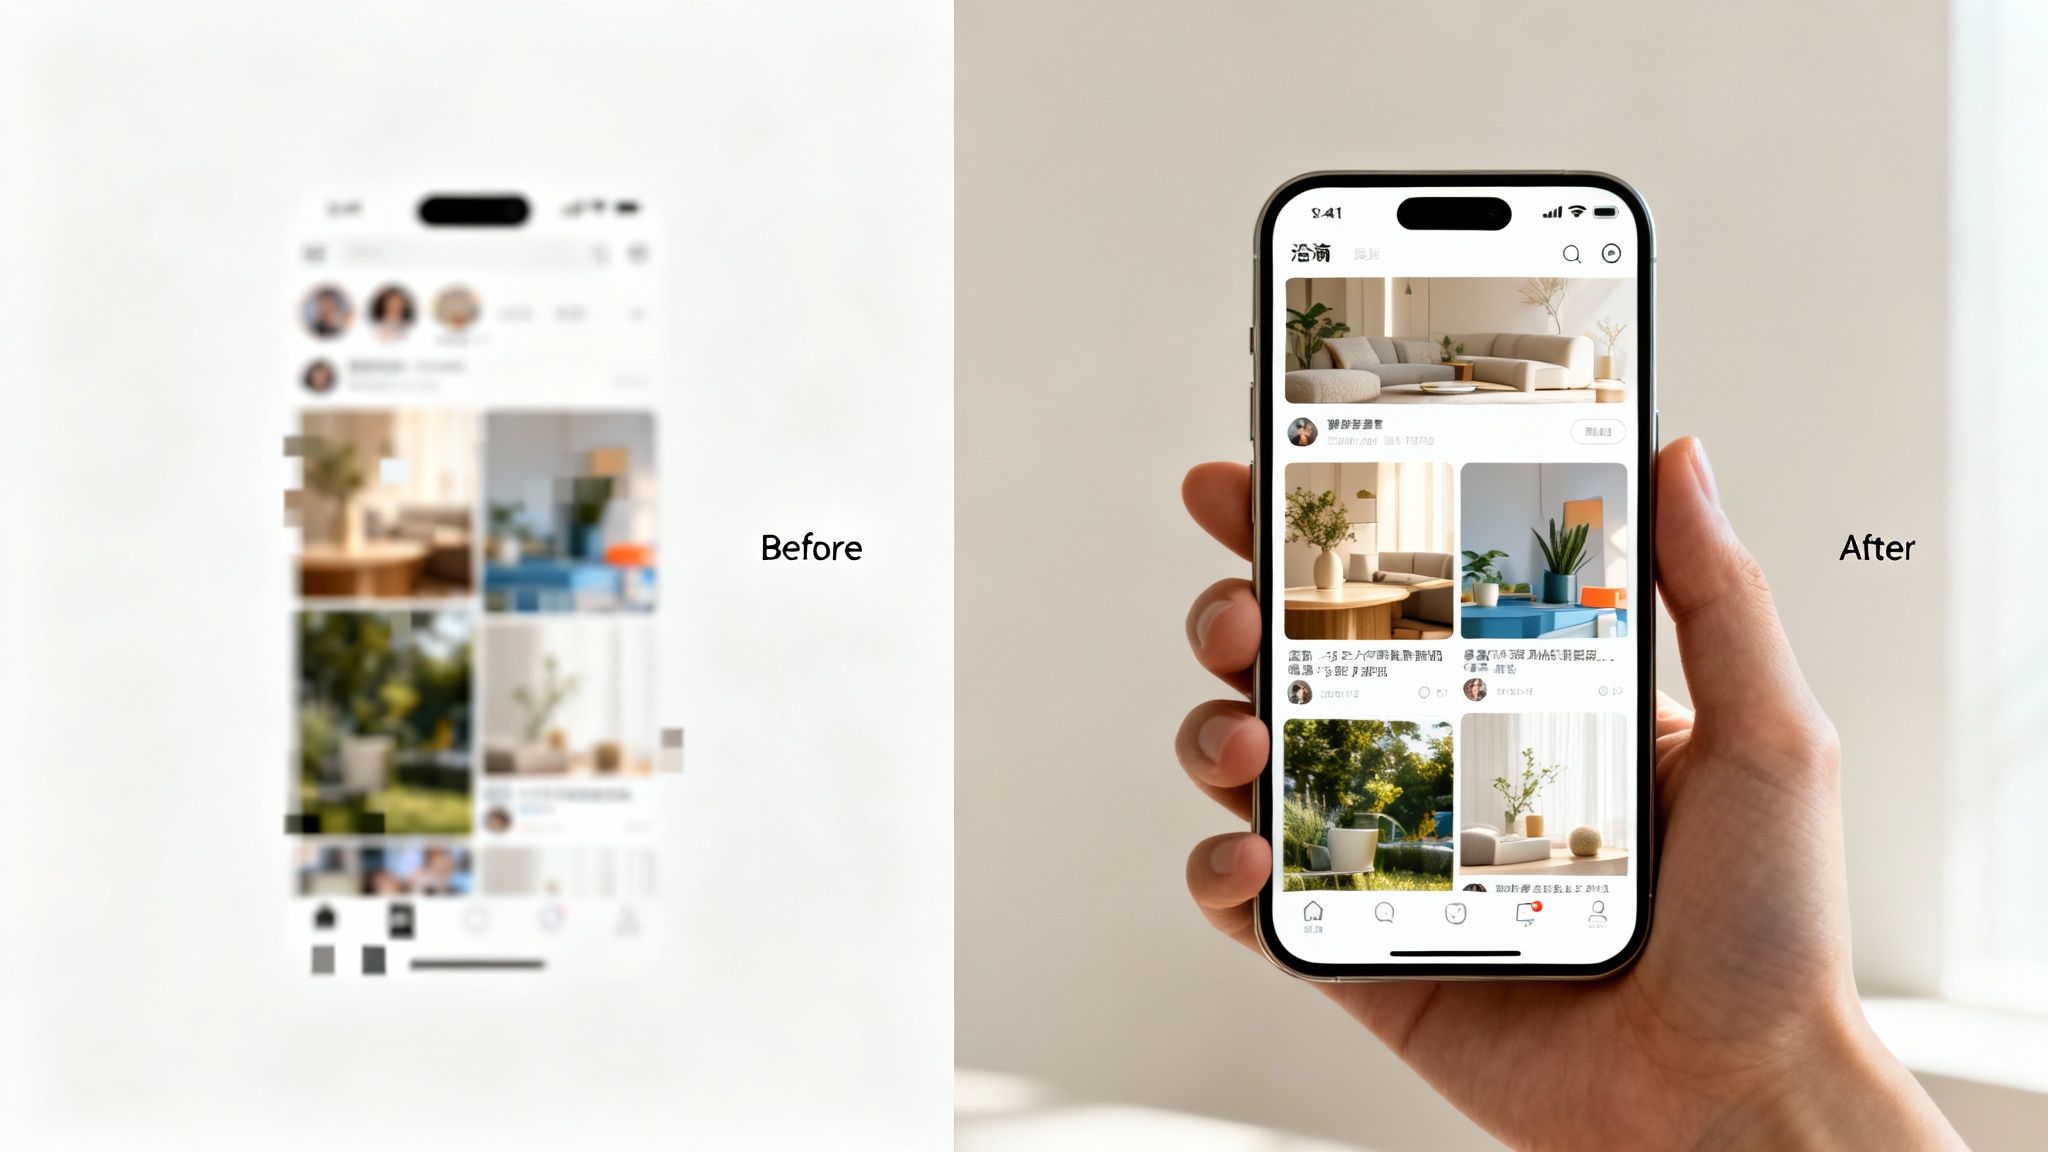
Think about scrolling through YouTube, TikTok, or Instagram. A blurry or pixelated image is an instant turn-off, right? You probably swipe right past it. It's not just that low-quality visuals look unprofessional—they can actively damage your brand's credibility and kill engagement before anyone even reads your message. People just expect sharp visuals these days; it’s a sign of quality and trustworthiness.
This creates a real headache for creators and brands. A faceless YouTube channel, for example, often has to rely on old stock photos or historical images that are usually low-resolution. If you use them as-is, the whole video just feels cheap and amateur, which is a surefire way to lose viewers.
The E-commerce Imperative
This need for clarity is even more crucial in e-commerce. A customer can't physically touch your product, so your photos have to do all the heavy lifting. If a product shot is blurry, it's impossible to see the details, and that creates doubt. On the other hand, crisp and detailed photos build confidence and directly lead to sales.
This pressure for better visuals has driven a lot of innovation. In online retail, the push for more engaging experiences has even led to things like AI clothing try-on technology, which absolutely depends on high-quality images to work.
Upscaling images with AI isn't just a niche trick for photographers anymore. It’s a basic tool for anyone trying to get noticed online. It’s simply about meeting a baseline expectation of professionalism.
A Growing Market for Clarity
The move toward high-resolution content isn't just a fleeting trend; it’s a booming market. What started as a niche area of research has exploded into a major commercial industry. The AI Image Upscaler market was on track to hit around $650 million by 2025, with projections showing an annual growth rate of about 22%.
That growth is coming from creators and businesses who need a reliable way to turn so-so assets into content that actually looks good on modern platforms. This financial momentum proves one thing: professional-grade visuals are no longer optional. Whether you're running ad campaigns, producing video essays, or selling products, starting with a high-quality image gives your content the best possible chance to succeed.
How to Choose the Right AI Upscaling Tool
With so many AI upscalers out there, picking the right one can feel like a chore. The secret is to think bigger than just the upscaling part. Are you looking for a quick, one-off fix, or do you need a tool that slots neatly into your entire creative process?
For anyone regularly creating content for social media, YouTube, or other video platforms, an all-in-one solution like Aicut just makes more sense. Juggling different apps—downloading an image, upscaling it in one tool, then uploading it somewhere else to animate or edit—is a real momentum killer. Doing it all in a single workspace saves a ton of time and keeps you from drowning in file versions.
Evaluating Key Features
When you start comparing tools, there are a few features that are absolutely essential for getting great results every time. A solid AI upscaler should give you control, not just a generic "enhance" button.
Here’s what I always look for:
- Multiple Upscaling Factors: You need options. A simple 2x upscale is often enough for a small web graphic, but for a high-res video background, you’ll want the power of a 4x increase.
- Specialized AI Models: The best tools have different AI models for different jobs. One might be trained to restore old, grainy photos, while another excels at sharpening faces or cleaning up digital art. Using the right model for your specific image can dramatically improve the final look.
- Batch Processing: This is a game-changer. If you’re a photographer editing a whole shoot or a marketer prepping a hundred product images, being able to upscale them all at once is a massive time-saver.
AI Upscaler Feature Comparison
To make it clearer, let's break down the differences between a simple online tool and a more robust, integrated platform. The choice really comes down to your workflow and how much you value efficiency.
| Feature | Basic Online Upscaler | Integrated Platform (like Aicut) |
|---|---|---|
| Workflow | Single-task focused (upload, upscale, download) | Multi-step workflows within one ecosystem (upscale, then animate) |
| Batch Processing | Often limited or unavailable | Usually a core feature for handling multiple assets |
| Specialized Models | Typically one general-purpose model | Offers multiple models for different content types |
| File Management | Requires manual downloading/re-uploading | Centralized asset library; no extra steps |
| Use Case | Good for quick, one-off enhancements | Ideal for consistent content creators and professionals |
Ultimately, a dedicated platform is built for action, turning a simple upscaled image into a ready-to-use asset without all the back-and-forth.
Standalone vs. Integrated Platforms
Think of a standalone upscaler like a specialty screwdriver—it does one thing really well, but that's it. An integrated platform is the entire toolkit. A standalone tool does its job in a bubble; once you have your upscaled image, it's on you to figure out what to do next.
The real magic happens when your upscaled image is instantly available for the next part of your project. In Aicut, for instance, you can upscale a character illustration and, in the very next step, bring it to life with animation, all without ever leaving the app.
This kind of connected workflow is what separates the good from the great. When your tools talk to each other, you get to spend more time being creative and less time on busywork.
And while you're refining your visuals, don't forget the power of a good idea. Sometimes, an AI brainstorming tool to boost creativity and innovation can spark the perfect concept for your next project. If your work also involves video, leveling up your skills there is a smart move. Check out our guide to the best video upscaling software to see how these same principles apply to moving images.
A Practical Walkthrough of Upscaling Images with Aicut
Theory is one thing, but seeing how a tool works in real-time is where things really click. Let's walk through the entire process of upscaling an image using Aicut, focusing on the practical steps that get you a polished, professional result. The idea is to make this second nature, so you're spending less time messing with settings and more time creating.
Before you even think about hitting that upload button, a little prep work can make a world of difference. You know the old saying, "garbage in, garbage out"? It's especially true for AI. Always start with the highest quality version of the image you can find, even if it's still pretty small.
Doing quick fixes first, like adjusting the color balance or cleaning up obvious dust spots, gives the AI a much cleaner canvas to work from. This small bit of effort upfront stops the AI from accidentally making existing flaws bigger and more noticeable.
Getting Started Inside Aicut
Once your source image is looking its best, the process in Aicut is refreshingly simple. You'll upload your image directly to the platform, and just like that, it's an asset in your library, ready for the next step. Keeping everything in one place is a huge time-saver, preventing that frustrating cycle of downloading and re-uploading between different tools.
After uploading, you’ll head over to the enhancement tools. This is where you'll find the upscale image AI options and make the key decisions that shape your final output.
This whole process is about making smart choices based on your end goal.
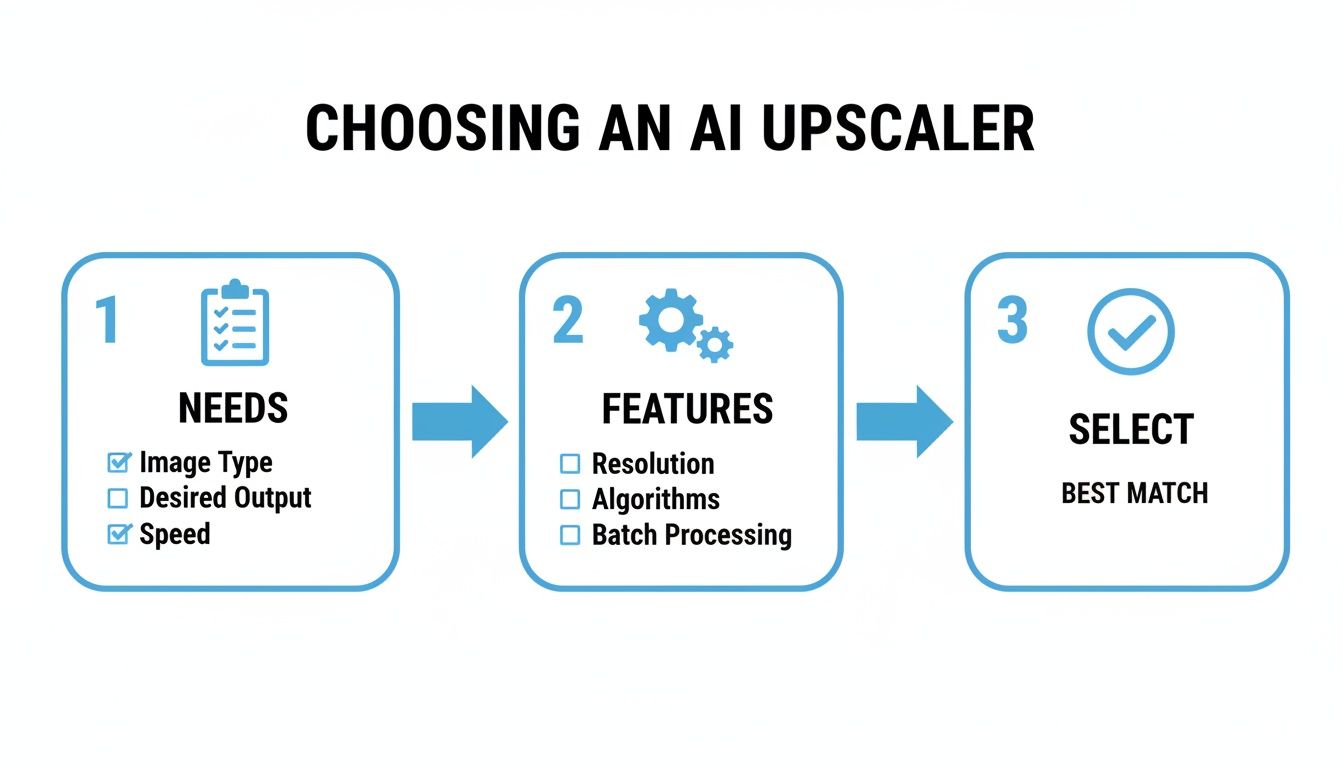
As the graphic shows, it really comes down to thinking about what you need, seeing what features are available, and picking the best tool for the job.
Choosing Your Upscaling Settings
Alright, this is where the magic happens. In Aicut, you’ll have a few settings that directly control the quality and style of your upscaled image.
Here’s a quick breakdown of what you need to know:
- Resolution Multiplier (2x, 4x, or 8x): My go-to is almost always 4x. It hits the sweet spot between a major resolution boost and keeping the image looking natural. A 2x upscale is handy for small touch-ups, while 8x is a powerhouse best saved for tiny source files where you need a massive size increase.
- AI Model Selection: Many tools, including Aicut, offer different AI models for different types of images. You might see options tuned for photos, illustrations, or even restoring old pictures. Always try to match the model to your image type for the most accurate results.
For instance, if I'm taking a low-res character drawing for a YouTube video, I’ll pick the 4x multiplier. That gives me a crisp, HD asset perfect for animating, and it helps avoid that "plastic" look you can get from pushing an upscale too far.
A little pro-tip from my own experience: always start with 4x. It's powerful enough for most professional work—like turning a phone screenshot into a full-screen video background—but it's conservative enough to sidestep the most common AI artifacts.
From Upscaled Image to Animated Content
Once the AI does its thing, you'll have a beautiful high-resolution image. But with a platform like Aicut, that's just the starting line. Your newly upscaled image is now sitting in your asset library, ready for you to get creative.
You can immediately pull that sharp, detailed image into Aicut's animation tools. This is how you can turn a static character into a talking avatar for TikTok or a simple product photo into a slick, dynamic ad. This smooth workflow—from enhancement to creation—is what really speeds up content production. If you want to dive deeper, you can learn more about how to create an AI image that perfectly fits your next project.
Sorting Out Common AI Upscaling Problems
So, you’ve run your image through an AI upscaler, but the result feels a little… weird. Maybe the skin looks waxy, a clear sky has some bizarre patterns, or a face has lost all its personality. Don't worry, these are common hiccups, and most of them are fixable with a few tweaks. Let's walk through how to get your AI-enhanced images from "good enough" to genuinely great.
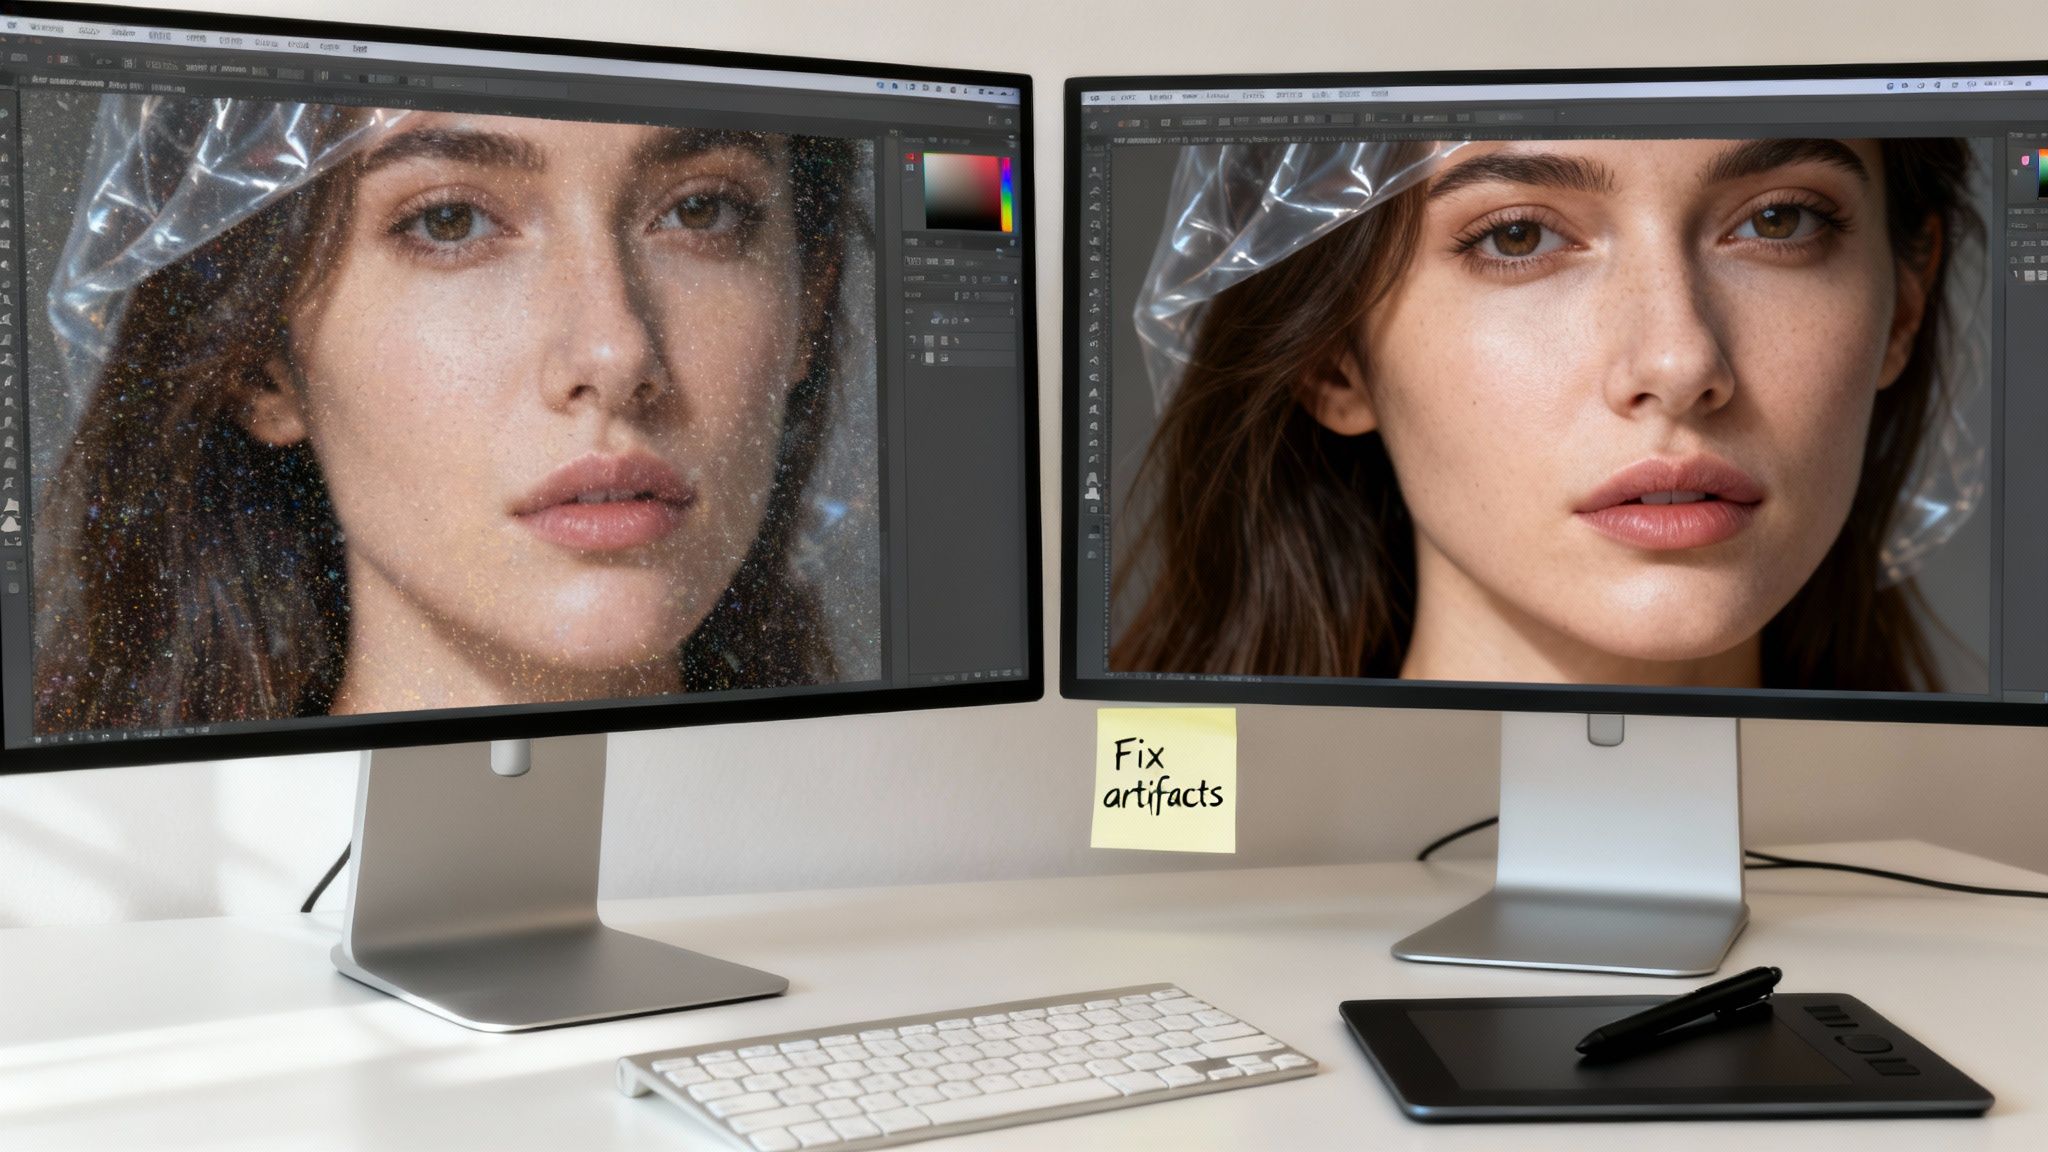
Before we dive in, the number one rule is this: start with the best source image you have. If your original is loaded with digital noise or heavy compression, the AI often gets confused and amplifies that junk instead of the real details. A clean starting point makes all the difference.
Fixing Unnatural Textures and "Plastic Skin"
One of the tell-tale signs of a quick-and-dirty upscale is that "plastic" doll-skin look. It happens when the AI gets overzealous and smooths out every single pore and flaw, leaving faces looking unnatural.
Here’s how I usually tackle that:
- Dial back the upscale factor. Instead of going straight for a massive 4x or 8x jump, try a more gentle 2x upscale first. Smaller jumps tend to preserve more of the original, subtle textures.
- Swap your AI model. Many tools, including Aicut, offer different models for different jobs. A photorealistic model is going to treat skin way more delicately than one designed for anime or digital art.
- Add a little grain back in. This is a classic photographer's trick. After upscaling, open the image in a photo editor and apply a very light touch of film grain. It instantly breaks up that artificial smoothness and brings back a natural, textured feel.
This isn't about just making the image bigger; it's about making it better without losing the very details that make it feel real.
Bringing Blurry Faces and Lost Details Back into Focus
When an AI has to upscale a blurry face from a tiny, low-res source, it's basically making an educated guess. And sometimes, that guess is just plain wrong, leaving you with smudged or generic features.
My Personal Tip: If the face is the most important part of the shot, I often crop in on just the face and upscale that section by itself. This forces the AI to concentrate all its power on the critical details. You’d be surprised how much better the results can be compared to upscaling the whole photo at once.
This technique is a lifesaver for group photos where some people are slightly out of focus. While today’s tools can boast impressive 2×, 4×, or even 8× resolution boosts, a focused approach always wins. It’s no surprise that creators using these tools report cutting their manual editing time by 30–60%. If you're curious about the numbers, you can explore the market trends for AI image enhancers to see how this tech is evolving.
Straightening Out Warped Lines and Weird Patterns
Ever upscale a picture of a building and suddenly all the straight lines are wavy? Or maybe a brick wall now has a strange, repeating pattern? This happens because the AI can struggle to replicate precise geometric shapes when it's inventing new pixels.
When this happens, the best move is to simply try a different upscaling model. Some AI models are trained specifically to handle things like architecture and text, so they do a much better job of respecting those hard lines. A little bit of experimentation here will usually lead you to a model that delivers that crisp, clean finish you're looking for.
Creative Ways to Use Your Upscaled Images
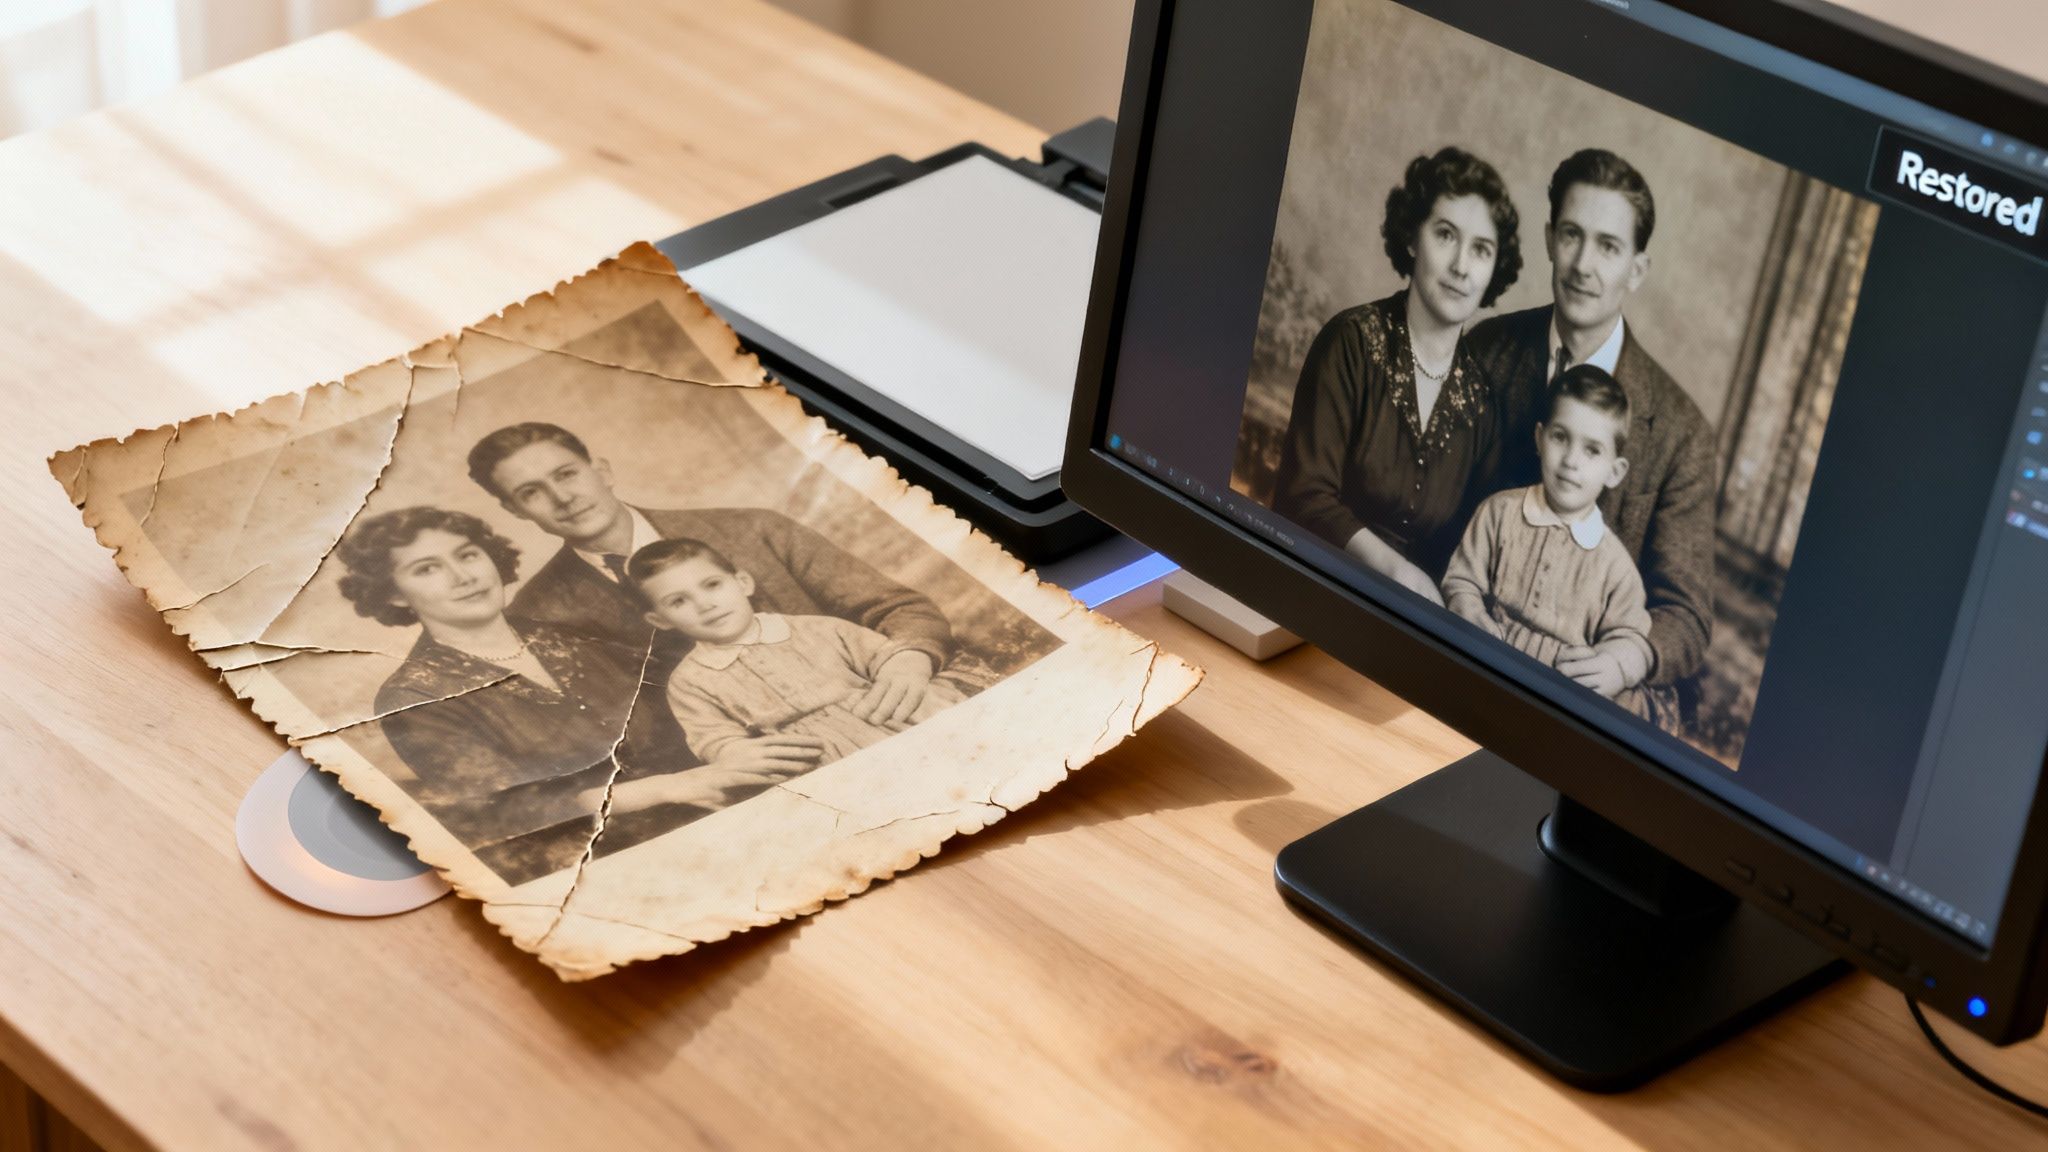
Using an upscale image AI isn't just about breathing life back into old, blurry photos. It's a creative springboard, turning what was once unusable into high-impact content for your social media feeds and video projects.
Think about it for a moment. You could take low-quality, user-generated content (UGC) from your biggest fans and transform it into a slick 4K video ad. Suddenly, you have the authenticity of real customer photos but with the crisp, professional finish of a studio shoot.
Reviving History for Modern Storytelling
If you're a history creator or run a documentary-style channel, you know the struggle all too well. Your source material—old family photos, archival images—is often far too small or grainy for modern HD and 4K screens.
This is where AI upscaling really shines as a storytelling tool.
- Documentary Production: Imagine reviving old photographs for your next YouTube documentary. You can finally zoom in on those important details without the shot dissolving into a pixelated mess.
- Faceless Channels: You can create high-resolution assets for faceless storytelling channels, turning public domain images into visually engaging backdrops that actually hold a viewer's attention.
The entire process gives old visuals a completely new life, making historical narratives more immersive and professional for today's audience.
Powering Up Other AI Workflows
Here’s where things get really interesting. One of the most powerful things you can do with an upscaled image is use it as a high-quality foundation for other AI tools. A sharp, detailed image will always produce better results when you feed it into another generative model.
For example, right inside Aicut, you can take a character illustration you just upscaled and immediately turn it into an animated avatar. Because the source is so clear, the final animation is sharp and detailed, not fuzzy and soft. This kind of seamless workflow is a huge time-saver. If this idea sparks your interest, you can learn more about transforming static images into dynamic content.
The quality of your input directly dictates the quality of your AI-generated output. A clean, upscaled image is the best possible starting point for any creative AI project, from animation to style transfers.
This need for high-quality digital assets is a global trend. While North America is currently the biggest adopter, the Asia-Pacific region is the fastest-growing market. This is fueled by an explosion of content creation in mobile-first markets, where creators are constantly pushing out short-form videos and e-commerce content. You can discover more insights about these AI trends in the 2025 AI Index Report from Stanford. This global creator economy is precisely what drives the need for efficient tools that deliver professional results.
Answering Your AI Image Upscaling Questions
As you dive into upscaling, you're bound to have some questions. It's totally normal. Let's walk through a few of the most common ones I get asked, so you can start working with more confidence and get those polished results you're after.
A big one is always about which images work best. The honest answer? You can throw almost anything at modern AI upscalers, but you'll get the cleanest results from images with clear subjects and less visual clutter. The AI has an easier time identifying and rebuilding details when it doesn't have to guess what it's looking at.
How Well Does AI Handle Faces and Text?
This is where things get interesting. Faces and text are notoriously tough because our brains are hardwired to spot even the tiniest imperfections. An AI model specifically trained on portraits can do a stunning job, adding realistic skin texture and keeping facial features sharp. On the other hand, a more generic model might over-smooth things, giving you that uncanny, "plastic doll" effect.
Text follows a similar logic. If the text in your original image is mostly readable, a good upscaler will sharpen it up nicely. But if you're dealing with tiny, pixelated text from a sign in the background, the AI might get confused and spit out jumbled, nonsensical characters.
Here’s my rule of thumb: manage your expectations. If you need to sharpen a slightly soft face in a group photo, AI is a lifesaver. If you're trying to recover unreadable text, you'll probably need to do some manual editing in a photo editor.
What’s the Real Difference Between Upscaling and Resizing?
This is a critical point that trips a lot of people up. Traditional resizing is just a brute-force stretch. It takes the pixels you already have and makes them bigger, which is why the image inevitably becomes a blurry, pixelated mess. Think of it like zooming in on a digital photo way too far—the quality just falls apart.
AI upscaling is a completely different beast. It's a generative process. The AI actually analyzes the content of the image, recognizes objects like a face, a tree, or a brick wall, and then intelligently creates brand new pixels that it predicts should be there. It’s adding real, convincing detail, not just stretching what already exists.
- Resizing: Stretches the original pixels, which destroys the quality.
- AI Upscaling: Generates new, context-aware pixels to add detail and improve quality.
So, when you choose to upscale an image with AI, you’re actively enhancing it, not just making it bigger. That's the secret sauce that lets you transform a small, grainy file into a crisp, high-resolution asset you can actually use.
Ready to stop fighting with low-resolution images? With a tool like Aicut, you can upscale your visuals and pull them right into your video projects without skipping a beat. It's a simple way to create professional-looking content that really stands out. Give Aicut a try and see for yourself.