
Ever wonder how your favorite creators get those impossibly smooth shots, gliding through a scene without a single tremor? The secret isn't some superhuman ability to hold steady. It's a gimbal.
So, what is a gimbal? In simple terms, it's a smart handle for your camera or phone that works tirelessly to keep your footage stable. No matter how much you walk, run, or jump around, it uses a combination of sensors and tiny motors to counteract your movements in real-time. The result is that silky, professional-looking video that used to be possible only with expensive Hollywood gear.
Think of it like this: try walking across a room while holding a full cup of water. It’s nearly impossible to avoid spilling. A gimbal is like a magical wrist that instantly anticipates every jiggle and tilt, keeping the cup perfectly level. That’s precisely what a gimbal does for your camera.
This technology feels modern, but its core principle is ancient. It dates all the way back to the Han Dynasty in China (202 BC to 220 AD), when an inventor named Ding Huan created a device with nested rings to keep an incense burner upright on a rocking ship. You can read more about its fascinating origins on UAV1.com. The same brilliant idea that kept incense from spilling centuries ago is now the engine behind ultra-smooth video.
The Core Components of a Gimbal
So, what’s going on inside that smart handle to turn shaky hands into cinematic gold? A modern gimbal might seem complex, but it all boils down to three key parts working together in perfect harmony.
Getting a handle on these basics is the first step to truly mastering your gear. Here’s a quick look at the components that make it all happen.
Gimbal Key Components at a Glance
| Component | Primary Function | What It Does for Your Video |
|---|---|---|
| Axes (Pitch, Roll, Yaw) | Provide rotational freedom | Allows the camera to tilt up/down, roll side-to-side, and pan left/right without affecting stability. |
| Brushless Motors | Provide corrective force | Instantly and silently move the camera in the opposite direction of any unwanted shake or bump. |
| Sensors (IMU) | Detect unwanted movement | Acts as the "brain," constantly measuring motion and telling the motors precisely how to react. |
When you boil it down, the sensors feel your movement, the axes give the camera a path to move, and the motors do the actual work of correcting the shot. It's a constant, lightning-fast dance that happens hundreds of times a second, completely invisible to the naked eye but obvious in the final footage.
So, what's really happening inside a gimbal to turn your shaky hands into those impossibly smooth camera glides? It’s a constant, lightning-fast balancing act, where the gimbal’s “brain” and “muscles” work together to kill every unwanted jiggle before it hits your shot.
To get a grip on this, you need to understand the three axes of movement. Think about all the ways your camera can move in space. The best way to visualize it is to imagine your camera as an airplane.
The Three Axes of Movement
A 3-axis gimbal is the industry standard for a reason. It counters movement on all three of these planes at once, which is how you get that truly cinematic, floating-on-air look.
- Pitch: This is the up-and-down tilt. Think of an airplane pointing its nose toward the sky or the ground. A gimbal corrects this, keeping your horizon steady even if you're walking up stairs or bending down to get a low-angle shot.
- Roll: This is the side-to-side wobble, like an airplane dipping a wing. When you turn a corner or shift your weight, it’s easy to tilt the camera. The gimbal’s roll axis keeps your shot perfectly level, preventing that disorienting diagonal look.
- Yaw: This is the left-to-right pan. Imagine an airplane turning flat in the sky. The yaw axis smooths out any jerky side-to-side motion that happens when you walk or pan your camera too fast.
But how does it know when you’ve moved unintentionally? That’s where the brains of the operation come in: a tiny but brilliant component called the Inertial Measurement Unit (IMU).
The IMU is the gimbal’s nerve center. It’s packed with gyroscopes and accelerometers that feel the tiniest, slightest movements—hundreds of times every second. It's the gimbal’s sense of balance, instantly flagging any shake, bump, or tilt that you didn't mean to make.
Once the IMU senses an unwanted movement—let's say your hand jerks to the left—it instantly signals the gimbal's muscles: the brushless motors. These are the quiet, powerful little engines located at each of the three axis points.
This diagram shows you exactly how the axes, motors, and sensors all work together in a continuous loop.
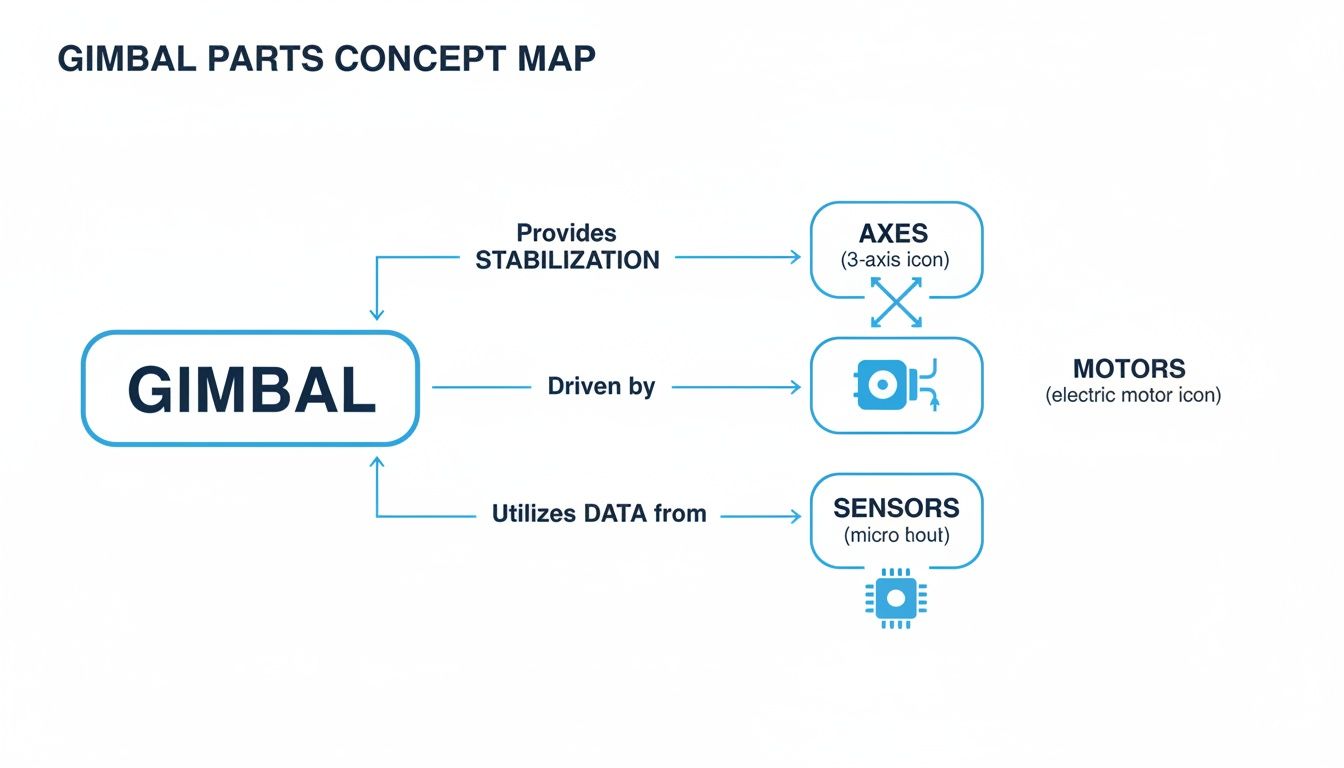
As you can see, the sensors detect your movement, and the motors apply a corrective force along the axes to keep the camera steady.
In our example, when your hand jerked left, the motors apply an immediate, equal, and opposite force, pushing the camera back to the right. This whole dance—detect, command, and correct—happens so fast that the shake is completely canceled out before it ever ruins your footage. That seamless, real-time correction is what a gimbal is all about.
From Ancient Discovery to Modern Creator Tool
It's easy to think of gimbals as a recent tech invention, but the idea behind them is surprisingly old. The core principle—using a set of pivoting rings to keep something stable, no matter how its container moves—has been around for centuries. Think of ancient Chinese incense burners that stayed perfectly level on rocking ships, or the crucial navigation systems that kept marine and aerospace instruments steady in the 20th century.
For today's creators, though, the real story picks up when this concept made the jump from navigation to filmmaking. It wasn't one single "aha!" moment, but a slow burn of innovations that eventually put buttery-smooth shots within reach for everyone, not just Hollywood studios.
The Mechanical Revolution in Filmmaking
Long before electronic gimbals existed, the obsession with smooth camera movement was a mechanical puzzle. Solving it led to some of the most iconic pieces of gear in cinematography, and they laid the foundation for the tools we use today.
The first big leap wasn't even called a gimbal. In 1975, the Steadicam burst onto the scene, completely changing how movies were made. This body-mounted rig gave us those unforgettable, flowing shots in films like The Shining. It was a huge improvement over earlier attempts like the 1910 Aeroscope, allowing operators to film for up to 10 minutes straight without the fatigue of hand-cranking a camera.
But these mechanical rigs required serious physical strength and a ton of skill to operate. The next breakthrough would come from electronics.
The Dawn of the Compact Electronic Gimbal
The moment that really opened the floodgates for independent creators was when the tech got smaller, smarter, and cheaper. The arrival of compact, 3-axis electronic gimbals built for DSLRs and mirrorless cameras was a total game-changer.
The Mōvi M10, which came out in 2013, is what really kicked off the small gimbal craze. It combined powerful brushless motors with a smart sensor (the IMU) and was designed for the new wave of lighter cameras. Suddenly, a single person could pull off shots that used to demand a full crew and a massive, expensive rig.
This innovation lit a fire under companies like DJI, who perfected the technology and made it accessible to just about everyone. What once cost tens of thousands of dollars and required an athlete's endurance was now something a solo creator could toss in a backpack.
The progress has been incredible to watch:
- Hollywood Budgets: Early stabilization systems were only for major film productions with massive budgets.
- Single-Creator Tools: Today, you can get a powerful gimbal for a few hundred bucks that works with the smartphone in your pocket.
- Smarter Workflows: Now, creators are taking that smooth gimbal footage and feeding it into AI tools like Aicut to automatically find the best parts, turning a day's worth of shooting into a polished video in minutes.
How to Choose the Right Gimbal for Your Videos
Picking the right gimbal really boils down to one simple question: What are you trying to create? It's easy to get lost in a sea of options, but the secret is matching the tool to your specific vision. A gimbal that’s perfect for a TikTok creator shooting quick clips will be totally wrong for a wedding videographer who needs rock-solid stability all day.
Not too long ago, gimbals were these huge, clunky rigs reserved for big-budget film crews. Then, a few key players started figuring out how to bring that high-end stabilization to the rest of us. The game really changed when companies like DJI jumped in, making smooth, handheld shots a reality for everyone from faceless YouTube channels to UGC creators. Back in 2012, DJI's Zenmuse Z15 was a breakthrough—the first consumer gimbal with brushless motors and gyros that delivered incredible precision. By 2014, they brought that tech down to earth with the Ronin, letting indie filmmakers stabilize heavy cinema cameras. You can read more about this journey toward gimbal innovation on DJI's blog.
Comparing the Main Gimbal Types
To make a choice you’ll be happy with, you have to get honest about what you’ll actually be filming. Are you grabbing your phone for on-the-go vlogs, or are you setting up a mirrorless camera for polished product videos? Your answer is your guide.
- Smartphone Gimbals: These are your best friends for portability and ease of use. They’re light, simple, and perfect for vloggers, social media mavens, or anyone wanting to level up their phone videos without a complicated setup.
- DSLR/Mirrorless Gimbals: If you’re using a bigger camera with interchangeable lenses, this is where you need to look. These gimbals have stronger motors and more professional features, making them the standard for serious YouTubers, indie filmmakers, and anyone shooting high-quality brand content.
- Specialized Gimbals: This is a catch-all for gimbals built for a specific job. Think tiny gimbals for action cameras to capture smooth POV ski runs, or wearable rigs for unique perspectives.
The single most important spec to check before you buy a gimbal is its payload capacity. This is just a fancy term for the maximum weight the motors can handle. Make sure the total weight of your camera and lens is comfortably under the limit—if it's too heavy, the motors will struggle and your footage will suffer.
Getting this choice right means your gimbal will feel like a natural extension of your camera, not a frustrating accessory. And once you nail that buttery-smooth footage, you can take it even further in post-production with tools that add AI-powered motion control for an extra layer of professional polish.
Gimbal Type Comparison: Which Is Best for You?
Still not sure? This table breaks down the most common gimbal types to help you find the perfect match for your creative style and budget.
| Gimbal Type | Best For | Pros | Cons | Price Range |
|---|---|---|---|---|
| Smartphone | TikTok, Vlogging, Social Media | Lightweight, Affordable, Easy to Use | Limited Payload, Fewer Advanced Features | $80 - $200 |
| DSLR/Mirrorless | YouTubers, Filmmakers, Brand Videos | High Payload, Advanced Control, Versatile | Heavier, More Expensive, Steeper Learning Curve | $300 - $800+ |
| Action Camera | Sports, Travel, POV Shots | Compact, Rugged, Mountable | Designed for Specific Cameras Only | $100 - $300 |
Ultimately, the best gimbal is the one you’ll actually use. Consider your primary camera and the kind of videos you want to make, and you’ll find the right stabilizer to bring your ideas to life.
Getting Started With Your First Gimbal
So, you just got your first gimbal. Awesome. Before you even think about hitting that power button, there’s one non-negotiable step that separates shaky, amateur footage from buttery-smooth professional shots: balancing your camera.
I get it—you want to turn it on and start shooting. But trust me on this. Taking five minutes to properly balance the gimbal is the most important thing you’ll do.
If you skip this, you're just asking for trouble. The gimbal's motors will have to work incredibly hard just to keep the camera level, which drains your battery fast and can even burn them out over time. Worse, you'll still get those micro-jitters in your footage—the very thing you bought a gimbal to eliminate.
Balancing Your Gimbal Step by Step
Balancing is all about making your camera "weightless" on the gimbal. The goal is to adjust it on each axis so that it holds its position perfectly, even when the gimbal is turned off. The exact knobs and levers vary by model, but the principle is always the same.
- Mount Your Camera: First, get your phone or camera locked into the gimbal’s mounting bracket. Try to get it as centered as you can.
- Balance the Tilt (Pitch) Axis: Loosen the tilt axis arm. Now, point the camera straight up, then straight down. Does it flop forward or backward? Slide the camera back and forth on its mount until it stays put wherever you point it. That’s the sweet spot.
- Balance the Roll Axis: Next, tackle the roll. Loosen that axis and see if the camera slumps to the left or right. To fix this, you’ll slide the horizontal arm left or right until the camera sits perfectly level, no tilting allowed.
- Balance the Pan (Yaw) Axis: Last one. Hold the gimbal handle at a 45-degree angle, like you're holding a flashlight. Loosen the pan axis. If the whole assembly swings around, you need to slide that final axis in or out until it stays completely still.
Pro Tip: Always, and I mean always, balance your gimbal with the exact gear you'll be shooting with. That means lens on, lens cap off, microphone attached, filters screwed in—everything. The slightest change in weight will throw the whole thing off.
Once you’re balanced, you can finally power it on. A great mode to start with is "Pan Follow," which lets you pan left and right smoothly while keeping the horizon perfectly stable. For shots where you need to keep the camera locked onto a single point no matter how you move, switch to "Lock Mode."
Getting the hang of these modes is just the beginning. For more great ideas on how to integrate your new skills, take a look at our other video editing tips for beginners.
Creative Ways to Use a Gimbal in Your Videos
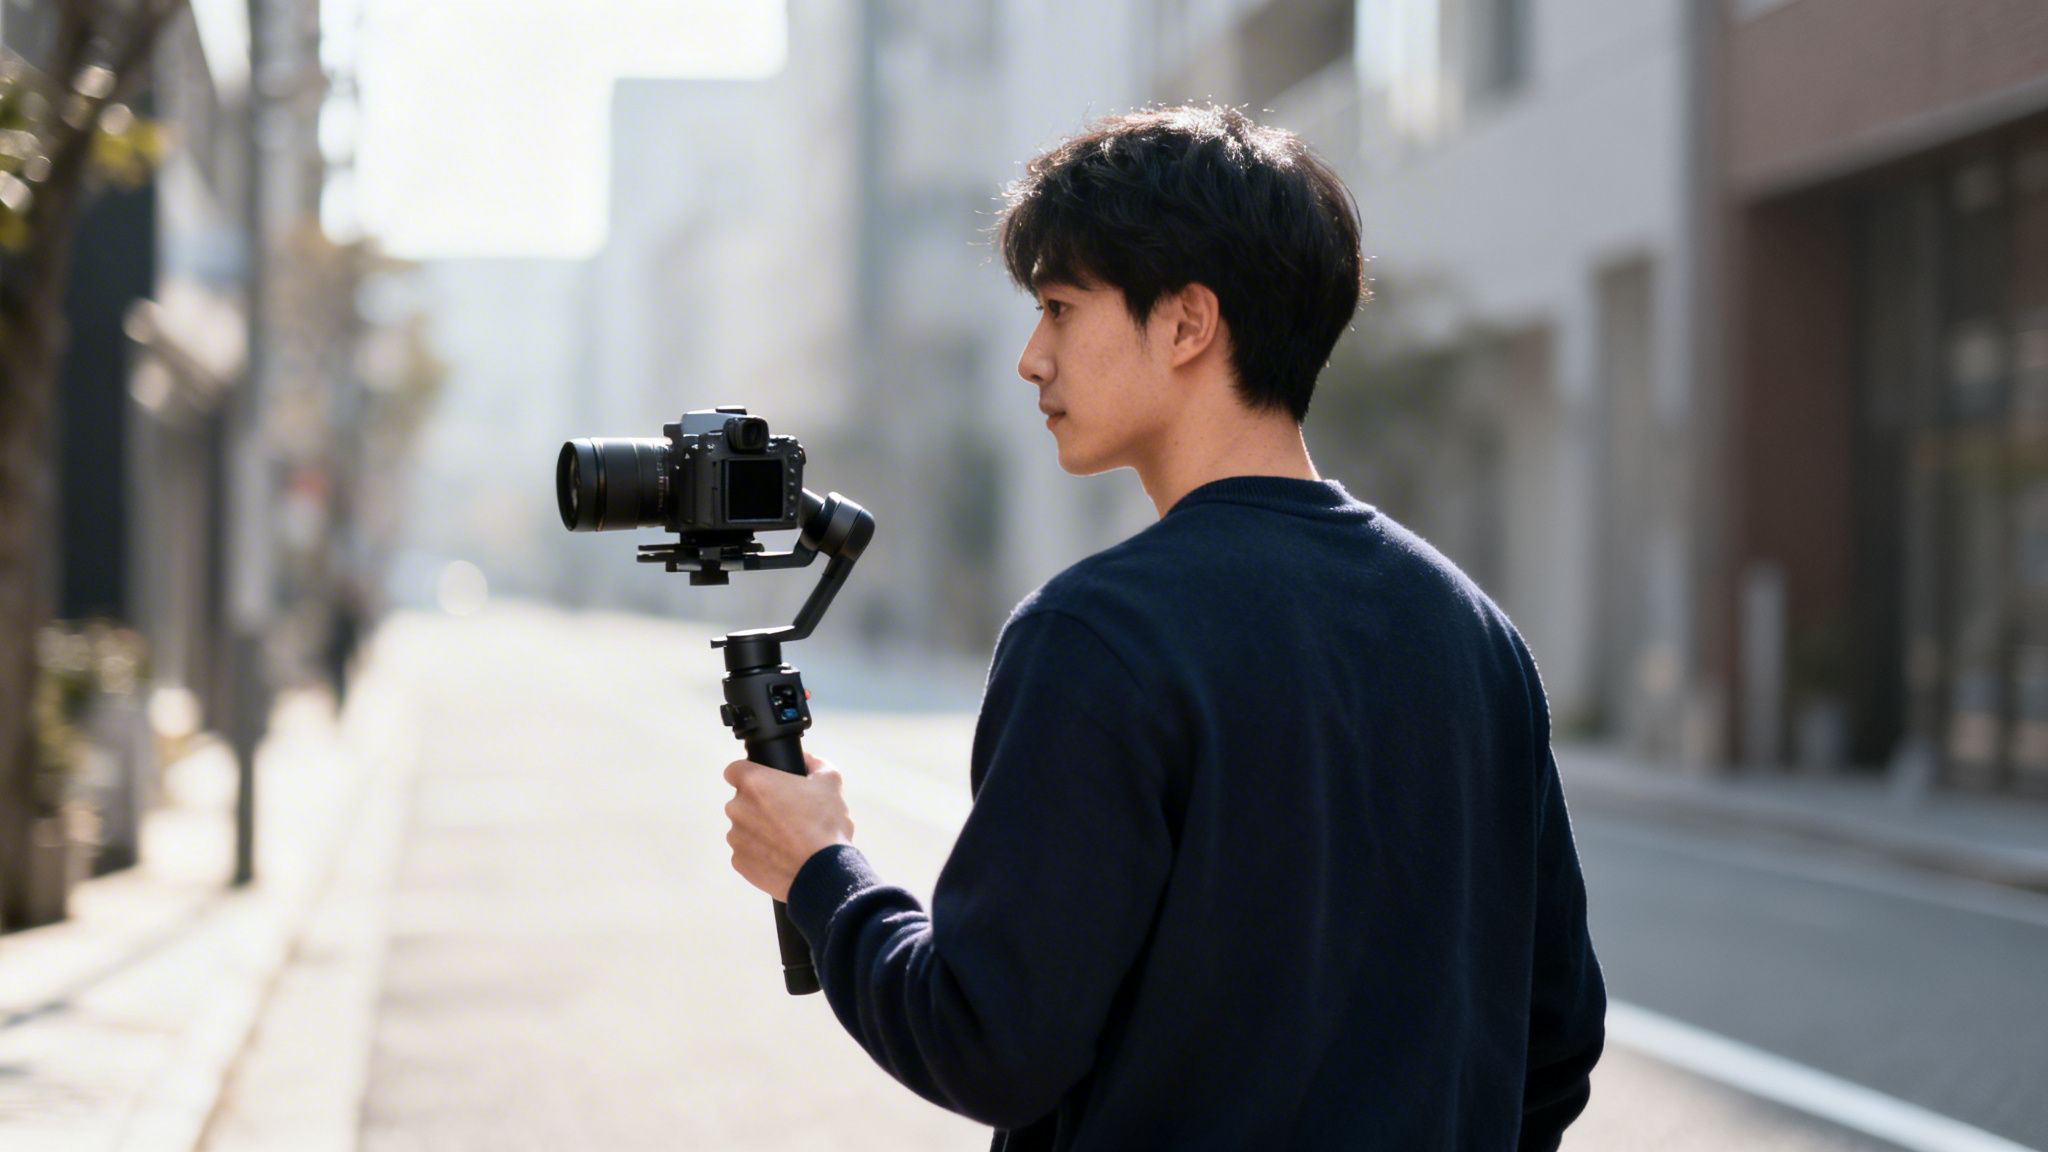
So you've figured out what is a gimbal. Great. But just knowing it stops the shakes is only scratching the surface. The real magic happens when you start thinking of it as a creative tool—your key to filming shots that make people stop scrolling and actually watch.
Let's get past the basics. A gimbal isn't just for damage control; it's for adding a deliberate, professional feel to your videos. It’s what separates amateur content from shots that feel expensive and polished.
Make Your Stories Feel Cinematic
Static, locked-off shots have their place, but a gimbal lets you invite your audience into the scene. You can guide their eyes and make them feel like they’re part of the action, not just a passive observer.
Bring 'Day in the Life' Vlogs to Life: Forget shaky walking footage. With a gimbal, you can glide through your day, turning a simple trip to the coffee shop into a smooth, cinematic journey that’s genuinely enjoyable to watch.
Shoot POV Tutorials That Actually Teach: If you're demonstrating something with your hands, a gimbal is a game-changer. It creates buttery-smooth point-of-view shots that follow your every move, making it crystal clear for your audience to see what you're doing.
Film Product Shots That Sell: Want that high-end commercial vibe? Use your gimbal to create fluid, orbiting shots that reveal a product from every perfect angle. It makes your items look premium and helps you achieve a look that used to cost a fortune in studio gear.
A Smarter Way to Create Content
Here’s the thing: shooting great footage is just one part of the equation. A truly modern workflow is about pairing that high-quality footage with tools that get it published, fast.
Think about it. You can go out for an hour and capture a ton of pristine, stabilized clips—beautiful gliding shots for B-roll, a few dynamic intros, and some flawless pans. You’re building a library of gold.
A gimbal gives you the raw cinematic ingredients. By capturing a library of ultra-smooth footage, you create a foundation of high-quality assets ready for fast-paced editing and distribution.
This is where your workflow gets a serious upgrade. Once you have a folder full of these amazing shots, you can drop them into an AI platform like Aicut. The software can analyze all that footage in minutes, pick out the best parts, and assemble them into videos for social media, complete with music and captions.
This workflow lets you focus on what you do best: being creative and capturing incredible visuals. The AI handles the grunt work of editing. Creators are using these techniques to pull off some incredible shots; you can see how they master advanced camera movements and tracking to get an idea of what's possible.
Common Gimbal Questions Answered
Alright, so you get the basics of what a gimbal is. But let's be honest, you probably still have a few questions buzzing around your head before you’re ready to actually buy one. Let's dig into the stuff people really ask.
Do I Really Need a Gimbal If My Phone Has Stabilization?
This is the big one. And the short answer is: yes, if you want your videos to look genuinely professional.
Your phone's built-in stabilization (OIS and EIS) is pretty amazing for getting rid of little handshakes. But the moment you start walking, running, or making any bigger movements, that digital stabilization hits its limit. It tries to compensate by cropping and warping the image, which often leads to that weird, distracting "jello" effect.
A gimbal works completely differently. It's not digitally fixing your footage after the fact; it’s physically isolating your phone from your body's movements in real time. It creates that smooth, floaty look that simply can't be faked. If your shot involves you moving, a gimbal is what separates a shaky home video from a polished, professional one.
What Is the Difference Between a 2-Axis and a 3-Axis Gimbal?
It all comes down to how many directions of movement the gimbal can smooth out.
- A 2-axis gimbal corrects for up-and-down tilt (pitch) and side-to-side roll. It’s a huge step up from nothing, but it leaves your shot vulnerable to that side-to-side swaying motion as you walk.
- A 3-axis gimbal handles tilt, roll, and that left-to-right panning (yaw). This is the one that corrects for all the major bumps and sways, giving you that truly cinematic stability.
For anyone serious about creating video content, a 3-axis gimbal is a no-brainer. It's the industry standard for a reason—it just works.
How Can I Use Gimbal Footage With AI Video Tools?
This is where things get really powerful for modern creators. Think of your gimbal and AI tools as the perfect workflow partnership. Your gimbal gives you the stunning raw material, and AI helps you shape it into finished content at lightning speed.
First, you go out and shoot. Use your gimbal to build a library of gorgeous, silky-smooth clips. We’re talking about gliding product shots, flowing B-roll of your workspace, or dynamic walking-and-talking sequences.
The gimbal provides the professional footage; the AI provides the speed and scale. This powerful workflow allows you to maintain high production values while dramatically increasing your content output.
Once you have that great footage, you upload it to an AI video platform. The AI can then analyze your best takes and instantly edit them into engaging videos, add a professional voiceover, and even generate perfectly timed captions. You get to focus on what you do best—shooting great video.
With beautiful footage and the right tools, you can completely change your content game. Aicut helps over 500,000 creators turn their best clips into polished, viral-ready videos in minutes. Focus on shooting, and let the AI handle the edit. Find out how you can automate your video creation.