
So, you’re ready to go live on YouTube? That’s great. Before you hit that broadcast button, there are just a few simple hoops YouTube needs you to jump through first.
Getting the Green Light for Your First Stream
The good news is that YouTube keeps the entry barrier pretty low. You don’t need a fancy studio or a Hollywood budget to get started. What you absolutely do need is a verified account in good standing.
This just means confirming your channel with a phone number. It’s a quick security step that proves you’re a real person and unlocks the live streaming feature.
Once you flip the switch to enable live streaming, you’ll have to wait 24 hours before your first broadcast can begin. Don’t panic—this isn't a penalty. It’s a one-time waiting period that everyone goes through. Just plan for it, and you'll be good to go.
Why Go Live on YouTube?
Choosing to stream on YouTube means you're setting up shop on the biggest stage in the world. The platform's audience is massive, giving you an incredible opportunity to connect with viewers and grow your channel in real-time.
This is a game-changer, especially for faceless or AI-video creators. You can build a genuine community without ever showing your face. Imagine hosting live Q&As with a custom avatar or streaming an AI-generated art session while you chat with your audience. The interaction is what builds loyalty.
The numbers back this up. By the end of 2025, YouTube Live is on track to pull in over 47% of all live streaming hours watched on the entire planet. That’s a huge slice of a market projected to hit $62.4 billion in 2026. With 52% of all live stream viewers already on the platform, you’re going where the audience is. If you want to dive deeper, you can explore the latest statistics and see the opportunity for yourself.
YouTube Live Requirements At a Glance Minimum vs Recommended
Let's break down what you absolutely need versus what will make your stream look and sound great. The goal is to just get started—you can always upgrade your gear later as your channel grows.
This table gives you a quick snapshot of the bare minimum to get on the air compared to what we'd recommend for a stable, high-quality broadcast that keeps people watching.
| Requirement | Minimum | Recommended for Quality |
|---|---|---|
| Channel Status | Verified account, no strikes | Verified, good standing |
| Internet Speed | 5 Mbps upload | 10-20 Mbps upload (for 1080p) |
| Encoder | YouTube's "Go Live" feature | OBS Studio, Streamlabs (Free) |
| Audio | Built-in mic (laptop/phone) | External USB or lavalier mic |
| Video | Built-in webcam or phone camera | 1080p external webcam or DSLR |
Starting with the minimums is perfectly fine. The most important thing is to be consistent and provide value to your audience. The "Recommended" column is just your roadmap for future upgrades.
Alright, let's get you ready to go live. Before you even start thinking about fancy microphones or software, there's one small hurdle to clear: unlocking the live stream feature on your YouTube channel. Think of it as getting the keys to the studio. It’s a simple, one-time step that proves to YouTube you’re a real person.
This all comes down to verifying your account with a phone number. YouTube isn't being nosy; it's a basic security check to keep spammers and bots at bay. By doing this, you're helping them make sure the people who stream are accountable. As a bonus, a verified account also lets you upload videos longer than 15 minutes and use custom thumbnails.
How to Get Verified
Getting this done is quick and painless. Just head over to your YouTube Studio. The steps are the same for everyone, whether you’re a gamer, a business, or a faceless AI-video creator like us.
- Click your profile icon in the top-right and choose YouTube Studio.
- On the left-hand menu, find and click on Settings.
- In the window that pops up, go to the Channel tab, then click on Feature eligibility.
- You'll see a section called "Features that require phone verification." Click it and then select Verify phone number.
From there, you just tell them if you want a text or an automated call with your verification code. Punch that code in, and you're officially verified. It’s a two-minute task that opens up a whole new set of creator tools.
The Annoying (But Necessary) 24-Hour Wait
Here’s something that trips up a lot of new streamers: after you enable live streaming, you have to wait 24 hours before you can actually start your first broadcast. Don't panic! Your account isn't broken, and you didn't do anything wrong.
This 24-hour delay is a standard security measure for every new channel activating live streams. It’s designed to stop someone from creating an account and immediately streaming something harmful. Just make sure you plan for this one-time wait so it doesn't mess up your launch day.
Once that initial day is up, you’re free to go live instantly whenever you want, as long as your channel stays in good shape. This waiting game only happens the very first time you turn the feature on.
Staying Out of Trouble
Unlocking live streaming isn't the final step; you also have to maintain it. Your ability to go live is directly tied to your channel’s reputation with YouTube's Community Guidelines.
- No Active Strikes: Getting a Community Guidelines strike can get your live stream access suspended for 90 days.
- No Live Stream Bans: Sometimes, YouTube might put a restriction just on your live streaming privileges, even if you don't have a full channel strike.
These rules exist to keep the platform safe for viewers and creators alike. Just be mindful of what you're broadcasting, and you'll have no problem keeping your "keys to the studio."
Alright, let's get into the nuts and bolts of your stream. The technical side can seem intimidating, but it really boils down to getting a few key settings right. Once you understand what they do, you'll be able to dial in a perfect, professional-looking stream every time.
Think of it like this: these settings are the instructions you give your computer to get your video to your audience smoothly. We’re going to focus on three main things: bitrate, resolution, and frame rate. Master these, and you'll go from guessing to streaming with confidence.
Let's start with the big one: bitrate. Imagine your internet connection is a pipeline. Bitrate is the measure of how much video data you can push through that pipeline every second.
A higher bitrate means more data gets sent, which translates to a sharper, cleaner picture for your viewers. If your bitrate is too low, your stream will look blocky and pixelated—like you're trying to send a high-definition movie through a grainy fax machine. It just won’t work.
Your Internet Speed Is The Boss
This is the number one spot where new streamers trip up. You can have the most powerful computer on the market, but if your internet upload speed can’t handle your bitrate, your stream is going to suffer. It will buffer, lag, or drop frames.
Before you do anything else, run an internet speed test. The only number you need to care about is your upload speed. Forget about download speed; it doesn't matter for streaming out.
As a rule of thumb, your stream's bitrate should never be more than 75-80% of your total upload speed. This gives you a safety cushion for any dips or fluctuations in your connection, keeping your broadcast stable.
Now, before you can even worry about bitrate, you first have to unlock the ability to stream on YouTube. It’s a simple, one-time hurdle every new creator has to clear.
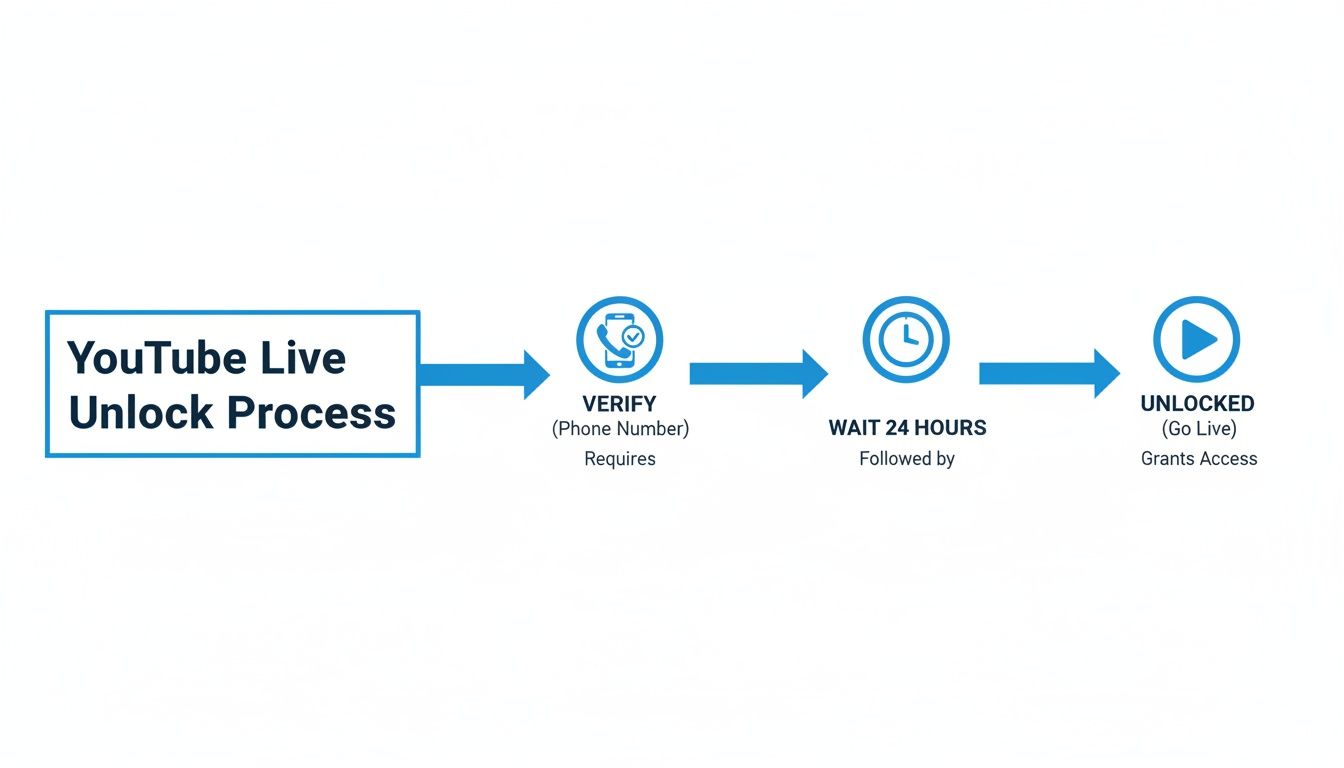
As you can see, it’s a straightforward path: you verify your account with a phone number, wait out a one-time 24-hour holding period, and then the "Go Live" button is yours to use forever.
With that out of the way, we can get back to your settings. Resolution (like 1080p or 4K) determines the sharpness of your video—it's the number of pixels packed into the frame. Frame rate (or fps) is how many of those frames are shown per second. A higher frame rate like 60 fps gives you that buttery-smooth motion, perfect for high-action content, while 30 fps is the standard for most everything else.
YouTube Recommended Stream Settings By Resolution
Thankfully, YouTube doesn't make us guess. They provide official guidelines that are tested and proven to work. Sticking to this chart is your best bet for a stable, high-quality stream that looks great to your audience.
| Resolution | Frame Rate (fps) | Video Bitrate Range (Mbps) | Audio Bitrate (kbps) |
|---|---|---|---|
| 4K (2160p) | 60 | 20 – 51 | 128 (Stereo) |
| 4K (2160p) | 30 | 13 – 34 | 128 (Stereo) |
| 1440p | 60 | 9 – 18 | 128 (Stereo) |
| 1440p | 30 | 6 – 13 | 128 (Stereo) |
| 1080p | 60 | 4.5 – 9 | 128 (Stereo) |
| 1080p | 30 | 3 – 6 | 128 (Stereo) |
| 720p | 60 | 2.25 – 6 | 128 (Stereo) |
| 720p | 30 | 1.5 – 4 | 128 (Stereo) |
Remember, bitrate, resolution, and frame rate are all tied together. You can't just crank one up without affecting the others. Always start by figuring out what your internet upload speed can handle, and then choose settings from the chart that fit comfortably within that limit.
Finally, there’s the codec. A codec’s job is to compress your video into a smaller, more manageable package for streaming. For YouTube Live, the gold standard is H.264 (also called AVC).
It strikes the perfect balance between video quality and file size, and it's universally supported. While newer codecs are out there, H.264 is the most reliable and foolproof choice for live streaming in 2026. If you want to go deeper on how this works, you can explore the details of video compression for YouTube in our other guide.
Alright, with your account ready and your settings dialed in, it's time to pick your encoder. This is the piece of software that takes everything you're creating—your screen, your pre-recorded videos, your audio—and bundles it up to send over to YouTube.
Think of it like the shipping department for your stream. It packages your content into a neat box and mails it directly to your YouTube channel so your audience can see it live.
It might seem like there are a million options out there, but honestly, you don't need to spend a dime to get started. For most creators, the best choices are completely free. The trick is finding a tool that gives you the features you need without bogging down your computer.
The Best Free Streaming Software
When you're just starting out, two names pop up over and over again for a good reason: OBS Studio and Streamlabs Desktop. They're both free and incredibly capable, but they serve slightly different creators.
OBS Studio: This is the industry standard. It’s an open-source tool famous for being lightweight and endlessly customizable. Because it uses less of your computer’s processing power, it's a lifesaver if you're working with an older machine or running other demanding programs. The trade-off? It has a steeper learning curve. You’ll have to manually add things like your chat box and alert notifications.
Streamlabs Desktop: Built right on top of OBS, Streamlabs is all about being user-friendly from the get-go. It comes with built-in themes, alerts, and an integrated chat, which makes setting up your first stream an absolute breeze. The downside is that all those convenient features make it heavier, so it can use more of your computer’s resources.
My advice? If you're new to this, start with Streamlabs Desktop. It just works. Once you get comfortable and want more control (or need to free up system resources), you can always "graduate" to OBS Studio for its lean performance.
Connecting Your Software to YouTube
After you've installed your encoder, you need to tell it where to send your stream. You do this with a unique code called a stream key.
Think of your stream key like the front door key to your live broadcast. It's a private code that connects your software directly to your YouTube channel. Never, ever share this key publicly. Anyone who gets their hands on it can stream to your channel.
Getting your stream key is easy.
- Head to your YouTube Studio and click the Go Live button.
- On the next screen, choose the Stream tab from the menu on the left.
- You'll see your stream key under "Stream settings." Just click Copy and then paste it into the "Stream" settings of your software (like OBS or Streamlabs).
Once that key is pasted in, your software and YouTube are officially talking to each other.
Essential Features for Faceless Creators
As a faceless or AI-video creator, your needs are a little different. You're not worrying about webcam lighting or a green screen. Instead, your focus is on smoothly managing all your different media elements.
This is where your software’s scene management becomes your best friend. Scenes are basically pre-set layouts you can switch between instantly with a single click.
For instance, you can set up a few scenes ahead of time:
- A "Starting Soon" scene with a countdown timer and some background music.
- A "Main Content" scene designed to play your polished, AI-generated video.
- A "Screen Share" scene if you need to do a tutorial or walk through a website.
- A "Q&A" scene that just shows a simple background with your viewer chat displayed nice and big.
By preparing these scenes before you go live, you can run a dynamic and professional-looking stream without ever showing your face. It's how you turn a simple broadcast into a polished production.
Alright, you've dialed in your technical settings. Now for the fun part: the gear. Let's talk about the actual hardware you'll need to go live. It’s easy to get overwhelmed here, but don’t worry. The "best" setup is simply the one that lets you stream reliably without breaking the bank.
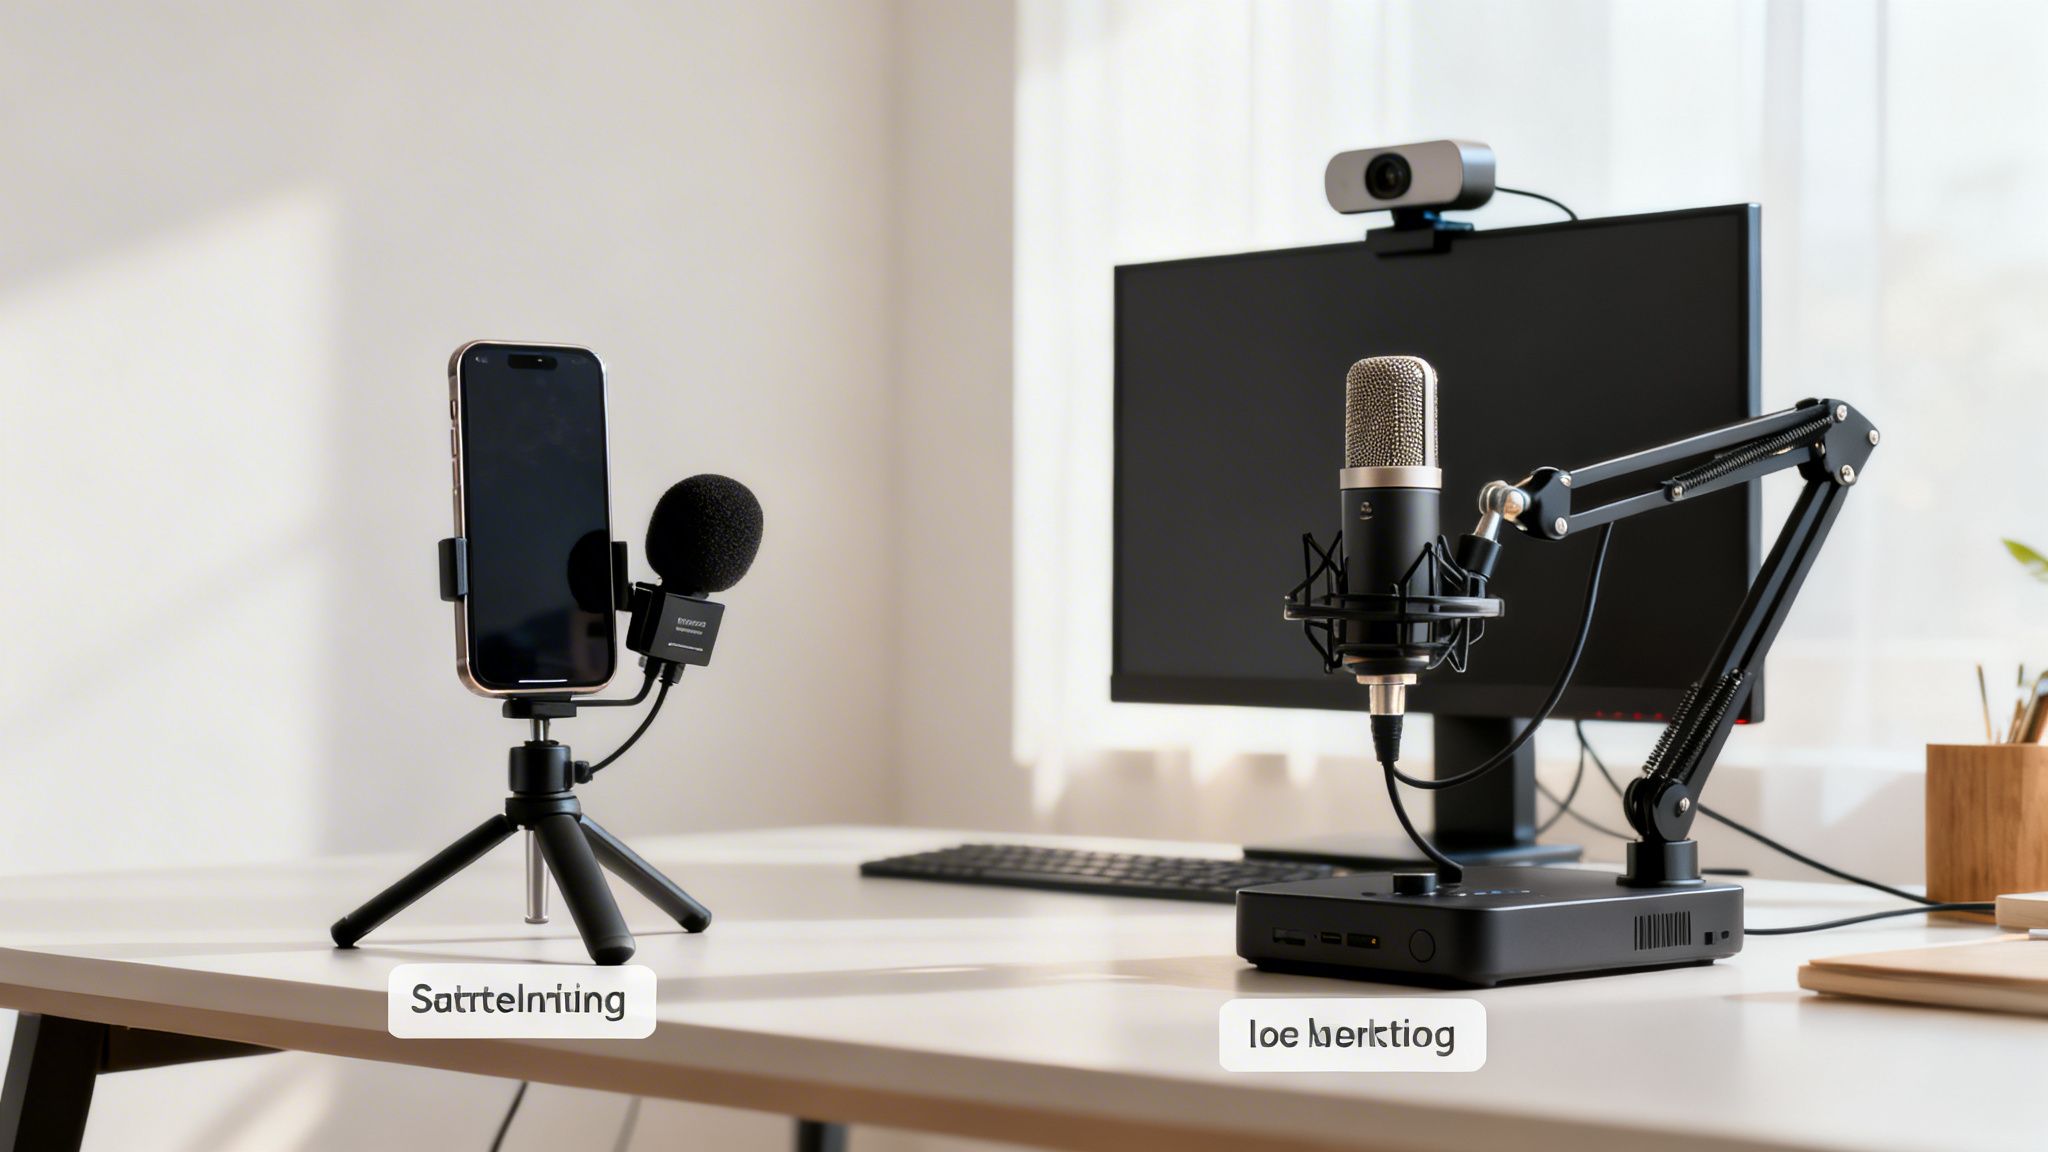
We'll look at two common paths—streaming from your phone and building a more robust desktop setup. I'll make sure to point out what really matters if you're a faceless or AI-video creator.
Streaming From Your Smartphone
Hopping on a live stream from your phone is the quickest way to get started. There’s just one small hurdle: YouTube requires you to have at least 50 subscribers before you can go live from their mobile app. Once you hit that first milestone, you can broadcast from pretty much anywhere.
Honestly, your phone’s built-in camera and mic are good enough to start. But if you want to punch up the quality without spending much, a couple of small accessories make a world of difference.
- A Simple Tripod: Nobody wants to watch a shaky video. A small tripod or even a basic phone stand gives you a steady, professional-looking shot that’s just easier on the eyes.
- An External Microphone: Your phone's mic is built to hear everything, including the air conditioner, your dog barking, or the traffic outside. A cheap lavalier (lapel) mic that clips to your shirt will make your voice a hundred times clearer.
Think of it this way: viewers will forgive a slightly grainy video, but they will click away instantly if the audio is a garbled mess. Clear sound is everything.
Building Your Desktop Streaming Setup
When you're ready for more control and a slicker production, it's time to move to a desktop setup. This is almost essential for faceless creators who are juggling pre-recorded videos, screen sharing, and other media during a live stream.
Let's break down the key pieces of the puzzle.
A Capable Computer
Your computer is the engine of your entire streaming operation. It’s doing a lot of heavy lifting—encoding your video, running software, and managing your content all at once. For faceless creators who are mainly streaming pre-made video files, your computer's power is way more important than your camera.
You don't need a monster gaming rig that costs thousands. A solid PC with a modern processor (like an Intel i5/i7 or AMD Ryzen 5/7 from the last few years) and at least 16GB of RAM will give you a smooth, professional broadcast without lag or stuttering.
A Clear Microphone
Even if you're never on screen, your voice is your brand. A good USB microphone is probably the single most important piece of hardware you can buy. For a faceless creator, your voice is the face of the channel.
Brands like Blue (the Yeti is a classic for a reason) or Audio-Technica offer incredible USB mics that deliver crisp, rich audio right out of the box.
A Simple Webcam
If you’re a true faceless creator, you can just skip this! But if you plan on using a small picture-in-picture of yourself, or maybe a VTuber avatar that tracks your movements, a basic webcam will do the job.
The Logitech C920 has been the go-to choice for years because it’s affordable, reliable, and gives you a great 1080p image. And if you’re thinking about adding more dynamic camera work to your streams, especially on the go, it’s worth learning what a gimbal does to keep your phone footage buttery smooth.
Your Final Checklist for a Perfect Stream
That moment right before you hit the “Go Live” button can be a mix of pure excitement and raw nerves. A little prep work can make all the difference, turning that anxiety into the confidence you need for a great show.
Think of this as your pre-flight check. Running through your setup, content, and community plan helps you catch those little problems that can derail a stream. This way, you can focus on what really matters: connecting with your viewers.
Technical Checks
Before you do anything else, you’ve got to check the engine. Technical snags are the quickest way to send viewers clicking away, so this part is non-negotiable.
- Internet Speed Test: Run a speed test just minutes before you start. Is your upload speed holding steady and well above the bitrate you’ve set? This is easily the most critical tech check.
- Audio Levels: Open up your streaming software and do a quick soundcheck. Talk into your mic. Are the levels staying in the green? If they’re jumping into the red, you’re going to sound distorted. Bad audio is a certified stream-killer.
- Video Feed: Is your video source—whether it's your camera, screen share, or a pre-recorded clip—showing up correctly in your software? Double-check that your resolution and frame rate are what you intended.
Content and Presentation
Once your tech is good to go, it's time to look at the show itself. A polished presentation tells your audience you respect their time and that you came prepared.
Your title and thumbnail are the front door to your stream. They aren't just an afterthought; they're the first thing people see and what makes them decide to click.
- Title and Thumbnail: Are they created, uploaded, and ready to go? Make sure they’re eye-catching and have the right keywords to attract viewers.
- Description and Tags: Did you fill out your stream description with useful info and links? Have you added a good mix of tags to help YouTube’s algorithm figure out who to show your stream to?
- Moderation Settings: Do you have your comment moderation tools active, or have you lined up a few moderators? This is so important for keeping the chat a fun and safe place for everyone.
A Special Checklist for Faceless Creators
If you're a faceless or AI-video creator, your prep work looks a little different. Instead of an on-camera presence, your focus is on making sure all your media runs like clockwork.
- Queue Up Your Media: Load all your video files, graphics, and background music into your streaming software’s media sources. It’s a good idea to put them in the exact order you plan to use them.
- Prepare Your Scenes: Test your different scenes. Do your "Starting Soon," "Main Content," and "Be Right Back" screens all work? Practice switching between them so the transitions feel completely seamless to your audience.
- Chat Window Ready: Make sure you have your live chat open and clearly visible—ideally on a second monitor or a separate tablet. Even without showing your face, engaging with your community in real-time is how you build that loyal following. For more tips on this, check out our guide on how to boost engagement by clipping your best moments.
Frequently Asked Questions About YouTube Live
Jumping into YouTube Live can feel a bit overwhelming, and a lot of the same questions pop up again and again. Let's tackle the big ones so you can get started with confidence.
Can I Go Live on YouTube Immediately?
Not quite. It’s a common misconception, but you can’t just hit a “Go Live” button the second you create a channel.
First, you have to verify your account with a phone number. Once that’s done and you enable live streaming for the first time, YouTube makes you wait 24 hours. Think of this one-time delay as a security check. Just be sure to plan for it and get your account verified a day or two before your first planned stream.
What Is the Minimum Subscriber Count to Go Live?
This is where a lot of new creators get tripped up. The answer really depends on where you're streaming from.
From your desktop: There are zero subscriber requirements to go live from a computer. If you're using streaming software like OBS or Streamlabs, you're free to stream as soon as that initial 24-hour waiting period is over.
From your phone: To stream directly from the YouTube mobile app, you'll need at least 50 subscribers.
For faceless and AI-video creators who rely on desktop software to manage media, this is great news. You can start building your audience with live content from day one, without needing to hit any subscriber milestones first.
Does My Internet Speed Really Matter That Much?
Oh, absolutely. It's one of the most important pieces of the puzzle. Specifically, your upload speed is the hero here. A slow or unstable upload connection is what causes that dreaded buffering, lag, or dropped frames that will make viewers click away in a heartbeat.
Before you ever go live, run a speed test. A good rule of thumb is to set your stream's bitrate to no more than 80% of your total upload speed. That extra 20% gives you a safety cushion for any random dips or fluctuations in your internet connection.
Do I Need Expensive Equipment to Start?
Definitely not. It's easy to get caught up thinking you need a professional studio, but you can get started with what you already have. Your computer and a free program like OBS Studio are all you really need to get on the air.
As a faceless creator, your voice is your most important tool. If you're going to invest in one thing, make it a good, clear USB microphone. You can always upgrade cameras, lights, and other hardware later on as your channel grows and starts earning.
Ready to create stunning videos for your live streams and channel without showing your face? With Aicut, you can generate photorealistic clips, animated characters, and viral video formats in just minutes. Join over 500,000 creators using AI to accelerate their growth and monetization. Start creating with Aicut today!