
You export a video that looks clean in Premiere, DaVinci Resolve, or Final Cut. Text is sharp. Gradients are smooth. Voiceover sounds fine. Then you upload it to YouTube, refresh the page a few minutes later, and the result looks soft, noisy, or strangely flat.
That usually isn't an editing problem. It's an upload workflow problem.
Most blurry uploads come from two things. The file was exported in settings YouTube doesn't handle well, or the video was published before YouTube finished its higher-quality transcodes. If you're making faceless videos, AI-assisted edits, talking-head videos, tutorials, or Shorts, the same rule applies. You have to give YouTube the cleanest possible source and let the platform finish processing before viewers arrive.
Good YouTube upload settings aren't complicated, but they do need to be deliberate. Resolution, codec, frame rate, bitrate, audio, thumbnail timing, and visibility settings all affect what viewers see. If even one part is off, YouTube's re-encode can punish the file.
Why Your Videos Look Blurry on YouTube and How to Fix It
The most common failure point happens right after export. A creator finishes a video in 4K, sends out a heavily compressed 1080p file, uploads it immediately, and shares the link before YouTube has built the HD version. Early viewers get a soft stream, text edges break apart, and the first impression is worse than the actual edit.
That mismatch is the whole issue. Your editor shows the master file. YouTube shows a re-encoded version of whatever you uploaded.
By the mid-2020s, creator guidance had shifted hard toward 4K and 1440p uploads, with technical reviewers noting that 4K and 1440p tend to preserve visible quality better after YouTube re-encoding than native 1080p uploads, which are more likely to look compressed or downsampled on larger screens and mobile devices, according to this creator-focused upload settings review.
Practical rule: If your final upload still starts at 1080p, you're often making YouTube work with a weaker source than it wants.
The fix is straightforward. Export in the right container and codec, upload at a higher resolution when possible, match the frame rate of your source footage, and don't make the video public the second the upload bar finishes. Those steps remove most of the softness people blame on "YouTube compression."
AI creators run into this even more often because generated assets can already contain fine texture problems, baked-in sharpening, or synthetic gradients. If you then compress that material too hard before upload, the artifacts stack. YouTube doesn't clean that up. It usually makes it more obvious.
Perfecting Your Video Export Settings for 2026
A strong upload starts before YouTube Studio. It starts on the export screen.
If the master file is thin, over-compressed, or mismatched to the footage, YouTube has less to work with on its own encode pass. That is why two creators can upload videos that look similar in the editor and get very different results after processing.
For most channels, the safest export baseline is still MP4 with H.264 video and AAC audio. It works across every major editor, uploads cleanly, and gives YouTube a file format it handles well without extra friction. I only move away from that baseline when a post-production workflow has a specific delivery reason.
Start with the format and frame rate first
These defaults cover the majority of YouTube uploads:
- Container: MP4
- Video codec: H.264
- Audio codec: AAC
- Pixels: Square pixels
- Scan type: Progressive
- Frame rate: Match your source footage
Frame rate matching matters because conversion creates avoidable problems. A 24 fps timeline exported at 30 fps can produce awkward motion cadence. A 60 fps screen recording exported lower can make cursor movement, UI animation, and gameplay look less clean. AI-generated clips also break faster here. Interpolated motion, lip sync, and synthetic camera moves often look acceptable in the timeline, then show artifacts after an unnecessary frame-rate change and YouTube recompression.
Keep the source cadence intact.
Resolution is a quality control setting
Creators still ask whether 1080p is enough because many viewers will watch at 1080p or below. The better question is what source file gives YouTube the best material for its own transcodes.
In practice, higher-resolution uploads usually hold up better, especially for:
- Text overlays
- Screen recordings
- Motion graphics
- Charts and UI demos
- AI visuals with gradients, particles, or fine textures
Use these targets when your system and internet connection can handle them:
- 3840×2160 for 4K
- 2560×1440 for 1440p
1440p is often the best middle ground. It gives YouTube more image data than 1080p without the heavier render times and file sizes of full 4K. For AI creators using tools like Aicut, that trade-off is practical. Many AI-generated assets already carry soft edges, banding, or baked-in sharpening. Exporting those projects at 1440p or 4K gives the final upload a better chance of keeping text, faces, and composited backgrounds intact.
Bitrate decides how much damage your file takes before YouTube even touches it
Weak exports usually show up first. If the bitrate is too low, gradients get dirty, motion turns blocky, and thin text loses edge definition. Then YouTube compresses the file again.
A reliable working preset for SDR 4K and 1440p looks like this:
| Setting | Recommendation |
|---|---|
| Format | MP4 |
| Video codec | H.264 |
| Audio codec | AAC |
| Resolution | 3840×2160 or 2560×1440 when possible |
| Frame rate | Match source footage |
| 4K bitrate at 24 to 30 fps | 35–45 Mbps |
| 4K bitrate at 48 to 60 fps | 53–68 Mbps |
| Audio bitrate | AAC at or above 384 kbps for stereo |
| Audio sample rate | 48 kHz |
Those numbers are a solid baseline, not a law. A talking-head video with a blurred background can survive at the lower end. Fast motion, game footage, kinetic captions, and AI scenes with smoke, rain, lighting changes, or textured backgrounds usually need more headroom.
I recommend saving two export presets in your editor. One for standard long-form videos. One for text-heavy or AI-heavy videos where compression flaws show up faster. If upload speed is a constraint, reduce file size carefully instead of crushing bitrate blindly. This guide on video compression for YouTube uploads is useful if you need smaller files without giving away too much image quality.
VBR vs. CBR matters less than creators think. The core issue is starving the file. A high-quality VBR export with a sensible target and enough maximum headroom usually works well. Aggressive compression presets do not.
Audio quality changes how polished the whole video feels
Viewers forgive a little visual softness faster than they forgive harsh or swirly voice audio.
Use straightforward audio settings:
- Codec: AAC
- Sample rate: 48 kHz
- Stereo output: Yes, if that matches your mix
- Bitrate: 384 kbps or higher for stereo
That setup works well for voiceover channels, interviews, tutorials, documentary edits, and AI-narrated videos. If your channel depends on synthetic narration, listen for artifacts before export, not after upload. YouTube will not repair metallic consonants, pumping, or brittle highs introduced earlier in the workflow.
Export presets that hold up in real publishing workflows
Preset for long-form landscape videos
Use this for explainers, commentary, tutorials, interviews, and documentary-style edits.
- Resolution: 4K when practical, otherwise 1440p
- Frame rate: Match source
- Codec: H.264
- Bitrate: Stay in the upper end of the recommended range if the video includes motion graphics, screen recordings, or fast cuts
- Audio: AAC, 48 kHz, stereo, 384 kbps or higher
Preset for AI-generated or text-heavy edits
Use this for Aicut workflows, caption-first videos, faceless channels, and any project built from generated visuals.
- Prioritize 1440p or 4K exports
- Avoid low bitrate presets, especially on scenes with gradients or synthetic lighting
- Check subtitle edges, small UI text, and facial detail before upload
- Export short test clips when trying a new AI style or prompt format
That last step saves time. AI content changes fast from one workflow to the next. A preset that works for static explainer visuals may fall apart on animated character footage or dense motion graphics.
If Shorts are part of your monetization mix, creative choices on pacing and framing also affect ad suitability and retention. FindClout's insights on Shorts ads are useful context when you build export presets for vertical content and sponsored placements.
A final note from practice. The best preset is the one you can repeat without guessing. Save it, name it clearly, and keep a one-page cheat sheet for 24 fps, 30 fps, 60 fps, 1440p, and 4K exports. That matters even more on AI channels, where one weak export step can undo a strong prompt, clean voice clone, and hours of edit work.
Adapting Settings for Shorts and Long-Form Video
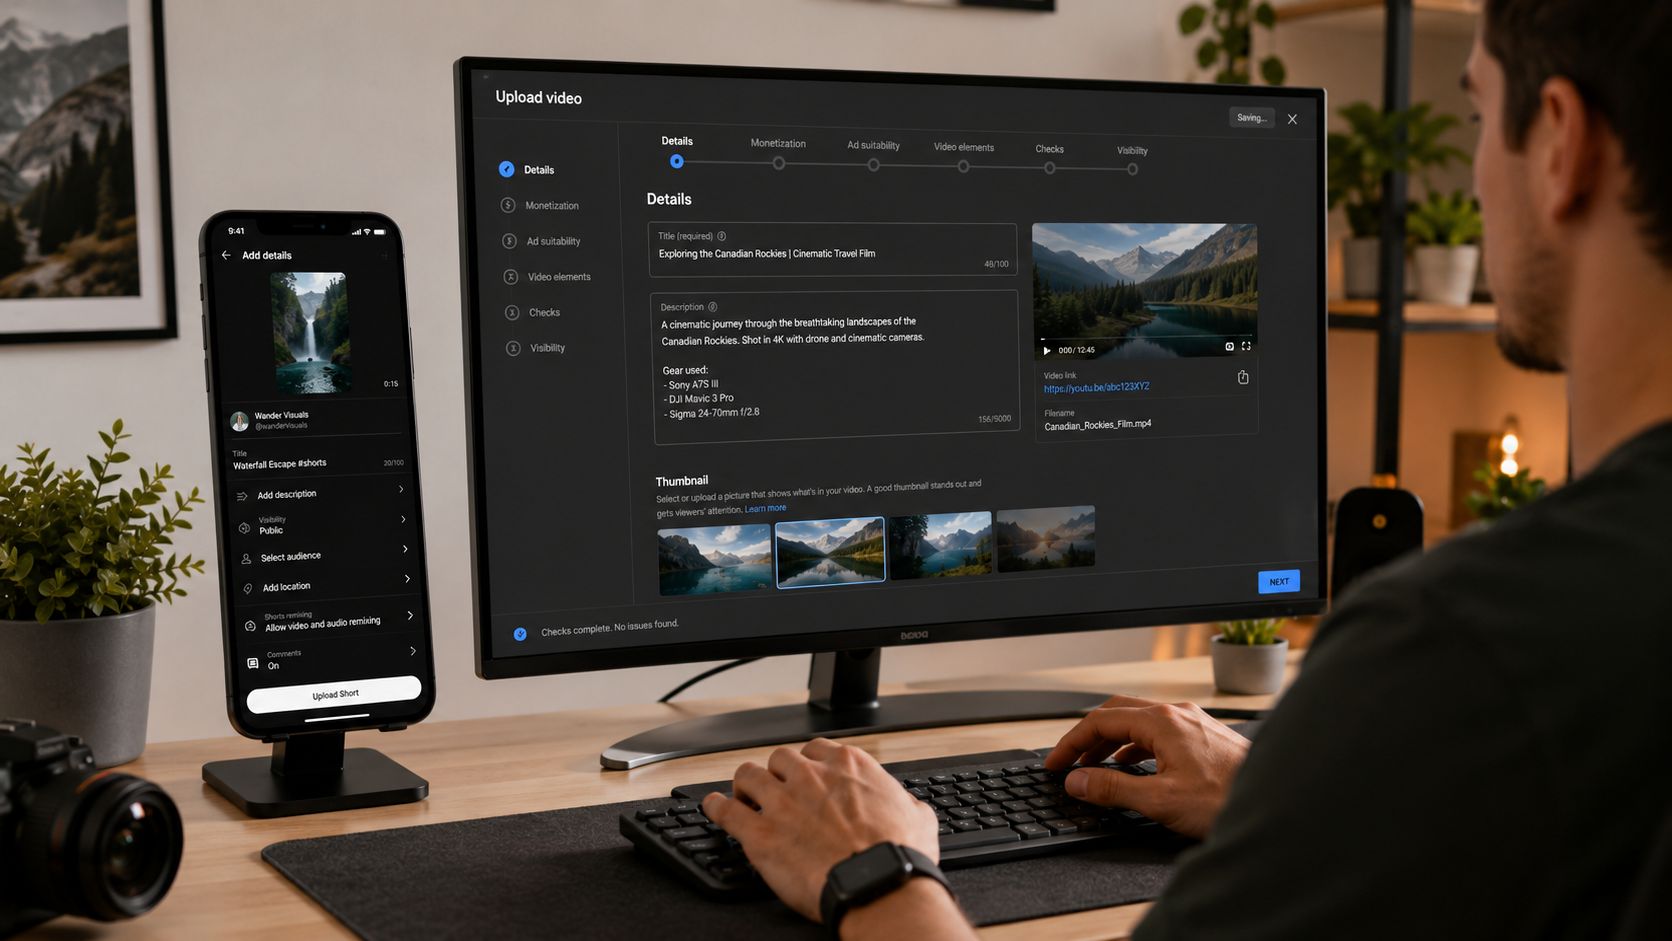
A YouTube Short and a long-form video can use the same codec family, but they shouldn't be treated like the same product. One lives on a vertical mobile screen with interface elements crowding the frame. The other often gets watched on TVs, laptops, and tablets where softness is easier to notice.
Long-form needs room for detail
For regular YouTube videos, use 16:9 framing and keep your master as clean as possible. Long-form content benefits more from higher-resolution uploads because viewers are more likely to watch on larger displays, pause to inspect the screen, or notice compression in graphics and B-roll.
That matters even more for channels built on:
- Screen recordings
- Text callouts
- Maps, charts, or motion graphics
- AI compositing with layered backgrounds
Those elements tend to expose softness fast.
Shorts need framing discipline
Shorts are a different job. The aspect ratio is 9:16, and the viewer usually watches on a phone with YouTube interface elements layered on top. If your captions, labels, or CTA text sit too low or too high, parts of the message can get covered.
When exporting Shorts, think about two things at once:
- Visual hierarchy: Keep the subject and text in the center-safe area.
- Compression tolerance: Fast cuts and animated backgrounds can still break down if the export is too light.
A simpler vertical Short can often tolerate a lighter file than a dense long-form edit, but don't confuse "smaller screen" with "compression doesn't matter." It still matters. It just shows up differently, usually in hair edges, moving text, and noisy backgrounds.
Build two presets, not one
Most creators get better results when they stop forcing one export preset onto every format.
Use one preset for:
- 16:9 long-form uploads
- Higher-resolution delivery
- More conservative quality settings for detailed scenes
Use another for:
- 9:16 Shorts
- Vertical framing
- Text placed inside safe zones
- Fast upload and quick review before publishing
If you monetize or test Shorts seriously, ad behavior and viewer flow matter too. FindClout's insights on Shorts ads are worth reading because they help you think beyond the file export and into how the format gets consumed.
The best Shorts preset doesn't just export cleanly. It protects your text, your focal point, and your hook in the first seconds.
Mastering the YouTube Studio Upload Workflow
A clean export can still launch badly if the upload setup is rushed. I see this often with AI-assisted channels. The file is sharp on the timeline, the creator uploads it, clicks through defaults, publishes too early, and the first viewers get weak playback, a vague title, or broken end screen logic.
YouTube Studio decides more than storage. It shapes click-through, session flow, and the quality viewers see in the first hour.
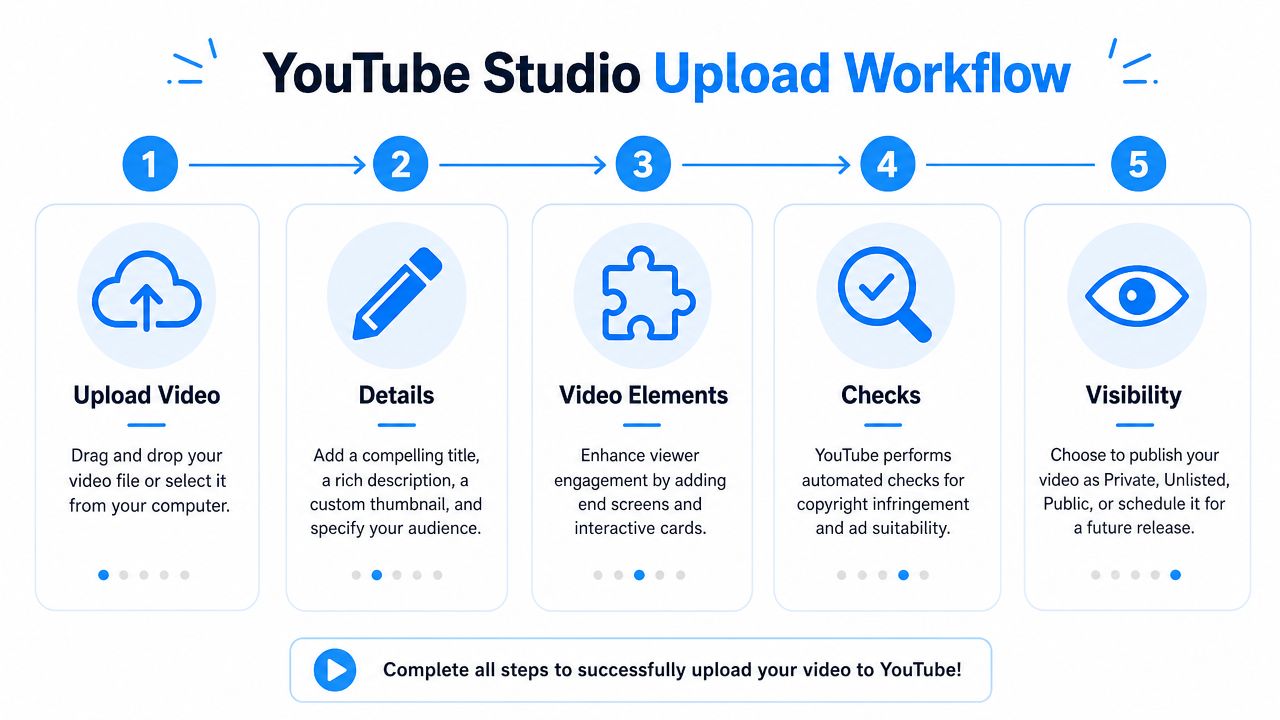
Set up the details that affect performance first
Start with the fields viewers notice before they ever watch.
- Title: Make the topic clear in the first few words.
- Thumbnail: Show one idea. Strong contrast beats clutter.
- First lines of the description: Tell the viewer what they will get and who the video is for.
Tags are low priority. Packaging is not.
If your workflow includes product links, newsletters, affiliate offers, or lead magnets, learn how to optimize YouTube description links so the top of the description stays readable instead of turning into a wall of links.
AI creators should be stricter here than they think. If a video is built with Aicut, stock footage, generated voice, or templated scenes, the packaging has to do more trust-building up front. Clear labeling, a believable thumbnail, and a direct promise in the description help the video feel intentional instead of mass-produced.
Use the features that improve watch flow
Chapters, cards, and end screens affect how people move through the video and where they go next. That matters for tutorials, list videos, explainers, and faceless AI channels that depend on strong session time.
Chapters
Chapters help viewers find the part they wanted without scrubbing around. They also make longer videos feel easier to commit to.
End screens
Send viewers to the next logical watch. A related sequel, part two, or deeper tutorial usually works better than your latest upload.
Cards
Place cards where the viewer already wants more context. If the card interrupts the moment, it gets ignored.
If you want a step-by-step refresher on the full posting sequence, this guide on how to post a video on YouTube covers the platform flow in more detail.
Here is a quick visual walkthrough before the visibility step:
Handle visibility settings with a quality check in mind
A lot of creators publish the moment the upload bar finishes. That is too early.
YouTube still needs time to process higher playback versions after the file arrives. If you publish immediately, early viewers can get a softer stream than the one you exported. For standard uploads, set the video to unlisted or private first, wait for higher resolutions to appear, then publish or schedule it. That extra pause is one of the simplest ways to protect launch quality.
My rule is simple. Never judge the upload by the local file. Judge the processed version inside YouTube.
Review the processed video before it goes public
Use a short pre-publish checklist:
- Play the uploaded version on desktop and confirm HD or 4K options are available.
- Check captions, on-screen text, and subtitles at full screen.
- Listen for voice issues such as clipping, harsh S sounds, or volume jumps.
- Shrink the thumbnail down and confirm the core idea still reads.
- Test links, cards, and end screens so viewers do not hit dead ends.
For AI-assisted workflows, extra discipline is necessary. Generated visuals can look polished in the editor and break after processing in subtle ways, especially on text edges, facial details, and motion transitions. If you use Aicut to produce videos at volume, build this review step into your preset cheat sheet and publishing SOP. Speed helps, but only if the final upload still looks deliberate.
Optimizing Uploads for AI-Generated Content
AI-generated videos add a new layer to YouTube upload settings because the source material behaves differently from camera footage. Synthetic textures, generated lighting, lip-sync artifacts, stylized motion, and baked-in sharpening all react badly to poor exports.
AI footage breaks in different places
Traditional footage usually falls apart in shadows, motion, and gradients when compressed too hard. AI footage often breaks at:
- Fine text edges
- Artificial skin textures
- Repeating background patterns
- Smoke, particles, and glow effects
- Fast zoom transitions
That means faceless channels need cleaner exports than they might assume, especially for story formats, motion templates, and narration-heavy edits built from generated scenes.
If your workflow includes prompt-based visuals, synthetic voiceovers, or template-driven scenes, this explanation of what AI-generated content means in practice is a useful baseline for thinking about how these assets differ from standard footage.
Keep AI edits readable, not just dramatic
A lot of AI videos look impressive in the timeline because the previews are large and local. Once uploaded, the weak points show up fast. Tiny subtitles become fuzzy. Character outlines shimmer. Gradient backgrounds band. Over-sharpened motion starts to look brittle.
The safest approach is simple:
- Export at a higher resolution when possible
- Avoid stacking too many compression steps
- Don't screen-record a generated video if you can export the master directly
- Check the final YouTube transcode on mobile and desktop
That last point matters. AI creators often optimize only for one viewing environment, usually mobile. But many channels now get mixed consumption across phone, desktop, and TV.
Metadata matters more for format-driven channels
AI channels often work inside recognizable formats. Viewers don't just search by topic. They also search by style, pattern, or recurring concept. That's why packaging matters. A title should identify both the subject and the format clearly enough that the right viewer clicks immediately.
A good AI upload doesn't hide the format. It signals it fast and makes the promise easy to understand.
Description writing should stay clean too. Don't stuff it with every variation of "AI video" and "viral Shorts." Name the concept, support the title, add any needed links, and move on. On format-driven channels, consistency usually beats cleverness.
Your Quick-Reference Presets and Final Checks
Most creators don't need more theory. They need a stable checklist they can trust every time they export and publish.
This is the version worth saving:
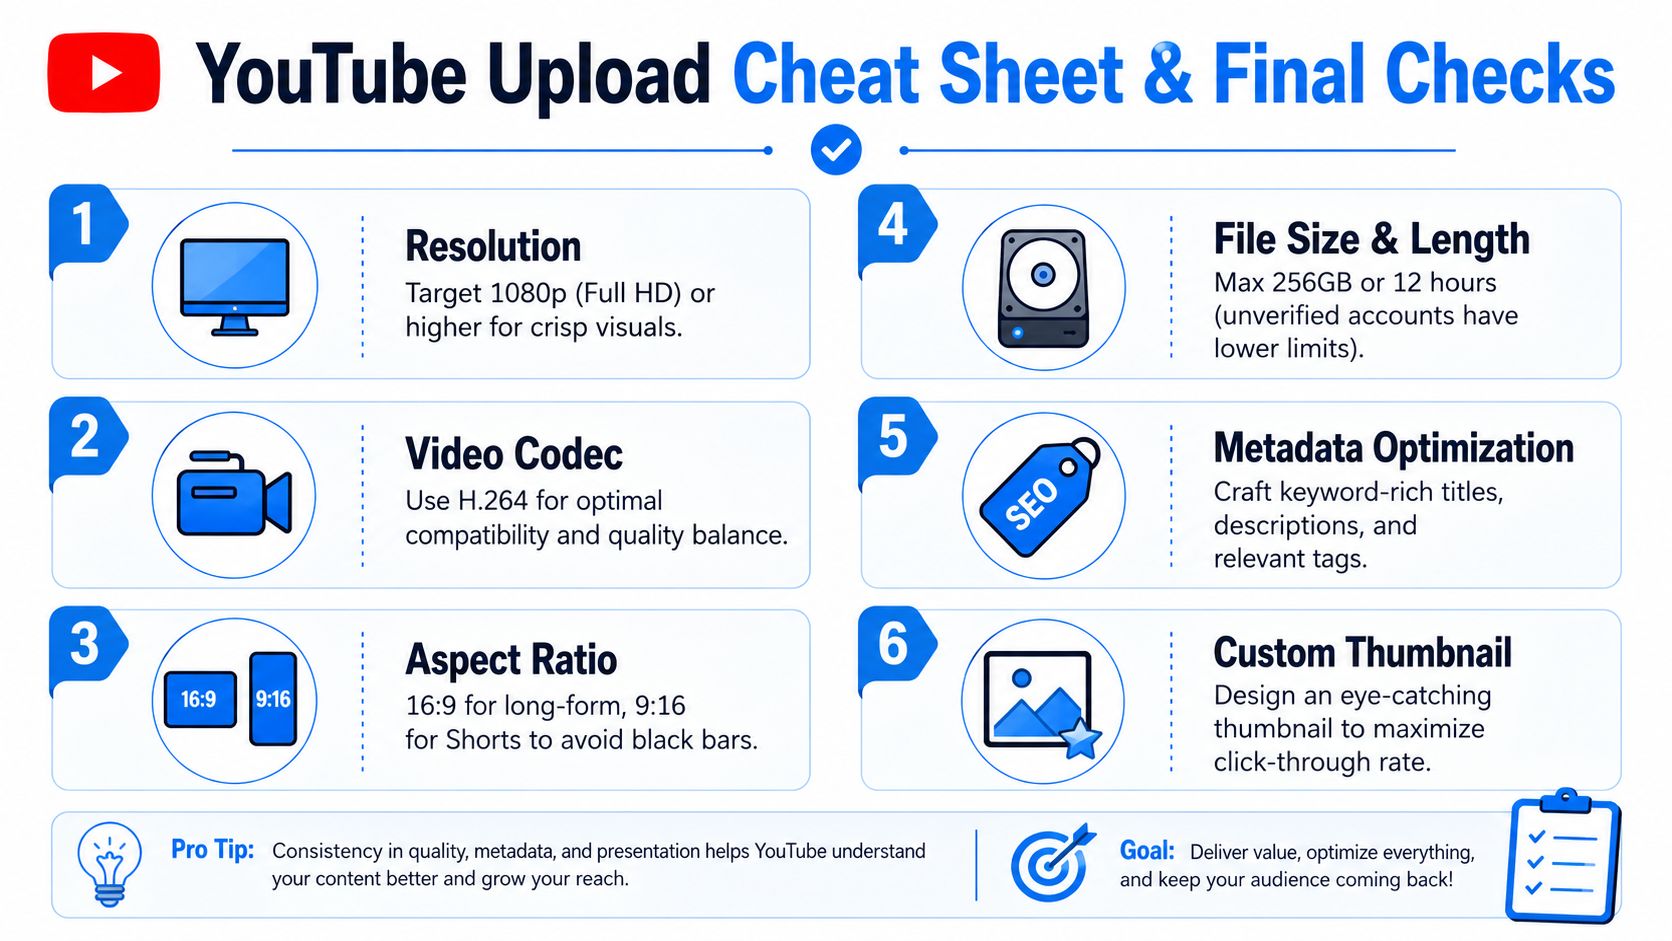
The preset cheat sheet
Keep two presets in your editor.
| Use case | Core preset |
|---|---|
| Long-form YouTube video | MP4, H.264, AAC, 16:9, match source frame rate, export at 4K or 1440p when possible |
| YouTube Short | MP4, H.264, AAC, 9:16, match source frame rate, place text in safe zones |
Then keep these fixed habits:
- Resolution first: If your machine and connection can handle it, export above 1080p.
- Audio discipline: AAC, 48 kHz, clean stereo mix, no clipping.
- Frame-rate matching: Keep source and export aligned.
- Direct export: Avoid re-saving through extra apps that recompress the file.
Final checks before publish
These are the checks that catch most preventable mistakes:
- Thumbnail test: Shrink it down and see if the idea still reads.
- Caption review: Auto-captions are helpful, but they still need a pass on names, jargon, and hooks.
- Playback check: Confirm the processed video looks right on both desktop and mobile.
- End-screen path: Make sure the next click leads to something relevant.
- Visibility timing: Let processing finish before the public sees it.
What usually doesn't work
Some habits keep causing the same problems:
- Uploading 1080p by default because it feels "good enough"
- Using old export presets made for another platform
- Publishing instantly after the upload completes
- Letting text sit at the edge of a Short
- Over-compressing AI visuals before YouTube compresses them again
What tends to hold up
The creators who get consistent results usually do the boring things well. They save tested presets. They export clean masters. They review the processed file, not just the timeline. They treat upload settings as part of production, not an afterthought.
You don't need endless tweaking. You need a repeatable workflow.
If you want to create and publish faceless videos faster, Aicut gives you an efficient way to build AI video workflows with templates, voiceovers, scheduling, and one-click posting. It's a practical option for creators who want faster production without losing control of quality.