AI-powered slow motion is all about frame interpolation. In simple terms, the AI intelligently creates brand-new frames and inserts them between the original ones in your video. This is how you can turn standard footage into something incredibly smooth and cinematic, without needing a special high-speed camera. It’s a complete game-changer for adding that professional polish to your work.
How AI Slow Motion Transforms Your Videos
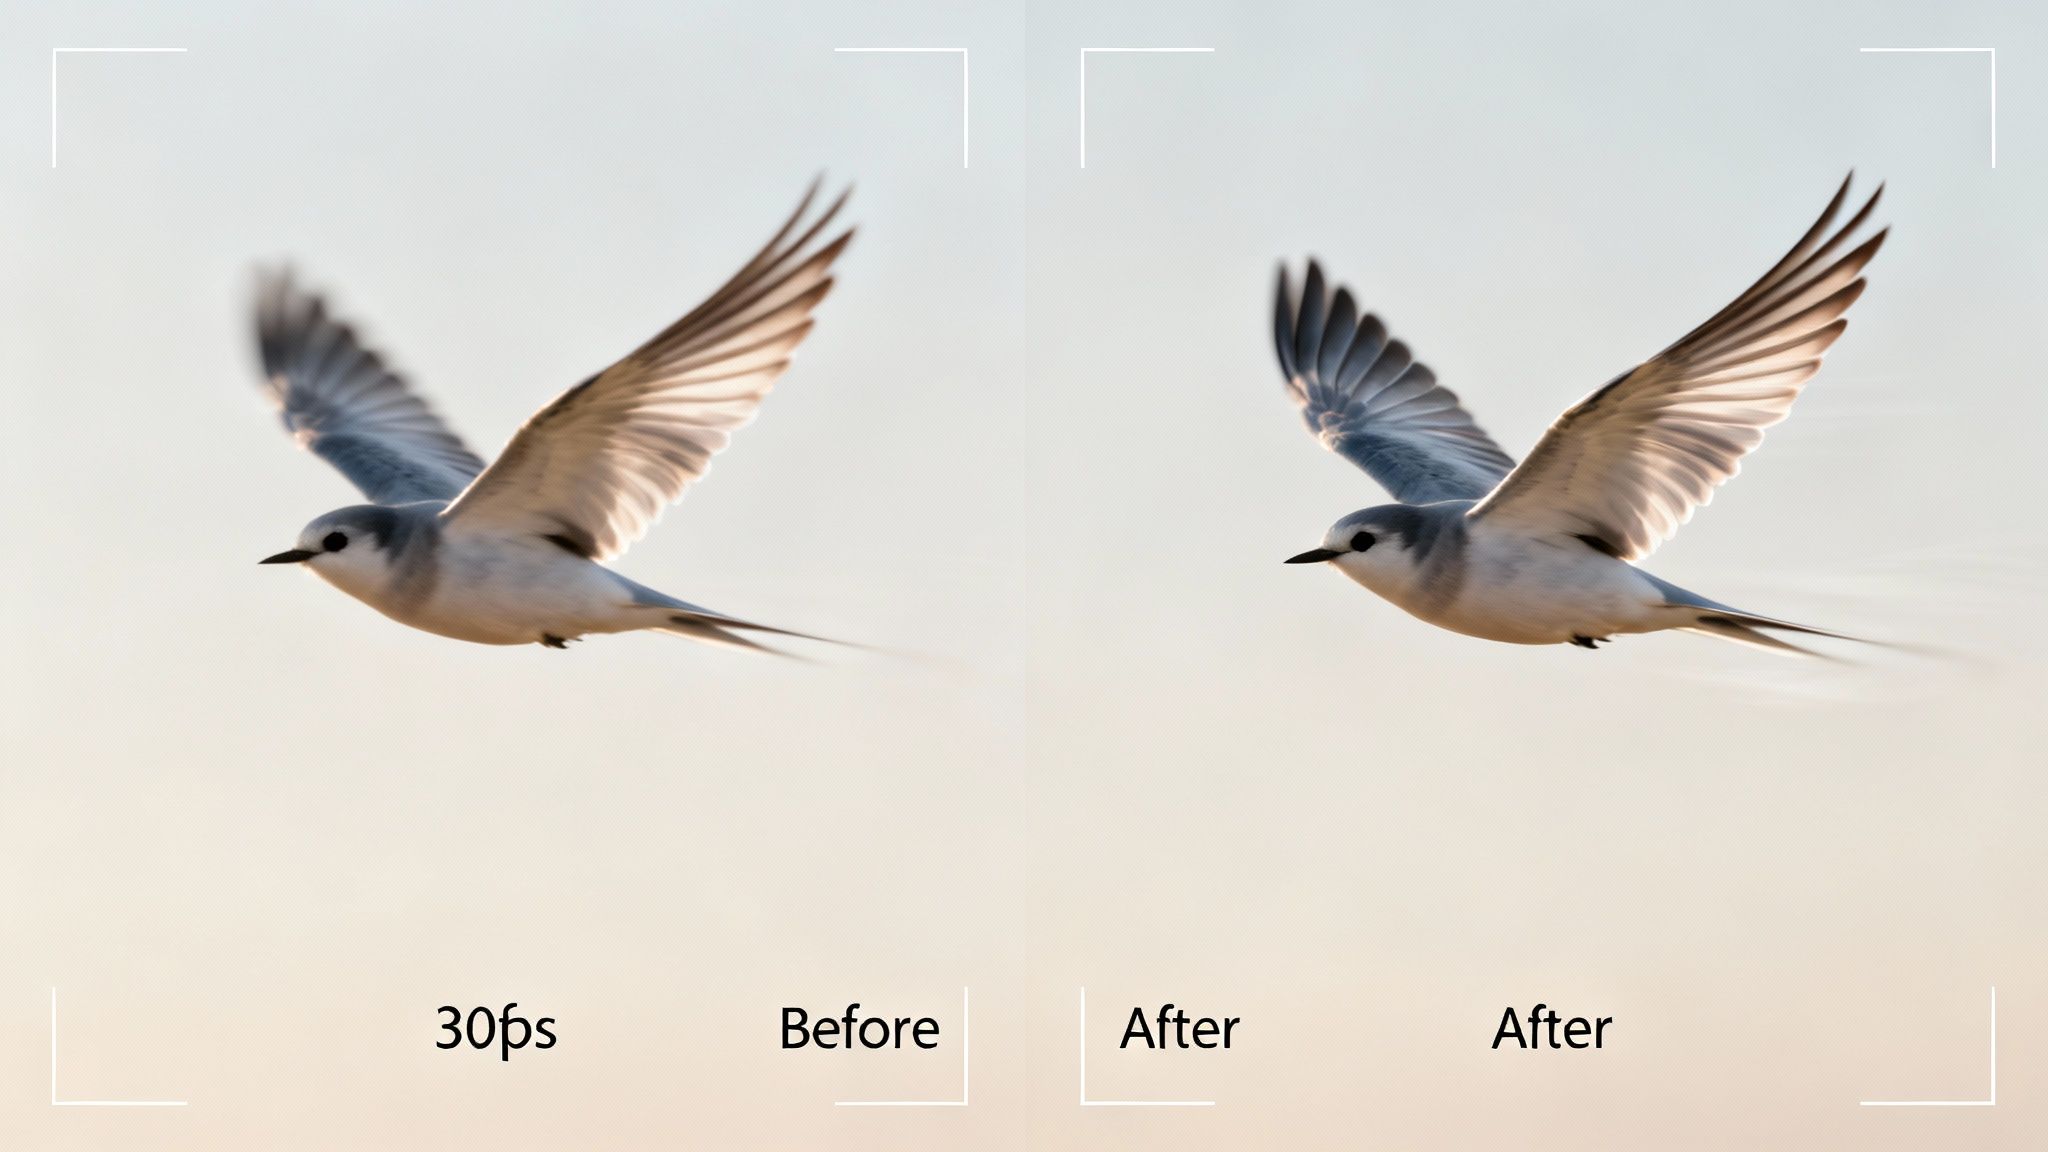
Ever seen those buttery-smooth, cinematic slow-motion shots and wondered how they were made without a Hollywood budget? The secret is AI frame interpolation. Traditional slow-motion just duplicates and stretches out your existing frames, which almost always leads to choppy, stuttering video. AI does something far more clever.
AI actually analyzes the motion between your original frames and then generates entirely new ones to fill in the gaps.
Think about it: you could take a standard 30fps clip of a bird taking flight and transform it into a breathtaking 240fps masterpiece. Suddenly, you can see the intricate details of every single wing flap—details that were completely lost in the original footage. It’s not just for looks; this technology adds a whole new layer of visual information and storytelling potential. The impact is huge, similar to how drones with Artificial Intelligence are revolutionizing industries by revealing new perspectives.
The Power of Predictive Frames
The process itself is remarkably sophisticated. These AI models have been trained on massive libraries of video content to learn how things are supposed to move. So when you tell it to slow down a clip, the AI is essentially predicting what should have happened between two frames and then creates a new image based on that prediction.
This approach gives you a few major advantages:
- Cinematic Quality: It instantly gives standard footage that professional, high-end look.
- Creative Flexibility: You can decide to slow down any clip after you've shot it, which gives you incredible freedom in post-production.
- Detail Enhancement: It uncovers subtle movements and textures that are completely invisible at normal playback speeds.
This technology didn't just appear out of nowhere. The deep learning era from 2000-2011 was its own kind of "AI slow motion," where progress was bottlenecked by computing power. Early GPUs had memory bandwidths around 20 GB/s—a tiny fraction of today's 1 TB/s speeds. Training was painfully slow until powerful GPU clusters finally broke through the barrier and accelerated development.
This fundamental shift from simply duplicating frames to intelligently creating them is one of the most exciting https://www.aicut.pro/blog/benefits-of-ai-in-video-production, putting what was once a high-end effect into the hands of any creator.
Getting Your Footage Ready for Flawless Slow Motion
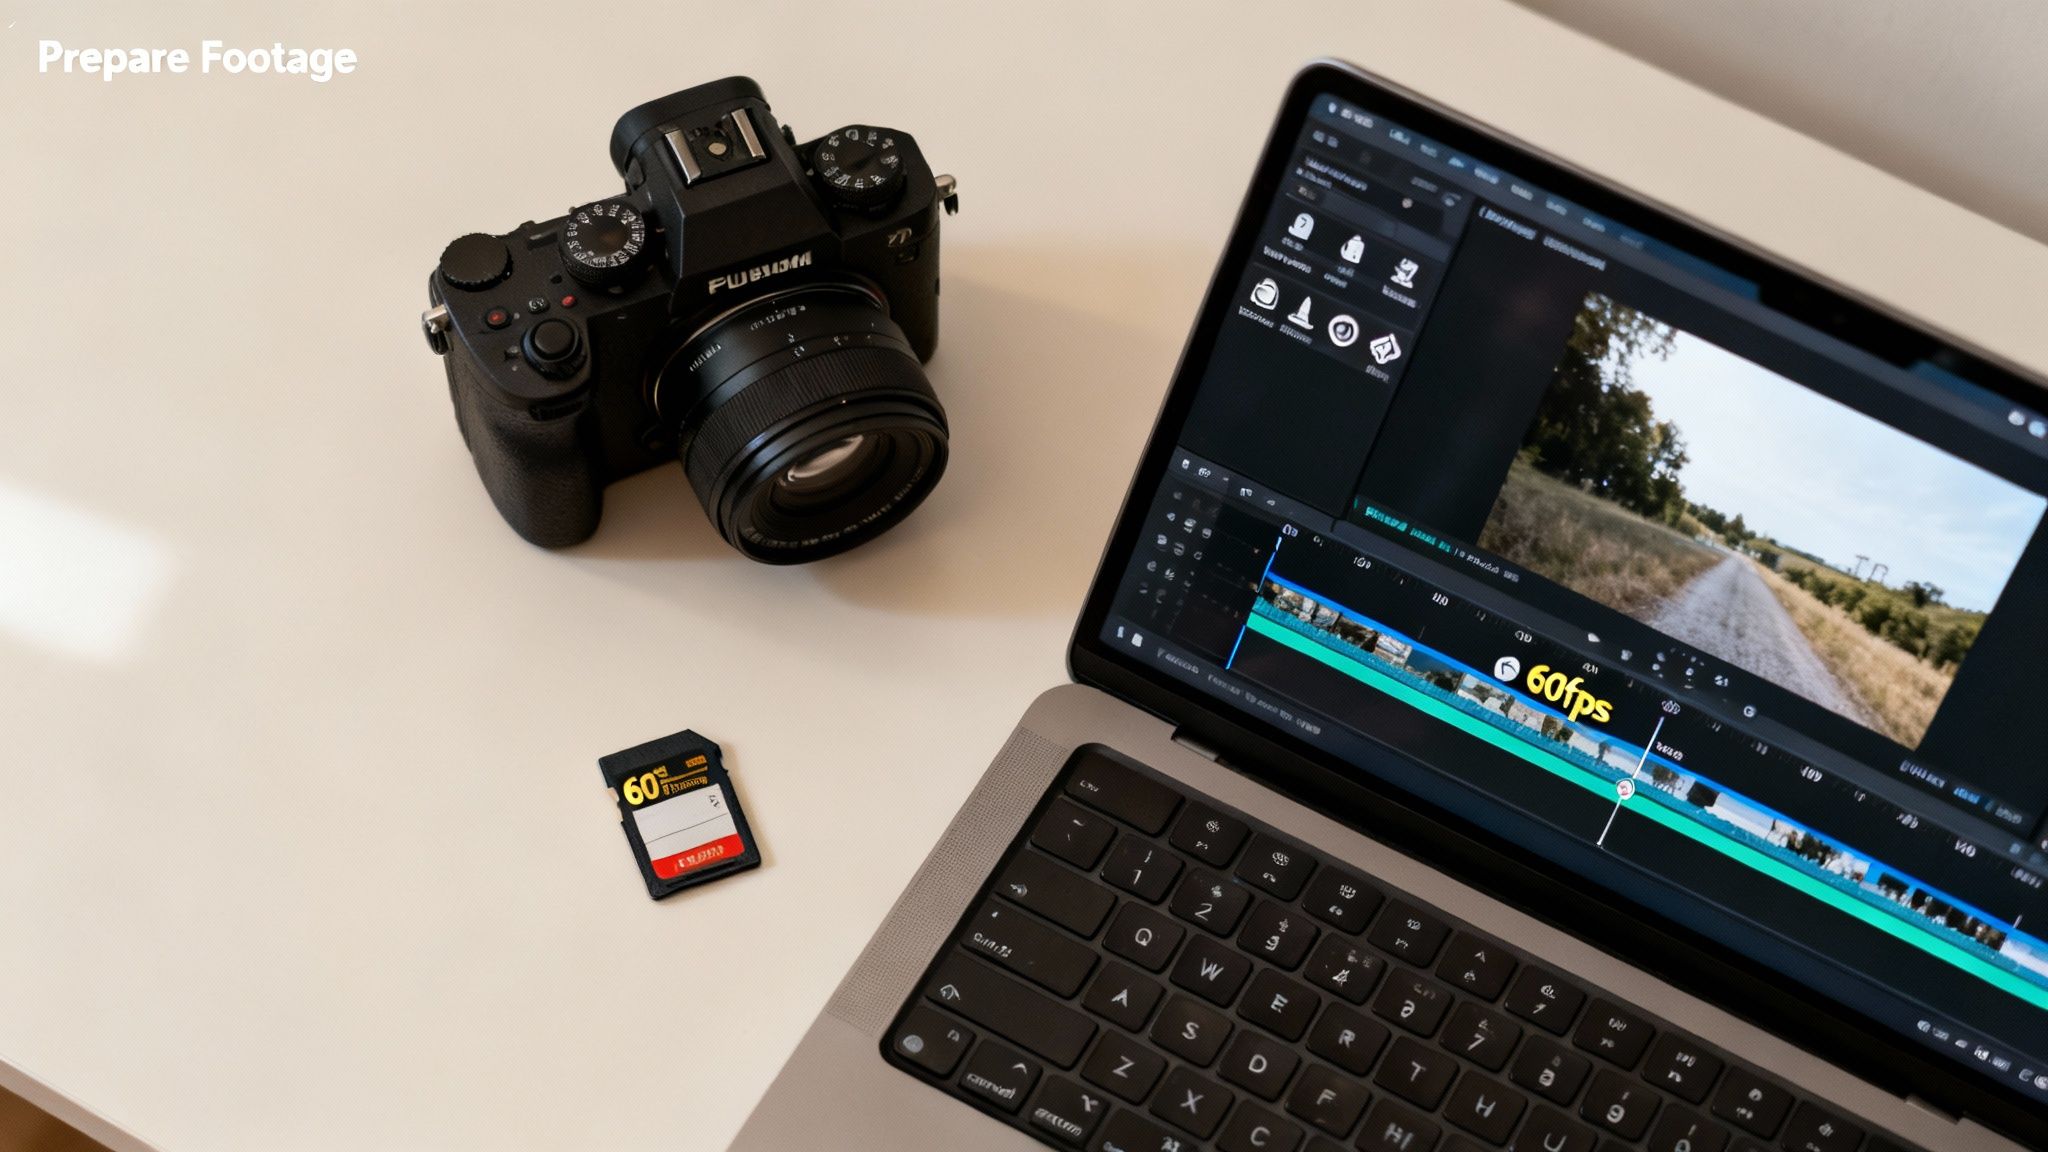
Here's a hard-earned lesson from countless hours spent in the editing bay: your AI slow motion is only as good as the video you feed it. Garbage in, garbage out. If you give the AI a blurry, low-quality file, you’ll get a distorted, soupy mess back. But give it a clean, detailed canvas, and it can paint a masterpiece.
Starting with the right footage is more than half the battle. While AI can work some serious magic on standard 30fps video, you’ll get dramatically better results if you start with something shot at 60fps or higher. Think of it this way: more original frames give the AI more concrete data to work with, allowing it to generate smoother, more believable in-between frames with far fewer ugly artifacts.
Pick Your Clips Wisely
Not every video clip is a good candidate for AI slow motion. Being selective from the start will save you a ton of frustration and wasted processing time. I always look for footage with clear, predictable motion and a well-defined subject.
Here’s what I look for when I’m hunting for the perfect clip:
- High Shutter Speed is Non-Negotiable: Motion blur is the absolute enemy of AI interpolation. When the edges of your subject are blurry, the AI gets confused and creates weird warping or ghosting effects. Aim for crisp footage.
- Good Lighting Makes a Huge Difference: Dark, grainy video is full of digital noise. The AI can easily mistake that noise for actual movement, leading to bizarre visual glitches that flicker across the screen.
- Keep it Simple: A single person running against a clean background? Perfect. A chaotic crowd at a concert with flashing lights? A nightmare for AI. Simple, clean movements always produce the best results.
Prepping the File for Export
Once you've found the perfect shot, a little prep work makes a world of difference. Before you even think about opening your AI tool, trim your clip down to only the part you want to slow down. AI processing takes a lot of horsepower, and there’s no sense in making your machine work harder than it has to.
If your source footage is a little soft or noisy, you might want to run it through an AI video upscaler first. Cleaning it up before interpolation can help the AI get a better read on the motion.
My Go-To Pro Tip: Always export your trimmed clip in a high-quality format. I personally use Apple ProRes, but a high-bitrate H.264 will also work well. Heavy compression introduces blocky artifacts that throw the AI for a loop, so a clean, high-quality export is essential.
After you have a trimmed, high-quality clip, you’re ready for the fun part. Nailing this prep work is a foundational step. If you want to dive deeper, we have other guides that explain how to upgrade your footage with an AI video quality enhancer.
Choosing the Right AI Slow Motion Tool
The world of AI video tools has blown up, and with it, the number of ways you can create stunning slow-motion footage. Honestly, it can be a little overwhelming. Instead of getting bogged down in endless feature lists, the best way to pick a tool is to think about what you actually need to accomplish.
Are you trying to whip up a slick social media clip in five minutes? Or are you a pro who needs fine-tuned control for a high-stakes project? Your answer will point you toward the right kind of software.
The Quick and Easy Solution
Let’s be real: for most people creating content for TikTok, Instagram, or YouTube, speed is the name of the game. You need something that just works. This is where simple, template-driven tools like Aicut are a lifesaver.
The whole point here is to avoid messing with complicated settings. You just upload your clip, pick how much you want to slow it down (say, 4x or 8x), and the AI does all the complex frame generation behind the scenes. It’s perfect for turning a decent 60fps clip into a buttery-smooth 240fps video that will stop the scroll. If you value your time more than having a hundred different knobs to turn, this is your best bet.
The Professional Powerhouse
On the other end of the spectrum, you have the heavy hitters—desktop software built for videographers and editors who can't compromise on quality. Think of tools like Topaz Video AI. This isn't a one-click-and-done kind of program.
It gives you a whole arsenal of AI models, each designed for different types of footage, whether it's live-action or animation. You can meticulously adjust settings to crush artifacts, handle tricky motion blur, and squeeze out every last drop of quality. This is the kind of control you need for paid client work or any project where perfection is the goal. Just be prepared for a steeper learning curve and the need for a beefy computer.
The rapid advancement we see in these tools today stands in stark contrast to AI's past. During the first 'AI Winter' in the mid-1970s, progress ground to a halt as funding dried up. By 1974, DARPA had cut about $1 million in annual funding from AI labs, causing a slump that lasted for years. This history of boom-and-bust cycles makes the current pace of innovation in video AI even more remarkable. Learn more about the historical timeline of AI development.
The Experimental Open-Source Option
Then there's the path for the adventurous and tech-savvy creators. If you love tinkering and want to play with the latest and greatest models before they hit the mainstream, open-source tools like Flowframes are for you.
These applications are often incredibly powerful and, best of all, free. The catch? The user experience can be a bit raw. You might have to jump through a few hoops to get it installed and running smoothly. But for those willing to roll up their sleeves, open-source options offer unmatched flexibility and a direct line to the absolute cutting edge of AI slow motion tech.
AI Slow Motion Tool Comparison
To make the choice even clearer, here’s a quick breakdown of how some of the popular tools stack up against each other.
| Tool | Best For | Key Features | Price Model |
|---|---|---|---|
| Aicut | Social Media & Quick Edits | • Template-based workflow • Cloud processing • Very user-friendly |
Subscription |
| Topaz Video AI | Professionals & Videographers | • Multiple AI models • Granular artifact control • High-resolution output |
One-time Purchase |
| Flowframes | Enthusiasts & Experimenters | • Access to cutting-edge models • Highly customizable • GPU-accelerated |
Free (Open-Source) |
| Runway | Creative Professionals | • Part of a full video suite • Text-to-video features • Collaborative tools |
Subscription (Credits) |
Ultimately, the "best" tool is the one that fits your workflow, budget, and creative goals. Whether you need a quick fix or a powerful engine, there's an AI solution out there that's right for you.
Your Workflow for Creating Flawless Slow Motion
Alright, you’ve prepped your clip and it’s looking sharp. Now for the fun part: putting the AI to work. This is where the magic really happens, and I’ll walk you through the process step-by-step. While we’ll focus on the general workflow you'd find in most tools, these principles are universal, whether you're using a simple online editor or diving deep into pro-level software.
First things first, you'll import your footage. Once it's loaded, you’re faced with your most important decision: choosing the right AI model. Modern tools like Aicut often have different models trained for specific types of content, like live-action, sports, or animation.
Picking the wrong model is a classic rookie mistake, and it’s the number one cause of weird visual artifacts. Imagine applying a model built for cartoons to a video of someone running—the AI might smooth out the motion so much that you lose all the realistic jitters and impact, making it look unnatural. The key is to always match the model to what you're actually slowing down.
Dialing in the Perfect Settings
With your model selected, it's time to decide how much you want to slow things down. You'll usually see options like 2x, 4x, or 8x. It can be tempting to push a 30fps clip to a wild 16x slowdown (creating a 480fps equivalent), but this massively increases the risk of warping and ghosting artifacts.
From my experience, a 4x to 8x slowdown generally hits the sweet spot, giving you that buttery-smooth look without sacrificing clarity.
This is the point where you have to decide what kind of tool you need. Are you looking for a quick and easy result, or do you want to get your hands dirty with every little setting?
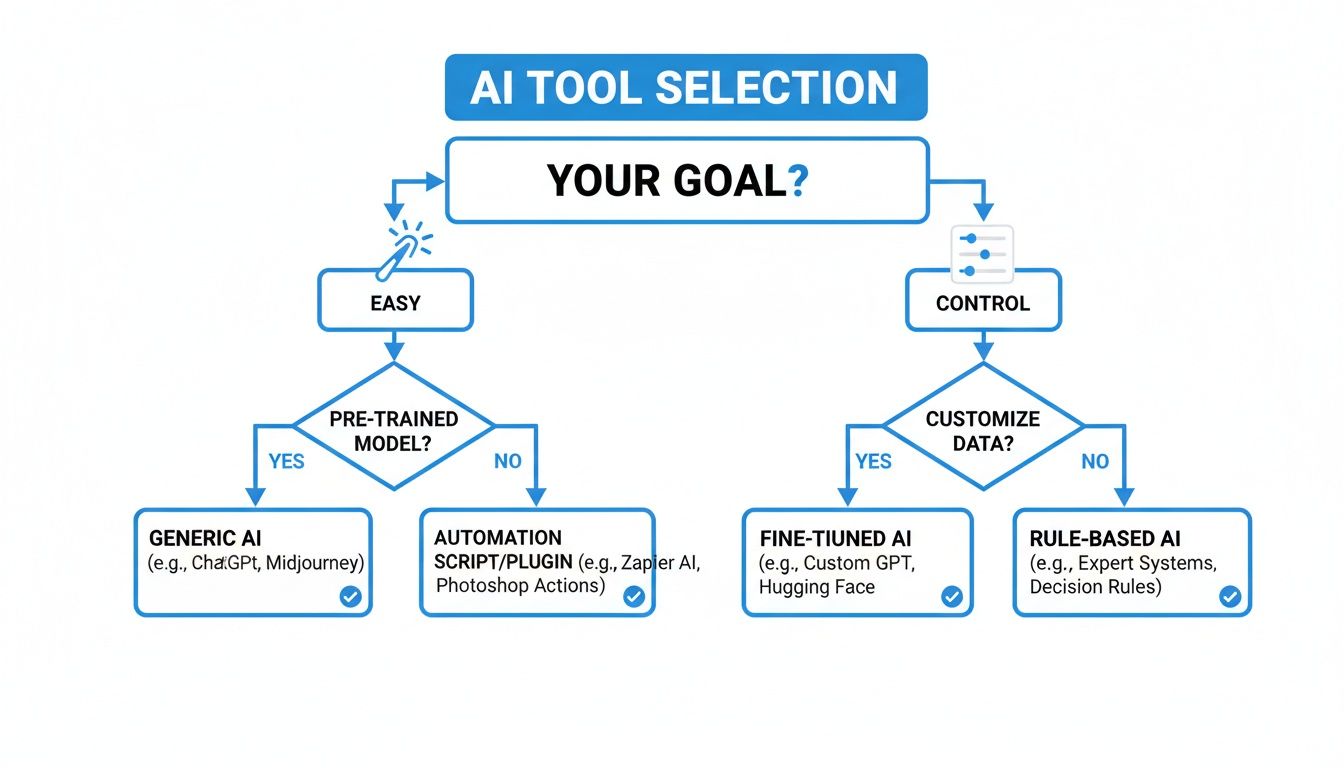
As you can see, your main goal—whether it's simplicity or total control—should guide your software choice from the very beginning.
Now, let's talk about some practical starting points, or "recipes," for different scenarios. These aren't set in stone, but they’re great presets to get you started.
Cinematic Action Scene: If you're working with a 60fps clip, try an 8x slowdown. Make sure to turn on any settings related to high-motion compensation or artifact reduction. This is an intensive process, but it’s perfect for capturing every last detail in a fast, dramatic moment.
Smooth Social Media Clip: For this, a 30fps or 60fps source file works perfectly. A simple 4x slowdown is usually all you need to get that eye-catching smooth effect without waiting forever for it to render. The standard or balanced quality settings are typically your best bet here.
Here's a pro tip: always check the preview before you commit to a full render. Most tools offer a quick, free preview that lets you spot problems early on. This one simple step has saved me countless hours of wasted processing time.
Finalizing Your Export for Social Platforms
Once the AI has done its thing and you’re happy with the result, the final step is exporting. How you export is just as critical as the processing itself. For platforms like Instagram or TikTok, you're looking for that perfect balance between image quality and file size. If you export a massive, uncompressed file, the platform will just crush it with its own compression, and you'll lose all that beautiful detail you worked so hard for.
I generally stick to these baseline settings for social media exports:
- Codec: H.264 is your best friend. It’s universally supported and gives you a great-looking video without a massive file size.
- Resolution: Stick with your source resolution, which is probably 1080p or 4K.
- Bitrate: For 1080p video, a target bitrate between 10-15 Mbps is a solid choice. If you’re exporting in 4K, aim for 35-45 Mbps.
Getting comfortable with this workflow turns AI slow motion from a technical chore into a powerful creative tool. By understanding these steps, you’ll be able to produce stunning, professional-looking clips every time. If you want to see how this fits into a bigger picture, you can learn more about how to create AI videos to build your online presence.
How to Fix Common AI Slow Motion Problems
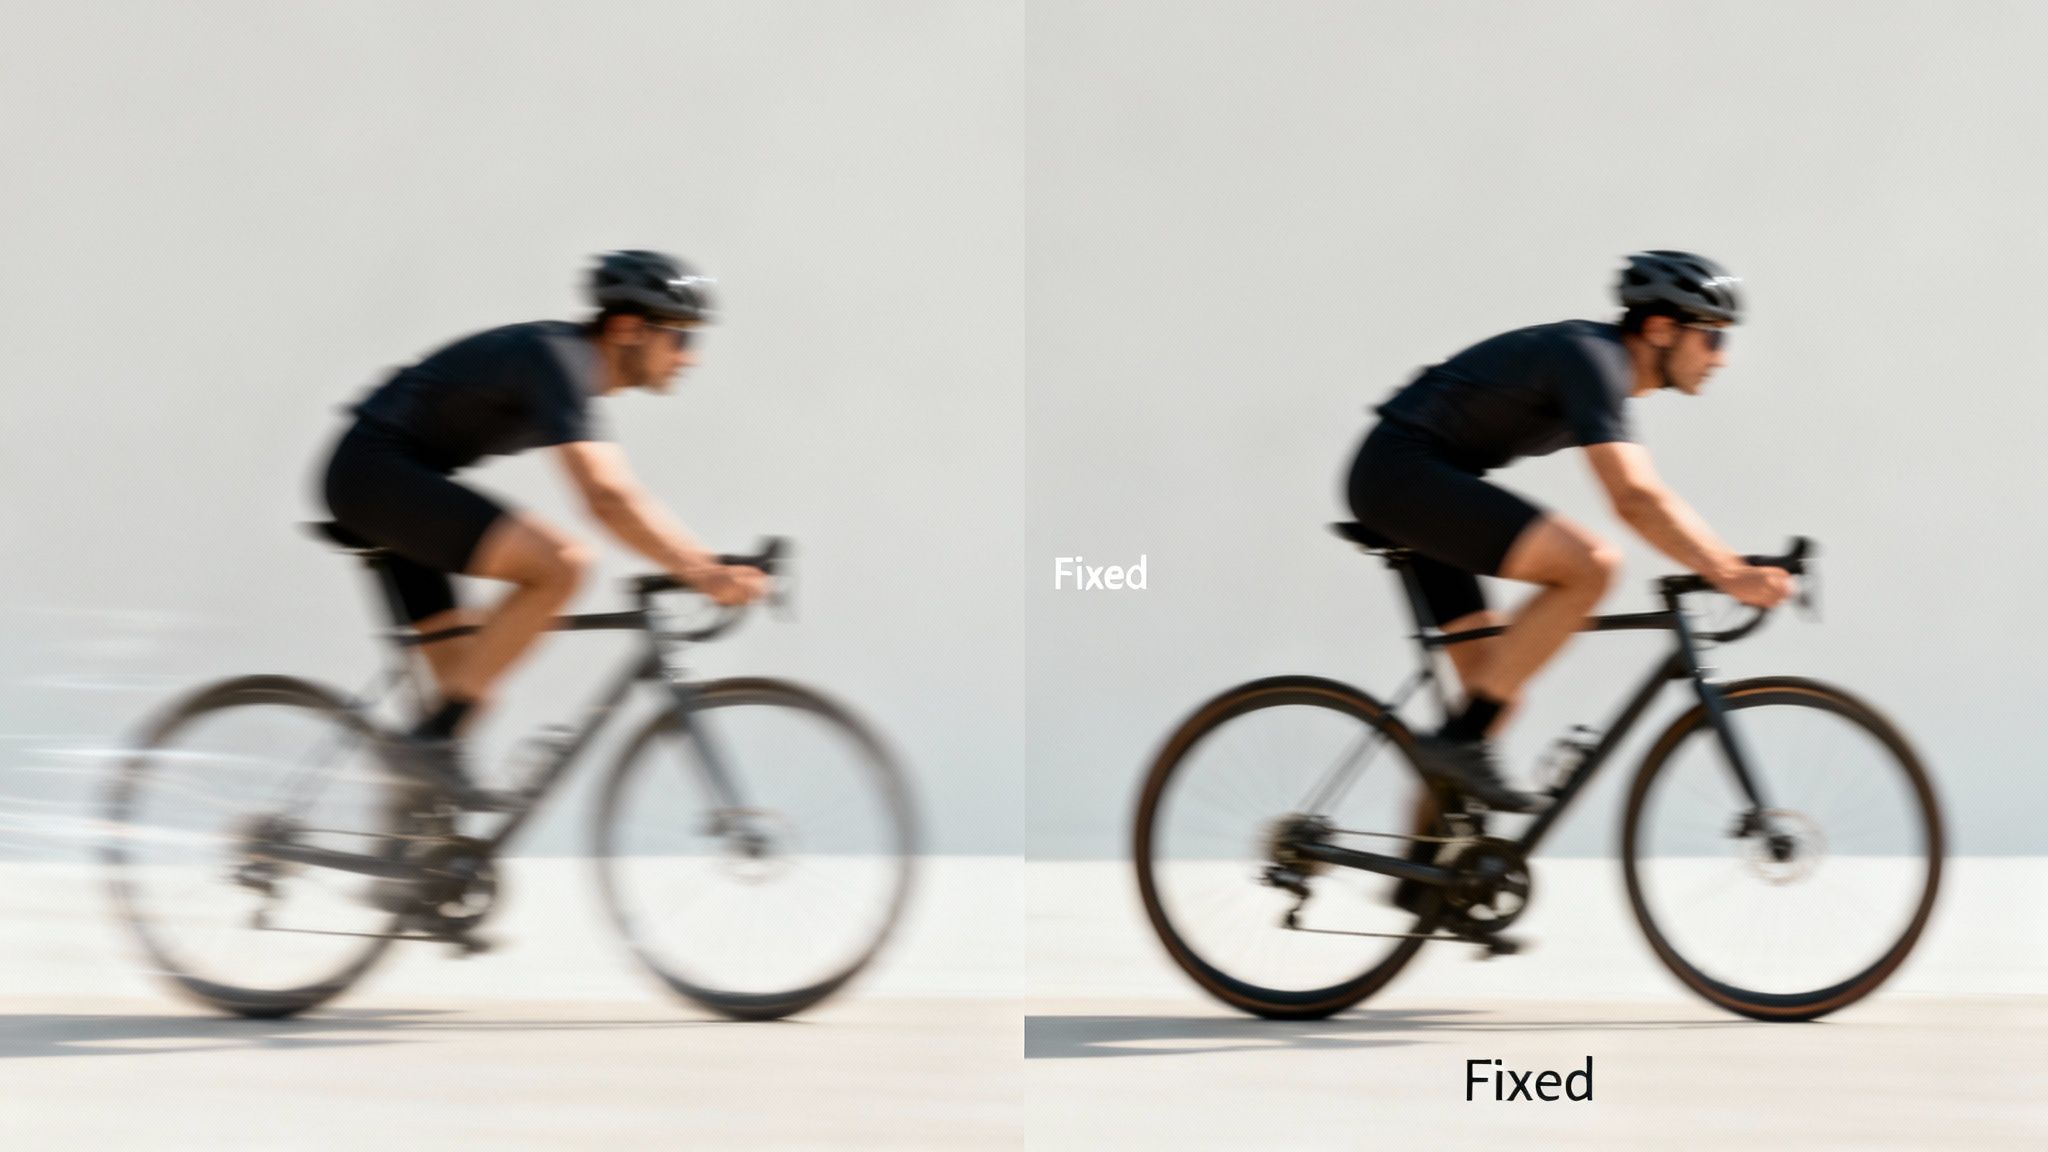
Even with the best tools on the market, generating AI slow motion isn't always a flawless, one-click affair. You'll eventually run into some weird visual glitches, which we call artifacts. Learning how to spot these and, more importantly, how to fix them is what really elevates your work from good to great.
Most of the time, the culprits are things like warping, ghosting, and odd blurring around your subject. These artifacts appear when the AI gets tripped up trying to guess what the in-between frames should look like, especially when dealing with fast or unpredictable movement. But don't sweat it—most of these issues are totally fixable with a few smart tweaks.
Diagnosing and Correcting Warping Artifacts
You know that strange, liquid-like distortion you sometimes see trailing a fast-moving object, like a person’s arm or a spinning tire? That's warping. It’s a dead giveaway that the AI is having a tough time tracking the object's shape as it moves between frames.
If you see this happening, your first move should be to dial back the slowdown factor. Let’s say you were trying for a dramatic 8x slowdown; try running it again at 4x. Just asking the AI to generate fewer frames is often enough to solve the problem. Another great fix, if your tool offers it, is to try a different AI model. A model trained specifically on sports footage, for instance, will likely do a much better job with fast action than a general-purpose one.
The golden rule here is to make small, isolated changes. Don't jump in and alter five settings at once. Tweak one thing—like the slowdown factor or the AI model—and then render a quick preview. This is the only way to know what’s actually working.
Eliminating Ghosting and Blurry Trails
Ghosting is that faint, see-through trail that seems to follow your subject. This is often triggered by too much motion blur in your original video, which confuses the AI about where the object's true edges are.
The best way to deal with ghosting is to prevent it in the first place. That means shooting with a higher shutter speed to get crisper, clearer frames. If you're stuck with the footage you've got, here are a few things to try:
- Simplify the Background: A cluttered or moving background can really throw the AI for a loop. If you can, pick a clip where your subject stands out clearly from their surroundings.
- Use Artifact Reduction Settings: Most serious video tools have sliders or checkboxes designed specifically to combat artifacts. Nudge these settings up a bit and see if it helps clean up the final render.
At the end of the day, your goal is to feed the AI the cleanest, most unambiguous information possible. By starting with good source footage and making methodical adjustments, you can troubleshoot almost any visual glitch. It's this careful, diagnostic approach that really separates amateur results from professional-grade AI slow motion.
Finalizing and Exporting for Maximum Impact
You've put in the work, and your slow-motion clip looks absolutely incredible. But we're not quite at the finish line yet. The final, and arguably most critical, step is getting that video out of your software and ready for the world without losing all that beautiful quality you just created.
This is where a lot of people trip up. You see, every social media platform has its own way of handling video. If you upload a massive, unoptimized file, platforms like Instagram will crush it with their own compression, and your once-crisp slow-motion can end up looking like a blurry mess. The trick is to give them a file that's already in their preferred format, so their compression algorithms don't have to work so hard.
Optimizing for Social Platforms
The go-to video format for pretty much every online platform is H.264. It's the gold standard for a reason—it strikes a fantastic balance between high quality and small file size, which is exactly what you need for the web.
Getting your settings right means your video stays sharp and clear. Think of it as giving the platform a file that’s already perfectly prepped, minimizing any further quality loss.
Here are my tried-and-true export settings for the major platforms. Sticking to these will help your ai slow motion videos look their absolute best.
Optimal Export Settings for Social Media
These are the recommended video export settings to achieve the best quality for your AI slow motion clips on popular social platforms.
| Platform | Recommended Codec | Target Bitrate (Mbps) | Resolution |
|---|---|---|---|
| YouTube | H.264 (or H.265) | 12-18 (for 1080p) | 1080p or 4K |
| H.264 | 10-15 (for 1080p) | 1080p (Vertical) | |
| TikTok | H.264 | 10-15 (for 1080p) | 1080p (Vertical) |
By tailoring your export to the destination, you're taking control of the final look and feel, ensuring your audience sees your work as you intended.
My Personal Tip: After I’ve exported the final slow-motion clip, I almost always bring it back into my main video editing software, like Premiere Pro or DaVinci Resolve. This is where the real magic happens. By re-importing it, I can seamlessly blend it with my original footage and play with advanced techniques like speed ramping. A good speed ramp—a smooth transition from normal speed to slow-mo and back again—can add a seriously professional touch and make those key moments hit so much harder.
Frequently Asked Questions About AI Slow Motion
Diving into AI video tools always brings up a few questions. Whether you've been editing for years or are just getting started, getting a handle on the technical side of things is key to getting great results. Let's tackle some of the most common questions people have about creating AI slow motion.
Can I Use AI on Old or Low-Quality Footage?
You can, but you might not like the results. AI models need clean, clear video to work their magic and generate believable new frames.
If your footage is low-resolution, grainy, or heavily compressed, it’s full of digital noise. The AI can get confused and mistake that noise for actual movement, which leads to some pretty nasty warping and ghosting effects in your final slow-mo clip.
For older footage, I’d suggest a two-step approach:
- First, run your clip through an AI video enhancer or upscaler. This will help clean up the noise and boost the resolution.
- Then, take that newly enhanced, cleaner version and apply the slow-motion effect.
This extra prep work gives the AI a much better canvas to paint on. It dramatically improves the quality of the new frames and leaves you with a much more polished, professional-looking video.
What Is the Maximum Slowdown I Can Achieve?
Most tools will let you slow things down by a lot—often from 2x all the way up to 16x. But the real limit isn't the software; it's your original footage.
Trying to push a standard 30fps clip past an 8x slowdown is usually asking for trouble. The AI has to invent seven new frames for every single original frame, which massively increases the chances of weird visual glitches.
The secret is all in the source frame rate. If you start with a clip shot at 60fps or, even better, 120fps, you can easily pull off stunning, artifact-free 8x or even 16x slowdowns. The AI simply has more real information to work with, so its generated frames are far more accurate.
Do I Need a Powerful Computer?
For desktop software, absolutely. Generating AI slow motion is a very demanding task. Frame interpolation leans heavily on your computer’s graphics card (GPU) to do the heavy lifting and calculate all those new frames.
For a smooth process without waiting forever, you'll want a modern NVIDIA or AMD GPU with at least 8GB of VRAM. If you try this on an older or less powerful machine, rendering even a short clip could take hours instead of minutes, which just isn't practical.
Ready to create stunning, viral-worthy slow-motion clips in minutes without the technical hassle? Aicut offers powerful AI models and easy-to-use templates that do the heavy lifting for you. Start creating with Aicut today!