
You're probably staring at a rough cut right now that feels flat. The clips are fine, the script is fine, the hook might even be solid, but every scene change feels like a small drop in energy. That's usually not a footage problem. It's a transition problem.
A good video transition effect doesn't just make a short look polished. It controls attention, hides weak seams, and gives AI-generated footage a rhythm that feels intentional instead of stitched together. That matters even more when you're building faceless shorts, product ads, or prompt-generated sequences where visual consistency can drift from clip to clip.
Most creators get stuck because transition advice is still trapped in old editing workflows. They get told to open Premiere Pro, nest layers, copy masks, animate transforms, and spend several minutes on one effect. That's not how fast short-form production works anymore. If you're using AI tools, you need transitions that can be prompted, templated, tested quickly, and reused without turning every edit into a manual project.
The Psychology of a Seamless Transition
A hard cut creates work for the viewer. Their eyes have to re-scan the frame, identify the new subject, and decide what matters. In a long-form documentary, that pause can be fine. In a short vertical video, it often feels like friction.
Smooth transitions reduce that friction by preserving object constancy, which is the viewer's sense that one element is continuing into the next moment instead of disappearing and being replaced by something unrelated. When the motion, direction, or scale carries forward, the brain tracks the change instead of restarting from zero.
Why abrupt edits lose people
Many creators treat transitions like decoration. That approach is backwards. The essential job of a transition is to guide the eye and lower the effort needed to follow the story.
A useful research reference comes from Heer and Robertson. Their 2007 study found that animated transitions between data graphics improved graphical perception accuracy by 12 to 24%, and staged animations improved accuracy by up to 37% over abrupt changes. They also found that smooth staged motion lasting 1 to 2 seconds was optimal for cognitive tracking, while very fast transitions under 500ms didn't help much (Heer and Robertson summary).
That study focused on visual information, not TikTok edits, but the lesson transfers cleanly. If viewers can track what moved, what changed, and where to look next, they stay oriented. When they have to decode every cut, attention leaks.
Practical rule: If your transition makes the viewer ask “what just happened?” before they process the next message, it's hurting retention.
What this means in short-form editing
In AI-native workflows, this matters even more because generated clips often shift in lighting, framing, or subject placement. A transition can smooth that discontinuity.
Use these principles when deciding whether a transition is working:
- Direction should continue. If one clip pushes left and the next enters from the right, the motion feels broken unless you want disruption.
- One visual change at a time usually reads cleaner. Move position first, then scale, or reveal first, then color shift.
- Staging beats chaos. Short-form isn't the same as random. Fast videos still need readable motion.
- The transition should support the idea. Time passing, topic shift, emotional drop, product reveal. Each asks for a different move.
Smooth motion doesn't slow a short down. It often makes a fast video easier to watch.
When creators internalize this, they stop adding effects because they “look cool” and start using them to manage attention. That's the difference between a flashy edit and a scroll-stopping one.
Choosing Your Viral Transition Style
Not every transition belongs in every short. A wipe that works in a meme page edit can look awkward in a skincare ad. A soft dissolve that works in a story-driven Reel can kill momentum in a hype cut. The right video transition effect depends on what emotional signal you want to send.
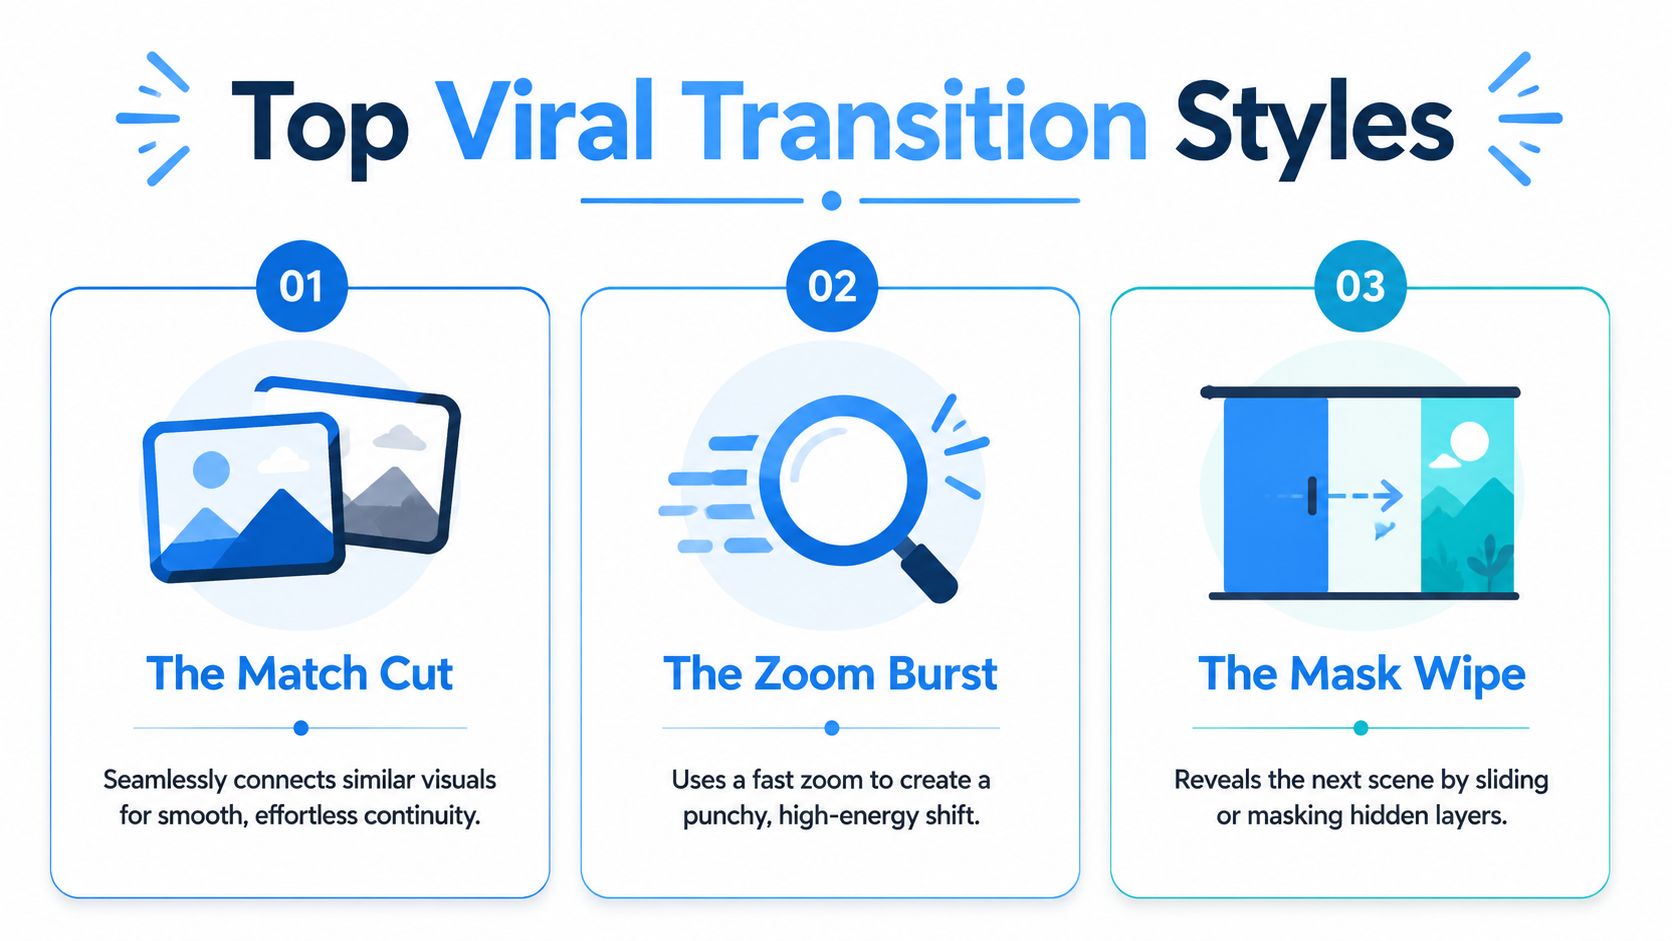
What shows up most often
A 2020 content analysis of more than 3,500 transition clips in data videos found that 41% used spatial motion, 22% used temporal sequencing such as fade-ins, and 19% used color shifts. High-engagement videos averaged 12.4 transitions per minute, and hybrid designs appeared in 37% of top-viewed clips (Tang et al. paper).
That tells you something useful. Motion-based transitions dominate because they keep visual continuity alive. Fades still matter, but they usually work best as punctuation, not as the whole editing language.
A practical style guide
| Transition type | Best use | What it feels like | Where it often works |
|---|---|---|---|
| Fade | Opening, ending, memory, time shift | Calm, clean, soft | Reels, explainers, product clips |
| Wipe | Topic change, chapter break, reveal | Intentional, directional | Tutorials, list videos, before-and-after edits |
| Zoom | Hook, emphasis, impact beat | Urgent, energetic | TikTok, Shorts, hype edits |
| Morph | Transformation, continuity trick | Fluid, surprising | Faceless AI stories, motion-control sequences |
| Glitch | Disruption, suspense, synthetic style | Tense, digital, edgy | Gaming, tech, horror, launch teasers |
| Match cut | Visual callback between scenes | Smart, cinematic | Storytelling, product demos, montage edits |
What works and what usually doesn't
Use a fade when you want viewers to feel a change in time or mood. Don't use it every few seconds or the video starts feeling sleepy.
A zoom burst works when the soundtrack and visual motion are already aggressive. It fails when the footage itself is static and the transition is trying to manufacture excitement that isn't there.
Morphs are great in AI workflows because they hide continuity problems between generated clips. They fail when prompts don't preserve subject position, silhouette, or color palette. If the source clips don't rhyme visually, the morph turns into sludge.
- For faceless storytelling: match cuts, morphs, slow wipes
- For UGC-style ads: crossfades, push transitions, clean zooms
- For trend edits: whip-style motion, punch-ins, glitch accents
- For educational shorts: subtle motion and fades over flashy distortion
If your transition style changes every three seconds, viewers notice the editor instead of the message.
The strongest creators don't use every transition. They build a small library of moves that fit their niche and repeat them until the pacing feels branded.
Creating Transitions with AI Prompts and Templates
Manual editing still has a place, but for short-form volume, promptable and templated transitions are far more practical. If you're generating clips with Sora 2, Kling, or a similar model, your job is to design continuity before the footage even hits the timeline. That means prompting for camera movement, subject position, and scene exit behavior that can connect cleanly.
Crossfade in an AI-first workflow
The simplest transition is still one of the most useful. A crossfade works when the clips share mood, color, or subject continuity and you want the change to feel invisible.
For a crossfade, overlap clips by 0.5 to 2 seconds, with 1 second as the optimal setting, and apply an ease-in-out curve to avoid artifacts. Durations under 0.5s feel abrupt, while transitions longer than 1.5s tend to drag. Audio matters too. Mismatched fades can cause a 30 to 52% drop in completion rates according to the benchmarks cited in this transition guide from Descript and Adobe references.
Prompt pattern for generated clips
Use prompts that prepare the cut before you edit:
- Outgoing clip prompt ending: “camera slowly pushes in, subject drifts slightly left, lighting remains soft and even, final frames reduce motion for a clean dissolve”
- Incoming clip prompt opening: “begin with similar framing and color tone, subject enters from left continuity position, gentle camera hold, cinematic soft motion”
- Negative prompt idea: “no sudden camera shake, no framing jump, no harsh exposure shift”
Then apply the crossfade in your editor with these settings:
- Overlap the clips by around 1 second.
- Set easing to ease-in-out.
- Crossfade the audio instead of letting one track hard-cut under a soft visual transition.
- Preview on mobile because vertical clips reveal awkward dissolves faster than desktop playback.
If you're producing lots of variations, it helps to rapidly test short form ad creatives before committing to one transition language across a campaign. Different hooks often need different seam styles.
Fade to black for scene resets
Fade to black is underrated. It's one of the cleanest ways to separate sections in faceless videos, especially when you're switching from hook to proof, or from problem to reveal.
For this move, keyframe opacity from 0% to 100% over 0.5 to 1 second using linear-bezier easing, then mirror that on the other side if you're fading out and back in. Keep the dip short. A fade that lingers feels like dead air.
Here's where templates help. Instead of rebuilding the transition every time, save it as a preset in your workflow or use a dedicated transition library such as AI video transition templates when you want repeatable timing between clips.
A useful prompt pair for fade-based scenes looks like this:
- Scene A ending: “subject pauses, motion settles, background darkens slightly near final frames”
- Scene B opening: “emerge from darkness into centered composition, immediate readability, strong focal subject in first frame”
Before you watch the demo, focus on the timing between visual fade and sound bed. That's where most amateur edits break.
What to automate and what to control by hand
You don't need to handcraft every transition. But you also shouldn't outsource every decision to the model.
Use AI for:
- Generating motion-compatible source clips
- Applying reusable presets
- Batch-testing transition duration on multiple variants
Control manually:
- Audio fade sync
- The first transition after the hook
- Any transition tied to a punchline, reveal, or CTA
A good AI workflow doesn't remove editing judgment. It removes repetitive setup.
That's the true advantage. You stop spending time on mask gymnastics and start spending it on pacing choices that affect whether people keep watching.
Optimizing Transitions for TikTok Reels and Shorts
The same transition won't read the same way on every platform. TikTok usually rewards edits that feel native to the feed. Instagram Reels often tolerates, and sometimes prefers, a cleaner polished finish. YouTube Shorts sits somewhere in the middle, where pace matters but over-editing can make a video feel disposable.
TikTok needs momentum
TikTok edits usually benefit from transitions that feel like an extension of camera movement. Pushes, zoom continuity, whip-like directional shifts, and quick morphs tend to feel natural there when they're tied to a beat or gesture.
If the video starts from still images, that changes the workflow. In that case, it helps to first create animated videos from static images so the transition has motion to inherit. A static image slammed into a flashy transition often feels fake. A lightly animated frame gives the effect something to connect.
Use TikTok transitions when:
- The hook needs immediate kinetic energy
- The edit follows a trending sound
- You want a “made for the feed” feel rather than a commercial look
Reels likes cleaner scene changes
Instagram Reels often responds better to smoother visual continuity. A calm crossfade, a subtle scale transition, or a neat mask reveal usually fits better than repeated glitches.
That doesn't mean Reels should feel slow. It means the polish should serve the content instead of shouting over it. Beauty, fashion, lifestyle, home, and product content usually look stronger with minimal transition noise.
A useful reference point for style ideas is this gallery of cool video transitions for short-form creators. Use it as a menu, not a checklist.
Shorts needs readability first
YouTube Shorts viewers often arrive from search, suggested video traffic, or broad topic interest. They may tolerate a little less chaos than TikTok viewers if the video is teaching, comparing, or explaining.
That makes transition clarity more important than flash. If each scene shift helps the viewer stay oriented, the edit feels professional. If every transition tries to be the moment, the short loses coherence.
A simple platform matrix helps:
| Platform | Best transition feel | Common mistake |
|---|---|---|
| TikTok | Native, rhythmic, energetic | Overdoing polished cinematic dissolves |
| Instagram Reels | Clean, aesthetic, refined | Using too many harsh glitch effects |
| YouTube Shorts | Clear, purposeful, readable | Chasing speed at the expense of comprehension |
Match your transition to the platform's visual culture, not just to your own taste.
Sound also matters. A transition that lands with the beat often feels intentional even when the visual effect is basic. Without that sync, even a strong visual move can feel off.
Advanced Techniques for Viral-Ready Transitions
After mastering the fundamentals, your next focus should be layering transitions while keeping the edit clean. Creators begin developing a unique signature style at this stage rather than relying on generic effects from popular trend pages.
Stack motion with purpose
A transition stack works when each layer solves a different problem. One layer carries movement. Another hides the seam. A third reinforces the beat.
A common stack for faceless shorts looks like this:
- Primary motion layer: a push, zoom, or morph carries the eye forward
- Secondary polish layer: a brief blur or light fade softens the join
- Audio layer: a whoosh, riser, or pre-lapped voice line sells the change
That's enough. Add more and the viewer starts noticing process over story.
Use sound before the visual cut
J-cuts and L-cuts are still underused in short-form. With a J-cut, the next scene's audio starts before the picture changes. With an L-cut, the current scene's audio continues briefly after the visual moves on.
That technique is especially useful in AI videos because it creates continuity where visual footage may vary. If the voiceover or ambient sound arrives first, the scene change feels motivated instead of abrupt.
For creators doing heavier motion, render speed matters too. If you're experimenting with 3D camera moves, particle overlays, or heavier transition composites outside lightweight AI editors, a guide to powerful GPUs for fast 3D rendering can help you decide when local rendering makes sense.
Build a transition library, not a random bag
Most strong editors use a repeatable set of transition behaviors. They don't reinvent every cut. They define a few rules and stay consistent.
Try a simple brand library like this:
- One default invisible transition for everyday cuts
- One energy transition for hooks and reveals
- One reset transition for chapter or topic changes
- One signature effect that viewers begin associating with your content
You can study this idea further in Aicut's article on transitions in video storytelling.
The most memorable transition style usually isn't the loudest one. It's the one you repeat with discipline.
That consistency is what makes an account feel edited by a real creator instead of assembled by software.
Frequently Asked Questions About Video Transitions
How many transitions are too many in a 30-second video
There isn't one universal number because pacing depends on format, voiceover density, and whether you're telling a story or pushing an offer. But if every cut has a visible effect, the edit usually starts feeling amateur.
A useful reality check is the gap in current education around AI workflows. According to the cited summary of 2025 Google Trends and tutorial analysis, searches for “AI video transition effects” were up 340% year over year, while 90% of YouTube tutorials still focused on manual Premiere Pro workflows that take 5 to 15 minutes per effect. It also notes that AI templates can be 10x faster for creators who need speed (analysis summary). That's why so many beginners overuse transitions. They finally get access to effects, then apply them everywhere.
A better rule is simple. Use visible transitions only when something is changing: time, place, topic, emotional tone, or visual scale.
How do I fix weird morph artifacts in AI-generated transitions
Start before the edit. Most morph problems come from source clips that don't match.
Check these first:
- Subject position: keep the character or product in roughly the same zone of frame
- Silhouette: don't morph between wildly different shapes unless you want a surreal result
- Lighting direction: mismatched highlights create ugly in-between frames
- Camera behavior: one clip drifting slowly and the next shaking hard will break the blend
If the morph still looks wrong, switch tactics. A fast wipe, push, or fade usually beats a bad morph.
Can transitions tell a story in faceless videos
Yes. In faceless content, transitions often carry narrative meaning that a live presenter would otherwise deliver.
A slow dissolve can signal memory or reflection. A hard directional wipe can signal progress. A match cut can connect two ideas without explanation. In AI-generated videos, that storytelling function becomes even more important because transitions can establish continuity between scenes that were created separately.
What's the fastest way to get pro-looking results without learning a full editor
Use a small repeatable toolkit. Pick one invisible transition, one energetic transition, and one reset transition. Then apply them consistently.
That approach beats spending hours copying complex manual tutorials. Most creators don't need more effects. They need better judgment about when to use them.
If you want to turn these ideas into a repeatable workflow, Aicut is built for short-form creators producing faceless videos for TikTok, YouTube, and Instagram. It supports AI-driven templates, prompt-based creation, and automated editing flows that make transition testing much faster than traditional manual setups.