So, what exactly is a viral AI video? It’s a short clip, cooked up with AI tools, that catches fire and spreads like crazy across social media. The secret isn't a one-off lucky shot; it’s a repeatable formula that blends a great idea with smart AI generation and a solid distribution plan.
The Framework for a Viral AI Video
The people who consistently pump out viral hits aren't just stumbling into success. They’re following a well-defined process. Think of it less like chasing a magic bullet and more like building a reliable engine. This framework is what separates the one-hit wonders from the pros who get results time and time again.
The goal here is to get out of the random brainstorming phase and into a smooth, efficient workflow. This means figuring out what kinds of content play to AI's strengths. We're talking about things like faceless narration videos or UGC-style clips—they're cheap to make and audiences love them.
Core Components of a Viral Framework
A solid framework breaks down the entire process into a few key stages. Each one builds on the last, making sure your final video isn't just cool but is also primed to get picked up by the algorithm.
Here’s what that looks like in practice:
- Strategic Ideation: This isn't just waiting for inspiration to strike. It's about digging into trending topics, finding little-known niches, and getting a feel for the visual styles that are killing it right now on TikTok and Instagram.
- Efficient Production: You've got to pick the right tool for the job. Is it Sora for that cinematic look, Veo for believable people, or Kling for handling longer, more complex scenes? This is also where you nail down your script, fine-tune your prompts, and generate your core video clips.
- Impactful Polishing: The raw output from an AI model is rarely finished. You'll need to edit for pacing, add a professional-sounding AI voice-over, upscale the video quality to look sharp, and create a thumbnail that people can't resist clicking.
- Algorithmic Distribution: A great video that nobody sees is a waste. The final piece is all about posting at the right times, obsessing over metrics like watch time and audience retention, and using that data to make your next video even better.
This structured approach takes the guesswork out of the equation. This simple flowchart breaks down the core workflow, from the initial idea all the way to getting it in front of eyeballs.
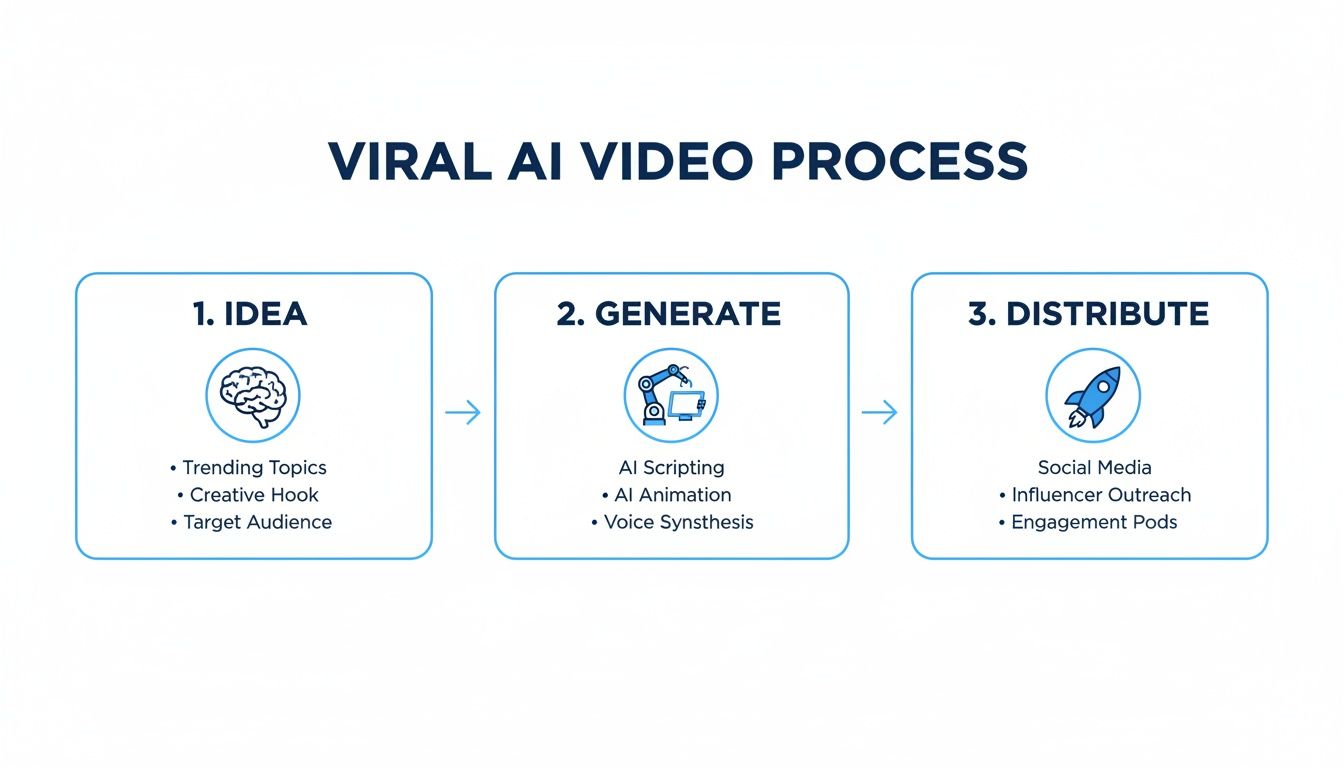
As you can see, success is a chain of smart decisions, not a single action. The numbers back this up, too. AI-powered short-form video now drives a massive 80% of all social media traffic. And it’s not just for creators; 90% of businesses using generative AI have slashed their production times, while 73% have seen a real boost in engagement.
To give you a clearer picture, here’s a quick summary of the workflow.
Viral AI Video Workflow At a Glance
| Stage | Key Action | Objective |
|---|---|---|
| 1. Ideation | Research trends and select a proven video template. | Find a high-potential concept that resonates with a target audience. |
| 2. Production | Write a script, generate scenes with an AI model, and add a voiceover. | Create the core visual and audio assets for the video efficiently. |
| 3. Post-Production | Edit scenes, add music/SFX, and upscale video quality. | Polish the raw assets into a compelling, high-quality final product. |
| 4. Distribution | Post on a schedule, write engaging captions, and use relevant hashtags. | Maximize reach and engagement on your chosen social media platforms. |
| 5. Iteration | Analyze performance data and identify patterns. | Refine your strategy based on what works to improve future videos. |
This table lays out the roadmap. Following these steps helps you focus on what really matters at each point in the process.
The secret to consistent growth isn't having one viral video; it's having a system that produces many potential viral videos. Focus on the process, not just the outcome.
This system is especially powerful on social platforms that reward you for posting consistently. You can dive deeper into this by checking out our guide on AI content creation for social media. By adopting this framework, you stop guessing and start executing with a clear purpose.
Finding and Prompting Your Viral Idea
Every viral video begins with two things: a great idea and a killer prompt. This is the moment you stop planning and start creating. Your idea doesn’t have to reinvent the wheel, but it absolutely must connect with what people are already watching and feeling. The prompt is what turns that idea into something the AI can actually see and build.
The best ideas are usually hiding in plain sight. Don't wait around for a lightning bolt of genius—go find it. I spend a ton of time scrolling through Reddit, especially in communities like r/AITAH ("Am I the Ahole?") or r/tifu ("Today I F*ed Up"). These places are overflowing with raw, emotional stories that are perfect for anonymous, faceless AI videos that get people hooked.
Another go-to spot is TikTok's Creative Center. It’s not just for seeing what’s already huge. It’s where you can spot trends just as they start bubbling up. Keep an eye out for recurring sounds, video styles, and storytelling angles. The trick is to catch the wave while it's still building, not after it's already crashed onto the shore.
Engineering the Perfect Prompt
Once you’ve got your concept, the prompt is everything. A lazy, generic prompt will get you a generic, forgettable video. But a sharp, detailed prompt? That's what separates the amateur stuff from a polished clip that’s ready to go viral. You have to think like a film director giving instructions to a cinematographer who is incredibly talented but takes everything you say literally.
A great prompt is built in layers. Don't just ask for "a man walking on a beach." Get specific.
- Camera & Shot Type: Is it a "cinematic wide shot," a "handheld POV shot," or maybe a "drone shot flying backward"?
- Lighting & Mood: Use descriptive terms like "golden hour lighting," "moody, dramatic shadows," or "bright, vibrant, and optimistic."
- Subject & Action Details: Who is in the shot? What are they wearing? What emotion are they conveying? For example, "a young man in a worn leather jacket, looking contemplative as he walks along a windswept, overcast beach."
- Style & Realism: Define the aesthetic. Something like "photorealistic, 8K, shot on a Sony cinema camera" will look worlds different from "nostalgic 1990s home video footage, slight grain, VHS look."
Your prompt is your script, your shot list, and your style guide all rolled into one. The more precise you are now, the less time you'll waste fixing things later, and the closer the AI's output will be to what you imagined.
If you really want to get good at this, our complete text prompt guide dives into advanced techniques for getting exactly what you want out of any AI model.
Practical Prompt Formulas You Can Steal
Let's make this real. Here are a couple of formulas I use all the time that you can adapt for your own videos.
For a Hyper-Realistic Product Showcase:[Shot Type] of a [Product Name] on a [Type of Surface], [Lighting Style], surrounded by [Relevant Objects]. The scene is [Mood/Aesthetic], photorealistic, 8K resolution, detailed textures.
- Here's how that looks in practice: “Macro shot of a luxury watch on a dark marble surface, studio softbox lighting, with subtle water droplets on the watch face. The scene is elegant and sophisticated, photorealistic, 8K resolution, detailed metallic textures.”
For a Compelling Reddit Story Clip (POV):POV shot from a [smartphone/bodycam], handheld and slightly shaky, showing [Describe the scene from the storyteller's perspective]. The lighting is [Natural/Artificial Light Source], creating a sense of [Emotion/Feeling]. Realistic, UGC style, raw footage.
- And in action: “POV shot from a smartphone, handheld and slightly shaky, showing hands typing on a laptop in a dimly lit bedroom at night. The only light source is the laptop screen, creating a sense of late-night anxiety. Realistic, UGC style, raw footage.”
Using Negative Prompts to Refine Your Vision
Telling the AI what you want is only half the battle. You also have to tell it what you don't want. This is where negative prompts are a game-changer. AI models can sometimes spit out bizarre stuff—weird hands with extra fingers, distorted faces, or a cartoony vibe when you’re going for realism.
Negative prompts are your quality filter. By listing what to avoid, you guide the AI away from common glitches. Keep these in your back pocket:
- For Realism:
deformed, mutated, disfigured, extra limbs, blurry, grainy, cartoon, anime - For Quality:
low resolution, watermark, signature, text, ugly, jpeg artifacts - For Composition:
cropped, out of frame, poorly drawn
When you combine a powerful positive prompt with a targeted negative one, you get an incredible amount of control. It’s the key to making sure your final video is clean, professional, and exactly what you had in mind.
Generating Your Core Video Content

Alright, you've got a killer prompt. Now comes the fun part: bringing your idea to life. This is the stage where your text-based concept blossoms into a series of visual scenes that will form the backbone of your video.
The trick is to think like a director. You need to choose the right "actor"—your AI model—and feed it your script piece by piece, not all at once. Pushing your entire story into one prompt is a classic rookie mistake that almost guarantees a garbled, inconsistent mess.
Choosing Your AI Video Model
Think of AI video models as different types of cameras or film stocks. Each one has its own unique look and feel, and picking the right one is crucial for getting the vibe you're after. While there are a ton of tools out there, a few heavyweights like Runway Gen-3 are pushing the boundaries of what's possible.
So, which model is right for you? It really depends on what you're trying to create.
- Sora (OpenAI): If you're aiming for that big-budget, cinematic look, Sora is your best bet. It’s incredible at creating hyper-realistic scenes with complex camera moves that feel straight out of a Hollywood movie.
- Veo (Google): For content that needs to connect on a human level, Veo is a standout. It excels at generating lifelike people with subtle expressions and gestures, making it perfect for character-driven narratives.
- Kling (Kuaishou): Need a longer, continuous shot? Kling is a beast at maintaining consistency over extended clips. This means your characters and backgrounds won't bizarrely change from one second to the next, which is a common headache with other models.
Your script is your guide here. An epic sci-fi landscape screams Sora, while a heartfelt personal story is probably better suited for Veo.
Scripting Your Story Scene by Scene
The secret to getting great results from any AI model is to break your story down into a shot list. Feed the AI one scene at a time with a super-specific prompt for each.
Let's say you're adapting a short, emotional story you found on Reddit. Instead of one giant prompt, your shot list would look something like this:
- Scene 1:
POV shot from a smartphone, handheld and slightly shaky, showing hands typing on a laptop in a dimly lit bedroom at night. The only light source is the laptop screen, creating a sense of late-night anxiety. Realistic, UGC style, raw footage. - Scene 2:
Close-up shot of a character's face, illuminated by their phone screen, a single tear rolling down their cheek. Moody, dramatic lighting. Photorealistic. - Scene 3:
Wide shot of the character standing and looking out a window at the rain-streaked city lights below. Contemplative and lonely mood. Cinematic, 4K.
This approach gives you way more control and ensures every shot comes out looking exactly how you imagined. For a more detailed walkthrough of this process, check out our guide on how to generate AI video from text.
Techniques for Faceless and UGC Content
Faceless and user-generated content (UGC) styles are absolutely crushing it on social media right now. They feel authentic and relatable, which is exactly what audiences crave. And with AI, you don't even need to pick up a camera to create them.
For businesses, this is a game-changer. You can generate professional-looking ad creative that feels like a genuine customer testimonial.
A prompt like, "UGC-style selfie video, a woman with curly hair is unboxing a skincare product in her sunlit bathroom, she looks genuinely excited, shot on a smartphone, natural lighting" can produce an ad that feels less like a corporate push and more like a trusted friend’s recommendation.
The real power of AI in content creation is its ability to democratize authenticity. You can now generate videos that feel personal and relatable at scale, something that used to require significant time and resources.
This shift is also powering entirely new types of viral trends. Just look at TikTok, where AI filters let anyone jump on a meme—from dancing cats to the viral "AI hug" trend—without needing any video editing skills. It's a whole new way for creators to engage with what's popular, and it's happening at lightning speed.
By focusing on these practical generation techniques, you can start churning out the high-quality raw footage you'll need to piece together a viral masterpiece.
Editing Your AI Video for Maximum Impact
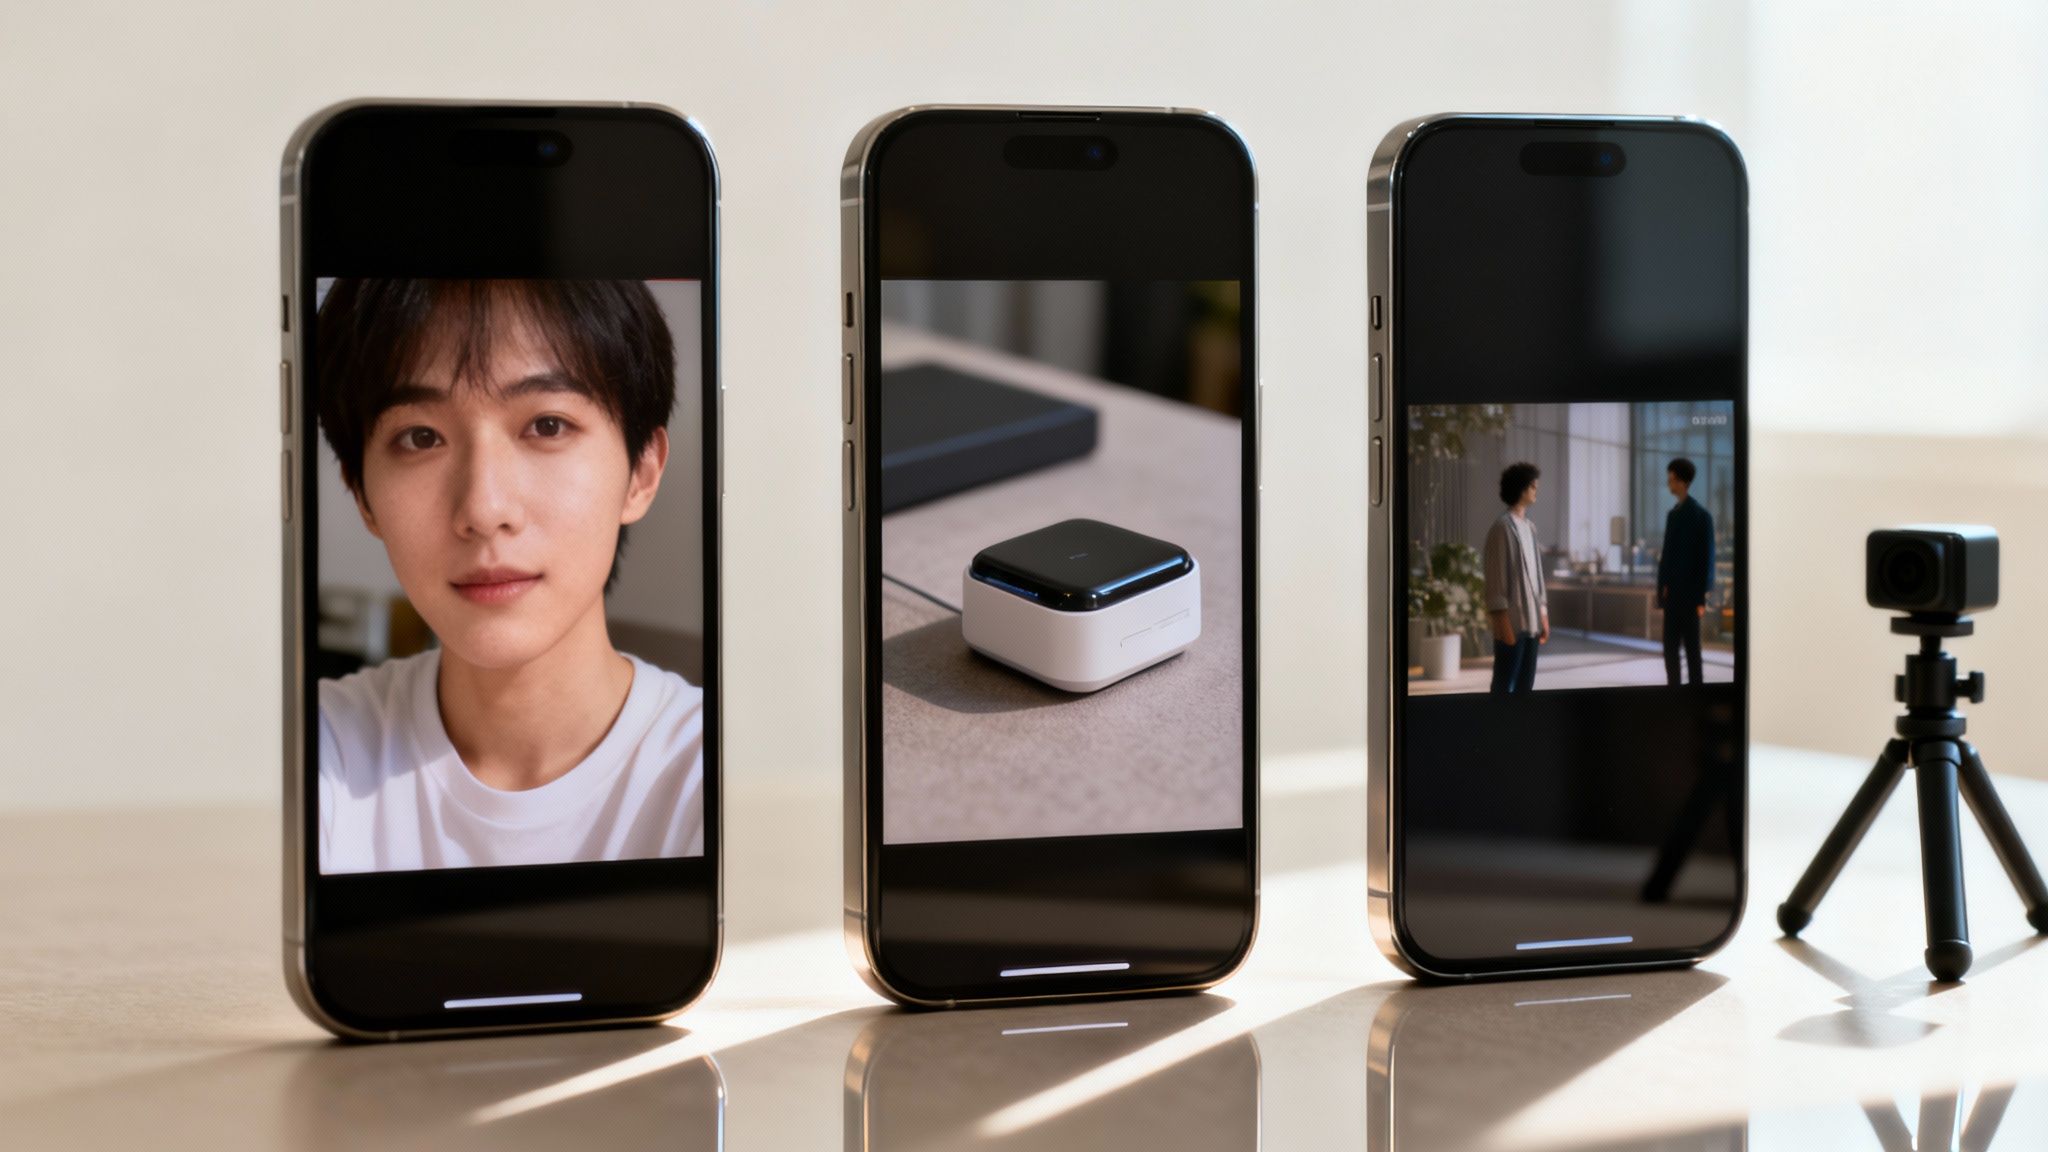
The raw clips you get from an AI model are just the starting point. Think of them as the clay, not the final sculpture. The real magic—the stuff that makes a video go viral—happens in the edit. This is where you stitch a handful of cool scenes into a story that actually grabs and holds attention.
Post-production is your chance to give your video a heartbeat. It’s all about rhythm, emotion, and polish. By nailing a few key things like sequencing, pacing, and audio, you can turn a simple AI experiment into a professional-looking video that people actually want to watch and share.
Sequencing Clips for a Compelling Narrative
Your first job is to arrange your clips into a story that flows. Even for a quick 15-second video, a basic narrative structure—a hook, a middle, and a payoff—is surprisingly important. It's what separates a random collection of shots from a satisfying mini-story.
Start by dropping all your generated clips onto your timeline. Don't be afraid to play around with the order. What happens if you move that one shot to the beginning? Does it create a stronger opening? A good rule of thumb I always follow is to lead with your most visually stunning or emotionally charged clip. You have about two seconds to stop someone from scrolling, so make it count.
Mastering Pacing for Short Attention Spans
On platforms like TikTok and Instagram, you're fighting for every millisecond of attention. This means your edit needs to be snappy and relentless. Unless you’re going for a specific dramatic effect, long, lingering shots are usually the kiss of death.
Here are a few tricks I use to keep the pace tight:
- Use Jump Cuts: Cutting quickly between similar shots injects a burst of energy and keeps things moving.
- Cut on Action: If your character starts to reach for something, cut to the next scene right as their hand moves. It feels seamless and keeps the viewer's brain hooked.
- Vary Shot Length: Mix super-quick one-second cuts with slightly longer three-second shots. This creates a dynamic rhythm that prevents the video from feeling monotonous.
The goal isn't just to make the video shorter; it's to make every single second essential. If a clip doesn't advance the story or add some visual flair, it probably doesn't belong.
Upscaling Footage for a Crisp Finish
Most AI video generators produce clips at a standard resolution, which can look a bit blurry or pixelated, especially on a nice screen. Upscaling your footage isn't just a nice-to-have; it's a crucial step for a professional look. Using an AI video upscaler, you can bump your footage up to 1080p or even 4K, making it look sharp on any device.
This process uses AI to intelligently fill in the details, resulting in a much cleaner, higher-quality video. People perceive crisp video as more credible and well-made, which can seriously boost your watch time. Plus, the algorithms on social platforms tend to favor high-quality uploads.
The Art of Sound Design and Voice
You've heard it before, but it's true: sound is more than half the experience. The right audio can completely transform the feeling of your visuals.
First off, find out what audio is trending. Spend some time scrolling through TikTok or Reels to see what sounds are blowing up in your niche. Using a trending sound can give your video an instant algorithmic advantage. Then, layer in subtle sound effects (SFX)—a whoosh for a quick transition or the soft patter of rain in a moody scene—to make your video's world feel real and immersive.
If you’re using narration, a clean AI voice-over is a must. Tools like ElevenLabs or Play.ht can generate incredibly human-like audio. Just make sure the voice’s tone fits the video's mood, whether you need something upbeat and exciting or calm and reflective.
Creating an Irresistible AI Thumbnail
Your thumbnail is the last hurdle. It's the final sales pitch that convinces someone to click play. A boring thumbnail gets ignored, but a great one sparks curiosity. AI image generators are perfect for this, letting you create custom, eye-catching thumbnails that pop in a crowded feed.
Honestly, using AI in post-production is becoming a huge part of what makes content successful. It’s not just a theory; 72% of YouTubers are now using AI to help create their thumbnails, and they're seeing a 38% increase in click-through rates because of it. This is part of a bigger trend where 77% of modern video editing tools now include AI features. As you can see from these video editing trends and statistics, this isn't a fad. By using AI to design a killer thumbnail, you're tapping into a proven method to get more eyes on your work.
Getting Your Masterpiece Out There (And Scaling Up)
Let's be real: creating a killer AI video is a huge win, but it's only half the battle. That polished clip isn't going to go viral sitting on your hard drive. If you want views, shares, and actual growth, you need a smart distribution plan.
This is where you switch gears from creator to strategist. Just throwing your video online and crossing your fingers is a fast track to disappointment. A deliberate approach to distribution is what tells the algorithm your content is worth showing to the world.
Find Your Rhythm: Nailing the Posting Cadence
Social media algorithms, especially on TikTok and Instagram, love consistency. Posting at random is confusing for them. A steady, predictable schedule, on the other hand, trains the algorithm to know when to expect your content and who to show it to.
You don't need to post 5 times a day to win. The goal is to find a pace you can actually stick with.
- Daily Drops: If you're in a super competitive niche like Reddit stories or quick news updates, posting daily can be a game-changer. More posts mean more chances for one to pop off.
- The Sweet Spot (3-4 times a week): For most creators, this is the magic number. It's frequent enough to keep you on the radar but manageable enough to avoid total burnout.
- Quality Over Quantity (1-2 times a week): This works best if you're creating longer, more cinematic pieces that just take more time. Let the quality speak for itself.
Pick a schedule and own it. Consistency builds momentum and creates an audience that actually looks forward to your next post.
Timing Is Everything
When you post is almost as important as what you post. Dropping a video when your target audience is asleep is like setting up a pop-up shop at 3 AM. To get that crucial initial burst of engagement, you need to publish when your followers are actively scrolling.
Understanding the best times to post on TikTok is a solid starting point. But don't just rely on general advice. Your audience is unique. Dive into your platform’s analytics—which you’ll get with a business or creator account—and pinpoint the exact hours and days your followers are online.
Pro Tip: A surge of likes, comments, and shares in that first hour is a massive green flag for the algorithm. It signals your content is a hit, prompting the platform to push it onto the "For You" page for thousands more to see.
Put Your Posting on Autopilot
Trying to keep up with a consistent schedule manually is a surefire way to burn out. This is where automation tools become your best friend. Schedulers like Aicut let you line up your finished videos days, or even weeks, ahead of time.
This strategy is a lifesaver for two reasons. First, you’ll never miss a post, keeping that content engine running smoothly even when life gets crazy. Second, it frees up your mental energy to focus on what really matters: creating your next great video, not just uploading the last one.
Look at the Data That Actually Matters
Once your videos are live, the numbers start pouring in. It's tempting to obsess over view count, but the metrics that really tell you if you're on to something are much deeper. To build a channel that grows consistently, you need to analyze how your audience is behaving.
These are the stats you should be obsessed with:
- Average Watch Time: How long are people actually watching? A high watch time is a direct signal to the platform that your content is genuinely engaging.
- Audience Retention: Pay close attention to the retention graph. It shows you the exact second viewers are dropping off. Use this feedback to figure out what's boring and what's brilliant in your videos.
- Share Rate: A share is the ultimate compliment. It means someone liked your video so much they put their own reputation on the line to recommend it. This is a powerful driver of virality.
- Comment Sentiment: Are the comments just "lol," or are people having real conversations? An active, positive comment section is another huge boost for your video's performance.
By digging into this data, you create a powerful feedback loop. You'll learn what hooks people, what makes them hit the share button, and what makes them scroll away. Every video becomes a lesson, helping you turn a one-hit wonder into a channel that people can't stop watching.
Common Questions About Making AI Videos
Even with a solid workflow mapped out, jumping into AI video creation can feel like a lot. You’re going to have questions as you go from a cool idea to a finished video. Trust me, getting straight answers to these common sticking points is the fastest way to get better results and start feeling confident.
This section breaks down the questions I hear most often from other creators. Think of it as your quick-reference guide to get unstuck and back to making your next potential viral hit.
Which AI Video Model Should I Use?
Honestly, the "best" AI model really comes down to what you're trying to accomplish. There isn't one perfect tool for everything—it’s about picking the right tool for the job. The model you choose has a huge impact on the final look and feel of your video.
For that cinematic, polished look: If you’re going for highly realistic scenes, complex backgrounds, and professional camera moves, Sora from OpenAI is usually the way to go. It just excels at creating that high-budget, film-like quality.
For genuine human connection: When your video needs believable emotions and subtle facial expressions, Google's Veo is the clear winner. It’s fantastic for character-driven stories where a small gesture says everything.
For longer, more consistent scenes: If your idea needs a longer clip from a single prompt, Kling by Kuaishou is an incredibly powerful option. It’s great at keeping things coherent and avoiding those weird visual glitches that can pop up in longer generations.
My best advice? Test them out. Generate a quick, five-second clip of the same idea with each model. You'll see right away which one nails the style and quality you're aiming for.
How Can I Make My AI Videos Look More Authentic?
Authenticity is what separates a good AI video from a great one. It’s that secret ingredient that helps it connect with people. To avoid that sterile, obviously-AI feel, I focus on three key areas.
First, you have to get really good at writing prompts. Don't just describe the scene; ask for imperfections. Adding phrases like "subtle hand gestures," "a slight breeze moving the character's hair," or "shot on a smartphone with minor lens flare" introduces a layer of realism that makes the footage feel more grounded.
Next, nail your audio. Use a high-quality, human-sounding AI voice-over, and take the time to license real music or sound effects that fit the vibe. Nothing screams "low-effort" faster than generic, repetitive background music.
Finally, use your editing software to your advantage. A little bit of color grading can completely change the mood. A gentle camera shake effect can mimic handheld footage. And of course, quick cuts are your best friend for keeping the pacing snappy and engaging.
Authenticity isn't about fooling anyone. It's about making your content feel relatable and real. The small, imperfect details are what make an AI-generated scene resonate emotionally.
What Are the Biggest Mistakes to Avoid?
I see so many new creators fall into the same traps when they're trying to go viral with AI videos. If you can sidestep these common mistakes, you’ll be way ahead of the pack.
The single biggest mistake is completely ignoring what's trending. You could create the most stunning AI video ever, but if it doesn't connect to a current conversation or a popular format, it’s probably going to get lost in the noise. Always do your homework and see what’s working on your platform right now.
Another huge one is bad pacing. Short-form video viewers have zero patience. Your hook—the most interesting part of your video—has to land within the first 1-2 seconds. Don't waste that precious time on slow, boring intros. Get straight to the good stuff.
Finally, inconsistency will absolutely kill your channel's growth. Posting one amazing video and then ghosting for a month just doesn't work. The algorithm rewards a steady stream of content. Use scheduling tools to keep a regular posting cadence, even if it's just a few times a week. It signals to the platform that you're a serious creator worth pushing.
Ready to stop guessing and start creating? Aicut gives you all the tools you need to produce a viral AI video in minutes. With viral templates, advanced models like Sora 2, and built-in automation to schedule your posts, you can build a high-growth channel faster than ever. Start creating with Aicut today!