
You record a short, the script is solid, the pacing is fine, and the hook should work. Then you watch it back and the whole thing looks dull. Your skin looks gray, the background feels muddy, or the product blends into the room. On TikTok, Reels, and Shorts, that usually means people swipe before they hear your second sentence.
Most creators try to fix that with a better camera, a sharper preset, or more aggressive editing. That's usually the wrong order. If you want to change the lighting in a way viewers notice, start with light itself, then use software to rescue or stylize what the camera already captured.
That's also why lighting is no longer a gear-heavy problem. The economics of light have changed dramatically. Our World in Data reports that the price of lighting fell by more than 99.9% from 1300 to 2023, dropping from about £34,000 for one million lumen-hours in the 1300s to £2.15 by 2023. Good light used to be scarce. For creators now, it's mostly a workflow issue.
Why Your Video Needs Better Lighting
Bad lighting doesn't just make a video darker. It makes the subject look less intentional. Faces lose shape, products lose texture, and backgrounds flatten into noise. Even faceless content suffers because lighting controls how text overlays, hands, props, screens, and surfaces read on camera.
A lot of creators think lighting is just about exposure. It isn't. Lighting decides mood, separation, and credibility. Bright, soft light makes a tutorial feel clean and easy to trust. Directional light can make a story clip feel tense or cinematic. Flat overhead light usually does neither.
Practical rule: If viewers can tell what you meant to emphasize within a second, your lighting is probably doing its job.
There are really two ways to improve it.
- Fix it on set: Move the light, soften it, change the angle, or control the room.
- Fix it after shooting: Relight, rebalance, or replace the environment in post when the original footage isn't usable.
The best results come from combining both. Physical lighting gives you clean raw material. AI tools help when time, space, or consistency get in the way.
What good lighting changes
Good lighting helps with more than looks:
- Clearer subject separation: You stand out from the wall behind you.
- Better perceived quality: Even phone footage looks more expensive when the light is controlled.
- More consistent edits: Cuts feel smoother when every clip shares the same light direction and color.
That matters even more for short-form video, where viewers judge quality almost instantly. You don't need a studio setup. You need control. Often that means one light in the right place, not three lights used badly.
On-Set Lighting Essentials for Quick Setups
If you only remember one thing from this article, remember this: the fastest way to improve video quality is to get the first light right. In professional imaging, lighting is considered to account for about 80% of the final result's performance, according to Delta ModTech's machine-vision lighting guide. Camera and lens choices matter less than most creators think.
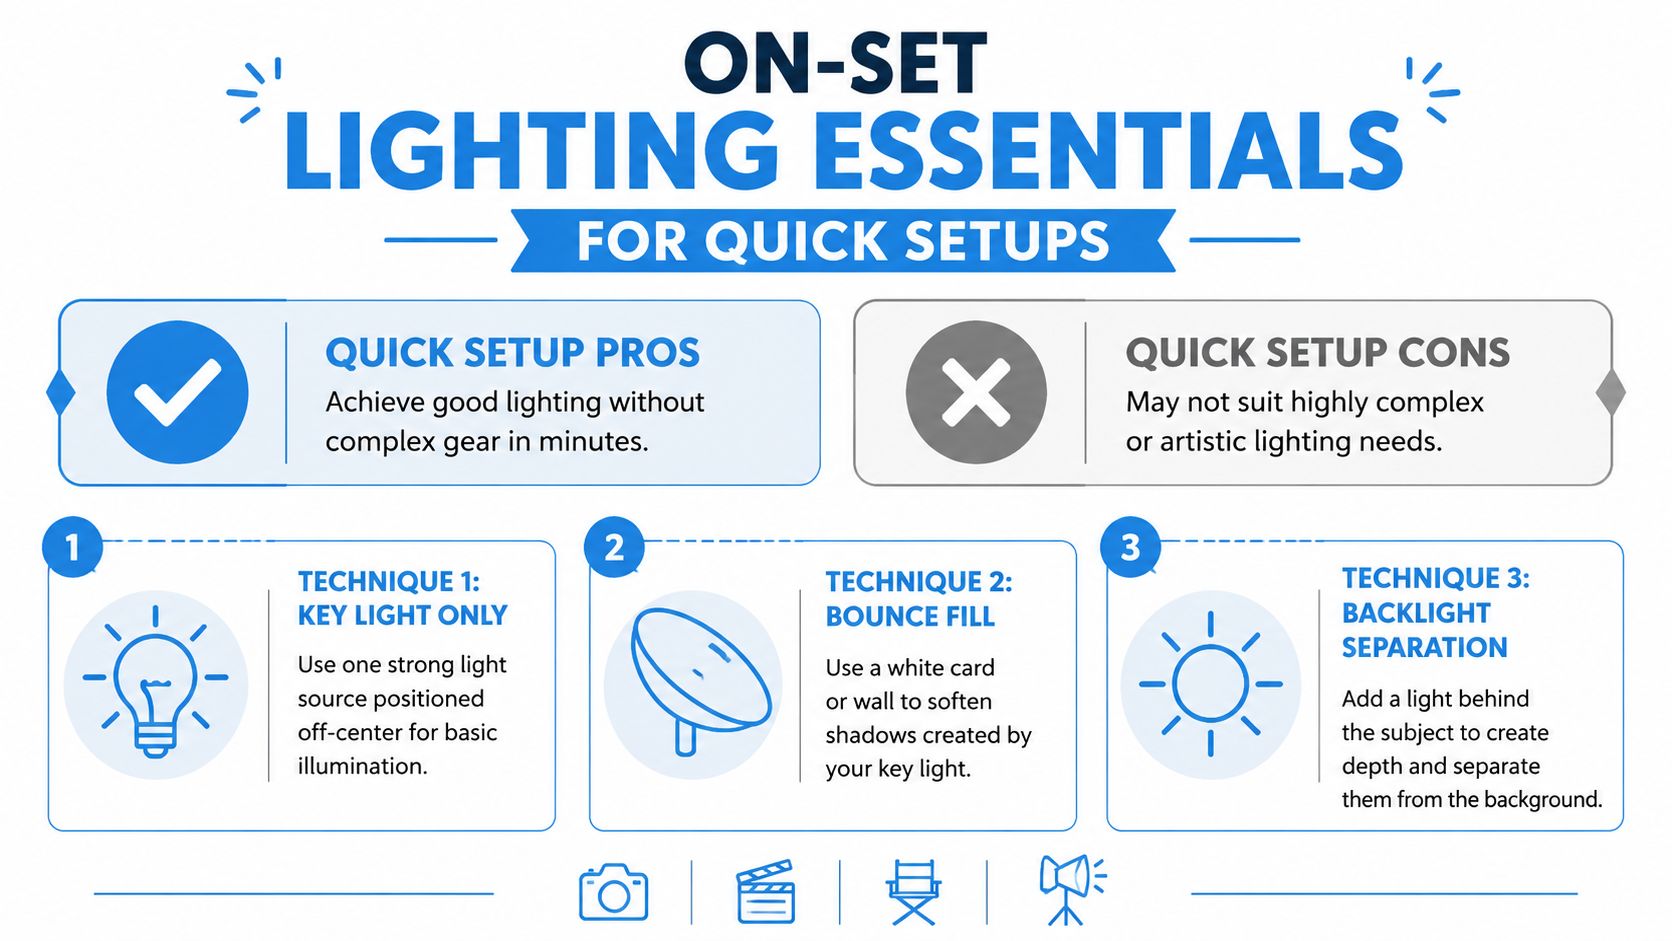
Start with one key light
A solo creator usually doesn't need a full studio layout. Start with a key light, which is the main light shaping your face, hands, or product.
Place it slightly to one side of the camera instead of directly above or straight on. That small offset adds shape. If you put the light dead center, the image often looks flat. If you place it too far to the side, shadows get harsh fast.
Good quick options include:
- A window: Free, soft, flattering, but only reliable when the weather and time of day cooperate.
- A ring light: Convenient and compact, but it can flatten features and create obvious reflections.
- An LED panel: More flexible than a ring light because you can move it off-center and shape the scene.
Use fill instead of adding another harsh light
Once the key light is in place, look at the shadow side. If the shadows are too deep, don't immediately buy more gear. Bounce the existing light back.
A white wall, foam board, poster board, or even a light-colored curtain can act as fill. This keeps contrast under control without making the scene look overlit.
Put the money into light control before camera upgrades. A cheap panel plus a white bounce usually beats a better camera under bad room light.
Add separation when the background looks dead
If your shirt, hair, or product blends into the wall, use a backlight or practical light in the background. This doesn't have to be fancy. A small lamp behind you, an LED tube off frame, or even moving yourself farther from the wall can create enough depth.
Here's the fast setup I recommend for most short-form shoots:
| Setup | What it does | What to watch for |
|---|---|---|
| Key light off-center | Gives shape and clean exposure | Too close can blow out skin or shiny products |
| Bounce fill | Softens shadows cheaply | Too much fill can remove all contrast |
| Backlight or distance from wall | Creates separation | Bright backlights can cause glare or haloing |
What works and what usually fails
Some common creator habits make lighting worse, not better.
- Overhead room lights: They cast shadows under the eyes and nose and make skin look tired.
- Mixed random sources: A window on one side and a warm lamp on the other usually creates ugly color conflict.
- Tiny bright lights too close to the lens: These often create glare, especially on glasses, packaging, or glossy tables.
This same logic shows up in industrial imaging. One machine-vision rule of thumb warns against putting a ring light around the lens on reflective surfaces and against relying on daylight or fluorescent sources that vary or flicker, as noted in the Delta ModTech article linked earlier. The creator version is simple: if the light changes on its own, your video will look inconsistent.
A quick setup you can use today
If you're filming tonight and want a usable setup in minutes, do this:
- Turn off the ceiling light.
- Face a window or place one LED panel slightly beside the camera.
- Use a white surface opposite the light to lift shadows.
- Step away from the wall behind you.
- Record a short test clip and watch for glare, deep eye shadows, and background mess.
That setup won't cover every artistic look, but it handles most talking-head clips, hand-demo videos, and simple product shots.
Using Color Temperature to Shape Mood
Once the light is in the right place, the next lever is color temperature. This is what makes a scene feel warm and intimate or cool and clean. You don't need to obsess over technical theory to use it well. You just need to decide what the video should feel like before you press record.
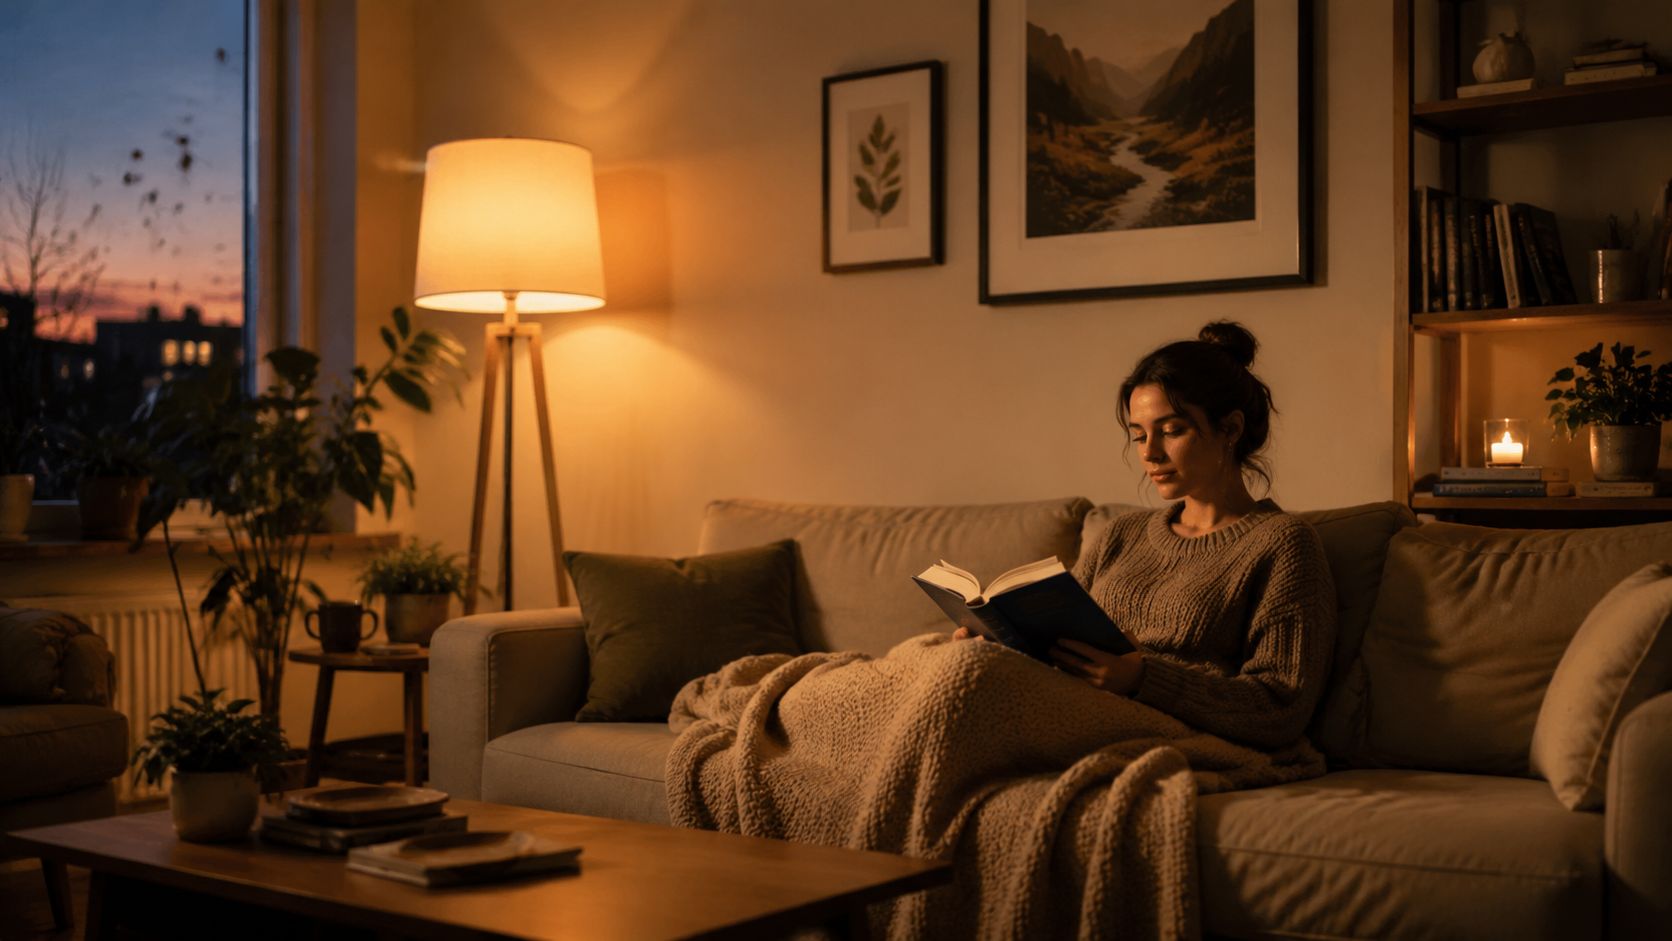
Warm light has more orange or amber in it. Cool light leans blue or daylight-like. For creators, the practical question is simple: should the scene feel cozy, dramatic, modern, clinical, nostalgic, or energetic?
Pick the mood before the bulb
A warm setup works well for storytimes, reaction clips, lifestyle content, and anything meant to feel personal. A cooler setup usually suits tutorials, desk videos, software demos, and product explainers because it feels cleaner and more neutral.
The reason this is easier now is LED adoption. In the U.S., the share of households using mostly LED bulbs for indoor lighting rose from 4% in 2015 to 63% in 2024, and residential LEDs use at least 75% less energy than incandescent bulbs, according to the U.S. Energy Information Administration summary citing DOE guidance. For creators, that means adjustable bulbs and panels are common, affordable, and easy to work with.
Keep one dominant color family
The simplest mistake with color temperature is mixing everything at once. A blue window, a yellow desk lamp, and a neutral key light can make skin tones and white objects look strange. Choose one dominant look and force the room to follow it.
A practical approach:
- Warm look: Great for bedrooms, sofas, wood backgrounds, evening scenes.
- Cool look: Better for white desks, tech content, studio-style talking videos.
- Neutral look: Safest choice when color accuracy matters, especially for products.
If you want help after the shoot, this guide to AI color grading for video looks is useful when your footage is close but not quite matching the mood you wanted.
Warmth adds emotion. Coolness adds clarity. Most weak-looking videos fail because they accidentally combine both.
A short visual breakdown helps here:
Match the scene to the content type
If you're a faceless creator, color temperature still matters because your brand feel often comes from environment more than personality. Hands opening a package under cool light feels sharp and commercial. The same shot under warm light can feel handmade or sentimental.
That choice should be deliberate. When people say a video has a “viral look,” they often mean the lighting and color feel consistent with the format.
AI Relighting When Reshoots Are Not an Option
Sometimes the footage is already shot and it's bad for reasons you can't undo on set. Maybe the room was dim, maybe the weather changed, or maybe you filmed a great take in a location you can't return to. In such situations, AI relighting becomes useful.
Traditional fixes can only push exposure and color so far. If you brighten a dark clip manually, shadows get noisy and skin starts to look thin. If you cool down a yellow room too aggressively, the whole image can turn gray. AI relighting is more useful because it tries to rebuild the look of the light, not just shift global sliders.

What AI relighting does well
The good use case is not “make anything cinematic.” The good use case is much more practical:
- Lift a dim indoor shot without making it feel washed out.
- Unify lighting across clips shot at different times.
- Change the apparent time of day so a flat scene feels softer or warmer.
- Fix faceless content backgrounds when the subject is fine but the room looks messy or lifeless.
One option in this category is Aicut, which can edit generated or source video, change lighting, and swap backgrounds inside a short-form workflow. For creators making faceless content at volume, that matters because the lighting problem is often tied to the environment, not just the subject. If you're dealing with weak source footage, an AI video quality enhancer workflow is often the right place to start before you fine-tune color.
A realistic before-and-after workflow
Say you recorded a product voiceover in a dim kitchen. The spoken take is strong, but the image looks muddy and the background feels random. A practical AI relighting pass would look like this:
- Stabilize exposure first. Get the clip to a usable base.
- Choose a target look. Soft daylight, golden-hour warmth, clean studio brightness, or moody side light.
- Relight for direction, not just brightness. You want shape on the subject and less chaos in the room.
- Adjust or replace the background if needed. A cluttered room can fight the new lighting.
- Check cut-to-cut consistency. The relit clip has to match the rest of the edit.
This approach is especially helpful when you can't reshoot. A lot of creators lose time trying to “save” footage manually with ten small adjustments. AI tools work better when you ask for a clear visual outcome.
If the take is good, don't throw it away just because the room failed you.
What AI won't fix cleanly
AI relighting is useful, but it isn't magic. It struggles more when the original clip has extreme blur, clipped highlights, or heavy reflections. It also can't fully replace intentional on-set light when you want precise shadows on a face, glass object, or shiny packaging.
That's the trade-off. Physical light gives you control at capture. AI gives you flexibility after the fact. For most short-form creators, the smartest workflow is to get the footage decent, then use AI to finish the look.
Lighting Templates for Faceless Creators
Faceless creators usually hit a different problem. The issue isn't one bad clip. It's keeping the channel visually consistent across dozens of videos without rebuilding a set every time.
That's where templates change the job. Instead of asking, “How do I light this one scene?” you ask, “What pre-lit style fits this content format?” A template already bakes in mood, background logic, framing, and often a repeatable lighting aesthetic.
Consistency beats perfection
A faceless page doesn't need custom cinematography on every upload. It needs a look viewers recognize. That might be eerie and high-contrast for story content, bright and playful for explainer clips, or polished and ad-like for product videos.
The practical advantage is speed:
- You choose a format first. Story, UGC-style, motion graphic, or prompt-based visual.
- The template carries the lighting style. You don't rebuild it every time.
- Your edits stay coherent across a series. That's what makes a page feel intentional.
If you're exploring this route, the Aicut template library overview shows how viral-ready formats can handle the visual look upstream instead of forcing you to solve it clip by clip.
A common faceless workflow
A creator running a daily niche page might start with a template like a stylized story format, paste in the script, swap the character or scene direction, and keep the built-in visual mood consistent across the week. Another creator making AI UGC clips might choose a template with clean product-friendly lighting so each ad variation still feels part of the same campaign.
That doesn't mean lighting stops mattering. It means the decision moves earlier in the workflow. You're selecting a visual system rather than placing a lamp.
This is often the fastest way to change the lighting for faceless content, because you're not repairing a scene after capture. You're choosing a pre-designed look before the video is fully built.
Troubleshooting Common Lighting Problems
Most lighting mistakes are simple. The fix is usually small too.
Shadows under the eyes
This usually happens when the light is too high or the ceiling light is doing the work.
- On set: Lower the main light slightly and bring it more in front of the subject.
- Quick fix: Add bounce from below with a white card or desk surface.
Glare on glasses or shiny products
Glare means the angle is wrong, not that the light is too bright.
- On set: Raise the light and move it off to one side, or tilt glasses slightly downward.
- In edit: Reduce highlights carefully, but don't expect that to solve major reflections.
Flicker
Some LEDs and room lights don't play nicely with your camera settings. The result is visible pulsing or banding.
- On set: Test another light source or adjust shutter settings in camera until the flicker disappears.
- Prevention: Avoid relying on unstable ambient sources if you need repeatable results.
Mixed light looks ugly
This happens when the room combines window light, lamp light, and overhead spill.
- On set: Turn off everything except the source you want to dominate.
- In post: Push the image toward one color family, not several.
When a scene looks off and you can't tell why, remove lights before you add them. Simpler setups are easier to diagnose.
Flat background and no depth
A lot of creator rooms look lifeless because the subject is pressed against the wall.
- On set: Move farther from the background or place a small practical light behind the subject.
- In edit: Use relighting or background replacement only after you've cleaned up exposure.
If you want a faster way to change the lighting in short-form videos, especially for faceless content, Aicut can handle relighting, background changes, templates, and editing inside one workflow so you can spend less time reshooting and more time publishing.